# Moonbase Documentation (full text)
> Source: https://moonbase.sh/docs/
# https://moonbase.sh/docs/api/
title: 'Core API Reference',
description: 'On this page, you can learn how to use the Core API to integrate Moonbase into your storefront.',
}
# Core API Reference
The Moonbase Core API has endpoints where you can manage your Moonbase account using API keys from other systems. It's the ideal set of endpoints to use when building custom integrations or migrating a lot of data to Moonbase.
When calling endpoints, be sure to use the full URL including your Moonbase account ID. Examples on this page assumes an account ID of `demo`, and so the base URL for all endpoints will be `https://demo.moonbase.sh/api/`.
Do you have a specific scenario you need to support or other questions?\
Reach out to us through the support channel, or at [developers@moonbase.sh](mailto:developers@moonbase.sh).
---
## Authentication
All endpoints that are part of this Core API require an API key on requests. API keys can be created under [Account settings > Developer](https://app.moonbase.sh/account-settings/developer) in Moonbase, and should be included in a header called `Api-Key`. For example:
```bash
curl -X 'GET' https://demo.moonbase.sh/api/products \
-H 'Api-Key: mb_bbdac119b64649f6937e...'
```
A key has full access, or is restricted to the areas you choose, each with **Read** or **Read & write** access: products, customers, orders, subscriptions, licenses, activations, trials, coupons, vouchers and affiliates.
When a restricted key calls an endpoint outside its access, the API responds with `403: Forbidden`, and `missingScopes` in the response body names the access it needs, such as `customers:read` or `orders:write`.
---
## Rate limits
Core API requests are limited to **500 requests per minute**.
If your server calls the [Storefront API](/docs/storefronts/api#rate-limits) or [Licensing API](/docs/licensing/api#rate-limits) on behalf of your customers, include your API key on those requests too, so they are not limited by IP address.
When you exceed the limit, the API responds with `429: Too Many Requests` and a `Retry-After` header telling you how many seconds to wait. Rather than hard-coding the limit into your client, honor `Retry-After` and back off until the window resets.
Present on `429` responses. The number of seconds to wait before retrying.
Need a higher limit for a bulk migration or a high-traffic integration? Reach out at [developers@moonbase.sh](mailto:developers@moonbase.sh).
```http {{ title: '429 response' }}
HTTP/1.1 429 Too Many Requests
Retry-After: 60
```
---
## Pagination
For endpoints that query a list of resources, we have pagination in place to make sure you can iterate through large amounts of data easily.
When you receive paginated responses, they always come wrapped in the same response wrapper:
This array contains objects with the resources requested.
Flag to indicate whether there are more results to be retrieved.
The path to call to get the next page of results.
The actual page size applied to this response. Requested `pageSize` values are clamped to a per-endpoint maximum (typically between 100 and 500) — read this field to confirm the effective limit rather than assuming the request value was honored.
Custom properties allow you to attach arbitrary metadata to your core entities: customers, licenses, products, trials, product releases, vouchers, and coupons. Each property has a typed value and two visibility flags that control where the property appears.
### Property structure
Each custom property is an object with the following fields:
The type of value this property holds.
The value of the property:
* **text**: A string value
* **number**: A decimal number value
* **boolean**: A true or false value
* **date**: An ISO-8601 date and time value
* **object**: A nested object containing more typed values
Controls if this property is visible in storefront and customer-facing endpoints.
Properties with `public` set to `false` will only be visible in the Core API.
Controls if this property is included in license tokens.
See the [licensing API documentation](/docs/licensing/api#licensing) for details on how custom properties appear in tokens.
### Validation rules
* Property names must start with a letter or underscore and contain only letters, digits, underscores, or hyphens.
* Nested objects support up to 5 levels of depth.
* Total custom properties size must not exceed 48 KB per entity.
* Object properties must contain at least one field.
Use customer endpoints to manage your customer accounts and get insights into who are buying your products.
Not every customer has an account: newsletter contacts, such as people who subscribed through a sign-up form or were imported from a mailing list, are customers too, and get an account once they sign up or buy with the same email address.
The customer object will contain the following fields:
The Moonbase ID of the customer.
The full name of the customer. Can be `null` for a newsletter contact imported without a name.
If the customer is a business, this holds the business name.
If the customer is a business, this holds the tax ID if given.
Current email address of the customer.
Flag for if the current email address has ever been confirmed.
Flag for if the customer has created a password yet.
Flag for if the customer has an account they can sign in with.
`false` for a newsletter contact, until they sign up or buy with the same email address.
Flag for if the this customer account has been deleted.
List of product IDs that this customer owns.
List of product IDs that this customer is currently subscribed to.
Billing address for the customer if stored.
Contains the following properties:
ISO 3166-1 alpha-2 two-letter country code.
First line of the regular street address.
Second line of the regular street address.
Postal code of the address.
Locality of the address, only required if no region is given.\
Also known as `City`.
Region of the address, only required if no locality is given.\
Also known as `State`.
Contains specific communication opt-ins given by the customer:
Flag for if the customer wants to receive newsletters.
Custom properties attached to this customer.
See [custom properties](#custom-properties) for more details on the shape and types of custom properties.
Use this endpoint to fetch all customers page by page. For more details on how pagination works, see [pagination](#pagination).
### Optional query parameters
Adjust the size of each page returned.
ISO-8601 timestamp; only return customers created before this point in time.
ISO-8601 timestamp; only return customers created after this point in time.
Importing a customer creates them a user account. It will not send any emails to the customer, and they will be able to reset their password using the normal reset password flow on your website or the hosted customer portal. You can also supply their password if you already have it, or can generate a secure one.
To bring over a mailing list instead, set `createAccount` to `false`. That imports each address as a newsletter contact without an account, the same kind of customer a newsletter sign-up form creates. A contact needs no name, has no password, and gets an account once they sign up or buy with the same email address.
In case a customer with the given email already exists, you will receive a `409: Conflict` response, where you can access the customer ID using the `instance` property of the error object.
### Required body properties
Full name of the user.
Optional when `createAccount` is `false`.
Email address of the user. Will be used as username. Can be changed by the user.
### Optional body properties
Whether to import the customer with an account. Defaults to `true`.
Set it to `false` to import a newsletter contact without an account, and send `communicationPreferences.newsletterOptIn` as `true` along with it, or the contact will not receive your newsletters.
The initial password for the user. Must contain lower case characters, uppercase characters, numbers and a symbol.
Not allowed when `createAccount` is `false`: the request is rejected with `400: Bad Request`, since a contact sets their password when they sign up.
ID of this customer in your existing system, useful for cross-referencing with other systems.
ISO-8601 timestamp to backfill the customer's creation date when migrating from another system.
A billing address for the user. Will be used when purchasing new products.\
Contains the following properties:
ISO 3166-1 alpha-2 two-letter country code.
First line of the regular street address.
Second line of the regular street address.
Postal code of the address.
Locality of the address, only required if no region is given.\
Also known as `City`.
Region of the address, only required if no locality is given.\
Also known as `State`.
Registered business name, for a customer buying on behalf of a company.
The customer's business tax ID, for example a VAT number.
Requires `address` to be supplied with a `countryCode`: the issuing country decides how the ID is interpreted, and there is no existing customer to fall back on during an import, so a `taxId` without one is rejected rather than dropped.
The existing communication preferences the customer has given, if any.\
Leaving a value out records no decision for that channel rather than an opt-out.\
Contains the following properties:
Customer has agreed to receive newsletters or other marketing emails.
Customer has agreed to receive product updates and similar emails.
Omit it and the newsletter decision covers this channel too, since systems you import from rarely separate the two.
This endpoint can be used to partially update customer accounts, with every property being optional.
### Optional body properties
Full name of the user.
Email address of the user. Will be used as username. Can be changed by the user. Changing this will _not_ send an email to the customer, and they will immediately be able to log in using the new address.
Phone number of the customer.
If you have collected updated communication opt-ins, you can update those using this object:
Flag for if this customer has opted in to receive newsletters.
Use this to delete customers from your Moonbase account. They will lose access to all products, and their user will be stripped of all personal information. Deleting customers will not affect historical sales, as we are required to store billing details for financial compliancy.
Use this endpoint to set custom properties on a customer. This replaces all existing custom properties on the customer.
See [custom properties](#custom-properties) for more details on the shape and types of custom properties.
### Request body
The body should be a JSON object where each key is the property name, and the value is a custom property object.
Each property must contain the following fields:
The type of value this property holds.
The value of the property, matching the declared type.
Flag for if this property should be visible in storefront and customer-facing endpoints.
Flag for if this property should be included in license tokens.
An order represents a customer purchase in Moonbase. Every checkout, whether paid or free, creates an order that moves through a short lifecycle: it starts `Open`, becomes `Paid` once payment is captured, and then `Completed` once Moonbase has fulfilled it by issuing licenses and sending the receipt. Use these endpoints to read orders from other systems, for example to reconcile revenue or sync purchases into your own tooling, to [prepare an order](#prepare-order) for a customer to pay for, or to [import purchases](#import-order) made before you moved to Moonbase.
The order object contains the following:
Unique identifier of the order.
The current status of the order:
* **Open**: The order has been created but not yet paid.
* **PaymentProcessing**: Payment is being processed.
* **Paid**: Payment has been captured, fulfillment is pending.
* **Completed**: The order has been paid and fulfilled.
* **Failed**: The payment failed and the order was not completed.
The currency used for this purchase.
The timestamp for when the order was completed. Omitted while the order is not completed.
The timestamp for when the order was fully refunded. Omitted while the order is not fully refunded.
Whether the entire order has been refunded. Remains `false` for a partial refund, even though `refundHistory` lists the refunded amounts.
Whether the order has been partially but not fully refunded. `true` once at least one refund has settled while the order still has unrefunded units.
The total amount refunded across all settled refunds, with `currency` and `amount` properties. Omitted while nothing has been refunded.
The settled refunds applied to this order, present once at least one refund has settled. Each entry describes a single refund:
Unique identifier of the refund.
The timestamp for when this refund was made.
The amount refunded to the customer in this refund, containing:
* `currency`: The currency of the refunded amount.
* `amount`: The refunded amount.
The order line items covered by this refund, each containing:
Identifier of the refunded order line item. Matches the `lineItemId` of an entry in the order's `items` array.
The number of units refunded for this line item in this refund.
The amount refunded to the customer for this line item, with the same `currency` and `amount` properties as above.
What the refund returned. `Sale` for a refund of the purchase itself, `TaxAdjustment` for over-collected tax returned after business details were applied to a completed purchase. A `TaxAdjustment` refunds no units, so each of its `lineItems` carries a `quantity` of `0`, and neither `isFullyRefunded` nor `isPartiallyRefunded` changes.
Flag indicating if this purchase has been disputed.
Calculated total for all items part of the order. Each value is an object with `currency` and `amount` properties:
* `original`: The original amount before discounts.
* `discount`: The total amount of discounts applied.
* `subtotal`: The total amount after discounts have been removed.
* `taxes`: Total taxes to pay, may be inclusive or exclusive of the `subtotal` depending on configuration, currency and region.
* `due`: How much is being paid in total by the customer.
Payout details for this order, only present if an amount is to be paid out.
Note that this may get updated as affiliate revenue splits are calculated later in the pipeline.
* `subtotal`: The original amount paid by the customer.
* `taxes`: The total amount of taxes collected and remitted.
* `platformFees`: The total amount of fees going to Moonbase.
* `due`: How much is being paid out to you.
Billing details about the customer who made the purchase:
Full name of the customer.
In case the purchase was a business purchase, this field will have the name.
In case the purchase was a business purchase, this field will have the tax id if given.
Email address of the customer.
Phone number of the customer. Note that collecting phone numbers is an optional feature in Moonbase and not activated by default.
Billing address for the customer, not present if the purchase was a lead generator purchase.
Contains the following properties:
ISO 3166-1 alpha-2 two-letter country code.
First line of the regular street address.
Second line of the regular street address.
Postal code of the address.
Locality of the address, only required if no region is given.\
Also known as `City`.
Region of the address, only required if no locality is given.\
Also known as `State`.
The coupons applied to this order, if any. Each entry contains:
Unique identifier of the coupon.
The coupon code that was redeemed.
Display name of the coupon.
Description of the coupon.
Whether this coupon can be combined with other discounts.
The discount granted by the coupon, discriminated using the `type` property:
* `PercentageOffDiscount`: has a `percentage` property with a value between 0 and 1.
* `FlatAmountOffDiscount`: has a `total` property mapping currency codes to amounts.
Map of product IDs to the pricing variation IDs the coupon applies to. Empty when the coupon applies to the whole order.
Map of bundle IDs to the pricing variation IDs the coupon applies to. Empty when the coupon applies to the whole order.
Collection of items part of the order.
Note that this can be either products or bundles, and they are discriminated using the `type` property.
Some properties are specific to each type, others are shared:
### Product line item
Item type discriminator.
The unique ID of the product.
The customer's license this line upgrades or renews, for a license that [covers only some releases](/docs/concepts/#release-access).
### Bundle line item
Item type discriminator.
The unique ID of the bundle.
### Shared
Stable identifier of this order line item. Use it to correlate entries in `refundHistory` back to the line they refunded.
The ID of the selected pricing variation.
The quantity of this item.
The original per-unit price, as a map of currency codes to amounts.
The calculated total for this line item, with `original`, `discount`, `subtotal` and `due` amounts.
When you need to know where the discount came from, the line total also splits it per source, each amount being what one unit of the line was discounted by: `productDiscount` for the discount on the product itself, `offerDiscount` for an offer picked for this item, `couponDiscount` for a redeemed code, and `cartOfferDiscount` for this line's share of a cart offer applied to the order as a whole.
All four are omitted on older orders that were priced before the split existed.
Details about the selected pricing variation, including its `id`, `name`, `entitlement`, `recurrence` and `price`.
Details about how the line item was fulfilled, discriminated using the `type` property. For a `License` fulfillment this includes the issued `licenseIds`, and `extendedLicenseIds` for the licenses an upgrade or renewal extended instead.
The amount refunded for this line item so far, with `currency` and `amount` properties. Omitted while nothing has been refunded for the line.
Whether every unit of this line item has been refunded.
When the order was created, containing an `at` timestamp.
When the order was last updated, containing an `at` timestamp.
The consumer right of withdrawal on this order. EU and EEA consumers have to waive it at checkout before their purchase can be delivered.
Omitted on orders the right does not cover, which is every order billed outside the EU and EEA and every business purchase.
Whether the buyer has to waive the right to check out.
The wording the buyer agreed to, or is being asked to agree to.
When the buyer waived the right. Omitted until they do, so a required consent without `grantedAt` is an order the buyer can still withdraw from.
A link to the order's receipt as a PDF, for you to send to your customer, for example from your own emails or support replies.
It opens without signing in and does not expire, so anyone holding it can read the receipt, including the buyer's name, address and tax ID.
Send it to the buyer only, rather than logging it or putting it on a page others can see.
Present once the order is completed. Omitted on [imported orders](#import-order), since the customer already has a receipt from whoever took their payment.
Always use this field rather than building a receipt link from the order ID, which will not open.
Use this endpoint to fetch all orders page by page, newest first. For more details on how pagination works, see [pagination](#pagination).
### Optional query parameters
Adjust the size of each page returned.
Only return orders with the given status.
ISO-8601 timestamp; only return orders created before this point in time.
ISO-8601 timestamp; only return orders created after this point in time.
Use this endpoint to look up a single order by its ID. If no order exists with the given ID, the API responds with `404: Not Found`.
This is also how you get a receipt link to send a customer who asks for their receipt: a completed order comes with its `receiptUrl`.
Use this endpoint to put an order together on your own server and send the customer straight to checkout to pay for it, for example from your app, a sales tool or a support conversation.
Prices come from the products and bundles in your Moonbase account.
The response is the new order with a status of `Open`, along with three URLs to pay for it. Which one you use decides how checkout is presented:
URL to pay for the order, pointing at whichever checkout the storefront mode of your Moonbase account is configured for.
URL to pay for the order on the Moonbase hosted checkout, as a full-page navigation.
URL to pay for the order in an iframe on a page of your own.
The checkout URLs are only returned here, not when you [get the order](#get-order-by-id) later.
If the request names a customer that does not exist, or is otherwise invalid, the API responds with `400: Bad Request` and a description of the problem.
### Required body properties
Three-letter code of the currency to price the order in, for example `USD`.
Checkout may still change it based on the customer's location and your account settings.
The products and bundles the customer is buying, each containing:
Whether this item is a product or a bundle.
The ID of the product. Required when `type` is `Product`.
The ID of the bundle. Required when `type` is `Bundle`.
The ID of the pricing variation to sell. Defaults to the default pricing variation of the product or bundle.
The number of units to sell.
For a product sold with licenses that [cover only some releases](/docs/concepts/#release-access), the customer's license this item upgrades or renews.
Buying it extends that license instead of issuing a new one, and any upgrade discount on the product applies.
The `quantity` must be 1, and each license can only be named once per order, so add one item per license.
Without it, the purchase issues new licenses.
### Optional body properties
Billing details to prefill at checkout, with the same `name`, `businessName`, `taxId`, `email`, `phone` and `address` properties as the order's `customer`.
The ID of an existing customer to attach the order to. The purchase goes to this customer's account whatever email address is entered at checkout.
When you leave out `customer`, the checkout is prefilled with this customer's details.
### Optional query parameters
Where the customer should be sent after a successful purchase.
Importing an order records a purchase made in another system as a completed order in Moonbase, so your customers' purchase history and lifetime value carry over when you migrate.
The order is dated from when the purchase happened, not from when you import it, and importing it sends no emails or webhooks.
Since the payment was taken elsewhere, an imported order is never part of your payouts, cannot be refunded through Moonbase, and has no `receiptUrl`.
Each `externalId` can only be imported once. Importing it again responds with `409: Conflict` rather than creating a second order, and letter case and surrounding whitespace are ignored when comparing.
Any other problem, such as an unknown product or a line total that does not add up, responds with `400: Bad Request` describing what is wrong, and nothing is imported.
### Required body properties
The order's reference in the system you are moving from.
Three-letter code of the currency the purchase was paid in.
When the purchase happened, as an ISO-8601 date and time. Taken as UTC when it has no offset, and cannot be in the future.
The line items of the order, at least one.
Amounts follow the tax mode of your prices in that currency: when your prices include tax, so do `unitPrice`, `discount` and `total`, and `taxes` is the part of them that was tax. Otherwise `taxes` comes on top.
Each line contains:
The ID of the product sold on this line. Each line needs exactly one of `productId` and `bundleId`.
The ID of the bundle sold on this line.
The ID of the pricing variation sold. Defaults to the current default pricing variation of the product or bundle.
The number of units sold. Defaults to `1`.
The price of one unit before discounts. Defaults to `0`.
The discount on one unit. Defaults to `0`.
The total tax on the whole line. Defaults to `0`.
The total for the whole line, treating tax the same way as `unitPrice`: including it when your prices include tax, and before tax otherwise, with `taxes` added on top.
Defaults to `unitPrice` minus `discount`, times `quantity`.
Supply it to keep the rounding of the system you are moving from. It has to agree with the per-unit amounts to within a cent per unit.
Issue the licenses this line delivered, using the product's current license settings.
Products that get their licenses from a key pool or an external generator also need `keyCodes`, since Moonbase will not issue a new key for a purchase that was already fulfilled.
The license keys this line delivered, one per unit. Requires `provisionLicenses`, and only works on product lines.
When the licenses from this line expire, as an ISO-8601 date and time. A date in the past imports them already expired.
### Customer properties
Every order needs a customer. Provide either `customerId` or `customer`, not both.
The ID of an existing customer the purchase belongs to.
The customer as your previous system knows them. They are matched to an existing customer by `externalId`, then by email, and created when there is none, without sending them any emails.
Email address of the customer.
Full name of the customer.
ID of this customer in your previous system.
Billing address of the customer, with the same properties as when [importing a customer](#import-customer).
Registered business name, for a purchase made on behalf of a company.
The customer's business tax ID, for example a VAT number. Only kept when `address` has a `countryCode`.
### Optional body properties
Where the sale came from, for example `pluginboutique`, so you can tell sales from different sources apart.
Letters, digits and dashes only, stored in lowercase. Defaults to `import`.
License endpoints let you manage the full life cycle of licenses, including individual activations. If you need to connect your own licensing system with Moonbase licenses, these endpoints should suffice. The license object contains the following:
The Moonbase ID of the license.
The Moonbase ID of the customer that owns this license.
The Moonbase ID of the product that this license is for.
Current status of the license:
* **Active**: The license can be used by the customer
* **Revoked**: The license has been revoked by the merchant
* **Expired**: The subscription for the license has expired
Number of devices currently activated on this license.
Max number of devices allowed to activate this license.
Flag for if offline activations are allowed for this license.
What a license that [covers only some releases](/docs/concepts/#release-access) covers.
Left out when the license covers every release.
Releases published until then are covered, and every release while it hasn't passed.
Every version whose major version is at most this is covered.
A license with both covers a release that either of them covers.
Custom properties attached to this license.
See [custom properties](#custom-properties) for more details on the shape and types of custom properties.
Use this endpoint to fetch all licenses page by page. For more details on how pagination works, see [pagination](#pagination).
### Optional query parameters
Adjust the size of each page returned.
Optionally filter licenses belonging to this product ID.
Optionally filter licenses created before this ISO-8601 date and time.
Optionally filter licenses created after this ISO-8601 date and time.
This endpoint can be used to create multiple licenses for a given customer for several products.
In case you want to create the user in the same process, you may instead opt to provide customer details instead of an owner ID.
The response will contain a list of licenses that have been provisioned.
### Request body properties
Moonbase ID of the customer that should receive the license(s).
Skip this if submitting customer details instead.
Provide this if you don't have an existing customer to grant the licenses to.
This object must contain the following:
Full name of the customer.
Email address of the customer.
If a customer already exists with this email, we attach the licenses to that user instead.
A list of license requests that should be fulfilled, each object contain the following properties:
Moonbase ID of the product you want to issue a license for.
Number of licenses to issue, defaults to 1.
Use this to only provision licenses up to a certain number for the given customer.
ISO-8601 timestamp; if set, the provisioned licenses will expire at this point in time.
Limits the licenses to some releases, with an `updatesUntil` date, an `upToMajor` version, or both, shaped like the license's [`releaseAccess`](#licenses).
Left out, the licenses cover every release.
Importing a license is almost the same as provisioning it through the Moonbase app or API, with the exception of no communication to the customer being done. The license will be available on their account immediately, and can be used to import a large amount of licenses. This endpoint also allows you to add existing activations for a given license or external key codes previously generated, making migrations easier in some cases.
### Request body properties
Moonbase ID of the customer that should receive this license.
Either `ownerId` or `ownerEmail` must be provided, but not both.
Email address of an existing customer that should receive this license.
Either `ownerId` or `ownerEmail` must be provided, but not both.
The customer must already exist in your Moonbase account — unknown emails are rejected.
Moonbase ID of the product that this license is for.
Max number of devices allowed to activate this license. If omitted, Moonbase will use the currently configured value from the product.
Flag for if offline activations are allowed for this license. If omitted, Moonbase will use the currently configured value from the product.
If you know devices that have already activated this license, you can also import them. It's important that the device signature will be the same so that license activation finds the correct seat to activate. Each activation contains the following properties:
User-friendly name of the device.
Fingerprint of the device generated by the licensing SDK.
Flag for if this activation has been activated as an online or offline device.
ISO-8601 date and time for when the device was last validated.
If you have an external license key code that you want to associate with this license, you can provide it here.
Will be visible to the customer in their customer portal.
Cannot be combined with `file`.
An existing license file to attach to this license, for customers that already have a generated license file you want to migrate.
Cannot be combined with `keyCode`. Contains the following properties:
Name of the file as it should appear to the customer.
Base64-encoded contents of the file.
MIME type of the file, for example `application/octet-stream`.
This is an internal property, stored on licenses to let you correlate imported licenses with your existing systems.
Sets the expiry date of this license to this ISO-8601 date and time.
Sets the created date of this license to this ISO-8601 date and time.
Limits the license to some releases, with an `updatesUntil` date, an `upToMajor` version, or both, shaped like the license's [`releaseAccess`](#licenses).
Left out, the license covers every release.
Revoking a license makes it inaccessible for the owner, and causes any further client-side validations to fail.
This is different from revoking license *activations*, which only disables single devices and doesn't prevent the user from re-activating their license.
Use this endpoint to set custom properties on a license. This replaces all existing custom properties on the license.
See [custom properties](#custom-properties) for more details on the shape and types of custom properties.
### Request body
The body should be a JSON object where each key is the property name, and the value is a custom property object.
Trial endpoints let you query current trials in Moonbase, and import existing trials you may have. The trial object contains the following:
The Moonbase ID of the trial.
The Moonbase ID of the product that this license is for.
Friendly name of the device that the trial is activated on.
Hardware signature of the device that the trial is activated on.
ISO-8601 date and time of the last validation.
ISO-8601 date and time of the expiry of this trial.
Absent for an endless trial, one started while its product's trials never expire.
Current status of the trial, if it's active or expired.
Custom properties attached to this trial.
See [custom properties](#custom-properties) for more details on the shape and types of custom properties.
Use this endpoint to fetch all trials page by page. For more details on how pagination works, see [pagination](#pagination).
### Optional query parameters
Adjust the size of each page returned.
Optionally filter trials belonging to this product ID.
Optionally filter trials created before this ISO-8601 date and time.
Optionally filter trials created after this ISO-8601 date and time.
Importing a trial lets you import existing trials you may have, to prevent your users from re-starting trials from other systems.
### Required body properties
Moonbase ID of the product that this trial is for.
User-friendly name of the device that the trial is activated on.
Fingerprint of the device generated by the licensing SDK of choice.
ISO-8601 date and time of the expiry of this trial.
### Optional body properties
Moonbase ID of the customer that should be attributed to this trial.
ISO-8601 date and time for when the device was last validated.
Sets the created date of this trial to this ISO-8601 date and time.
Use this endpoint to set custom properties on a trial. This replaces all existing custom properties on the trial.
See [custom properties](#custom-properties) for more details on the shape and types of custom properties.
### Request body
The body should be a JSON object where each key is the property name, and the value is a custom property object.
Product endpoints let you manage the products in your Moonbase account. The product object contains the following:
The Moonbase ID of the product.
The name of the product.
The tag line of the product.
The description of the product.
Current status of the product:
* **Active**: The product can be issued licenses for
* **Inactive**: The product cannot be used by any customer
* **Private**: Licensing, activation and fulfillment work exactly as they do for **Active**, but the product is hidden from your storefront and from every customer-facing API response unless the requesting customer owns it, and it cannot be purchased. Use it for products you hand out yourself, through this API or through a voucher.
The status is set in Moonbase rather than through this API, so it is read-only here.
Flag for if this product can be purchased.
Configured website URL for this product if any.
Link to the icon added to this product if any.
Semantic version of the current release of this product if any.
Internal notes for this product. Not visible to customers.
The ID of the default pricing variation.
Deprecated, use `releaseAccessControl` instead. Reports the level configured for the current release, so it cannot describe a product whose categories differ.
Controls who can download releases of this product. Each category of release is controlled separately, so the current release can be open to everyone while older versions stay owner-only and unpublished builds are restricted to a beta group.
Applies to published releases that are no longer the current one.
Applies to the release the product currently points at.
Applies to releases that have not been published yet.
All three have the same shape: a `level`, plus a `groupId` that is only present when the level is `AllowGroupMembers`.
* **AllowAnonymous**: anyone can download, no account needed
* **AllowCustomers**: any signed-in customer can download
* **AllowOwners**: only customers who own or subscribe to the product can download
* **AllowGroupMembers**: only members of the customer group named by `groupId` can download. Membership is the whole test, so owning the product without being in the group is not enough.
* **NoAccess**: nobody can download, owners included. The releases are still listed, with their notes, so you can withdraw old versions without hiding their history.
A product whose `status` is `Private` overrides this when a download is actually attempted: every category also requires ownership, and any level other than `AllowGroupMembers` and `NoAccess` collapses to owners only. The values reported here are the ones you configured, not the ones a private product resolves to.
Controls when this product appears in a customer's account area:
* **WhenOwned** (default): visible only to customers who own a license for the product.
* **Never**: never surfaced to customers — useful for internal SKUs, bundle children, or products that are sold but should not show up in the inventory UI.
* **Always**: always visible, even to customers who don't own it — useful for upsell or cross-sell catalogs.
Licensing configuration for this product.
Maximum number of concurrent activations allowed per license.
Whether offline activation is allowed.
Whether to automatically provision a license on activation.
For an add-on, whether it is [included in its main product's license](/docs/licensing/api/#add-ons): a device that activates the main product takes a seat of the add-on too, and the main product's license tokens list it.
Trial configuration for this product.
Whether trials are enabled for this product.
Whether a customer account is required to start a trial.
Duration of the trial period in days.
Whether trials never expire. A trial started while this is on has no expiry, and `numberOfDays` only applies again once it is turned off.
Array of pricing variations for this product. Each variation defines a way the product can be purchased.
Unique identifier for this variation.
Display name for this variation.
The type of entitlement granted. Either `PerpetualLicense` or `SubscriptionLicense` with a grace period.
A `PerpetualLicense` that [covers only some releases](/docs/concepts/#release-access) has a `releaseAccess`, described under [upsert product](#upsert-product).
The billing recurrence. Either `OneOff` for a one-time purchase or `Recurring` with a cycle length.
Object mapping currency codes to amounts.
Array of tiered pricing levels with `minQuantity` and `price`.
Override the product-level licensing configuration for this specific variation.
Array of pricing discounts for this product.
Display name for the discount.
Description of the discount.
The discount type. Either `PercentageOffDiscount` or `FlatAmountOffDiscount`.
Controls which customers can see and use this discount.
Array of variation IDs this discount applies to.
Time range for when this discount is valid.
Number of recurring payments the discount applies to before expiring.
Present when the discount comes from a promotion running across your catalogue.
The promotion owns the discount, so it cannot be changed or removed through the product endpoints.
Custom properties attached to this product.
See [custom properties](#custom-properties) for more details on the shape and types of custom properties.
Use this endpoint to fetch all products page by page. For more details on how pagination works, see [pagination](#pagination).
### Optional query parameters
Adjust the size of each page returned.
Only return products with this status. Omit it to return products of every status.
Deprecated, use `status` instead. `true` is equivalent to `status=Active`, and it is ignored when `status` is supplied. Defaults to `false`.
Use this endpoint to create a new product or update an existing one. The product ID is specified in the URL path. If a product with the given ID already exists, it will be updated; otherwise, a new product will be created.
Returns `201 Created` when a new product is created, or `200 OK` when an existing product is updated.
### Required body parameters
The name of the product.
The tag line of the product.
The description of the product.
### Optional body parameters
Parent product ID, used to create sub-products. Sub-products can also be addressed directly by using a dot in the product ID (for example, `parent-product.sub-product`); when the ID already contains a dot, `parentId` should be omitted. Nested sub-products (a sub-product of a sub-product) are not allowed.
Website URL for this product.
Internal notes for this product. Not visible to customers.
Whether this product can be purchased. Defaults to `false`.
The ID of the default pricing variation.
Controls who can download releases of this product, one category at a time.
Takes `pastReleases`, `currentRelease` and `preReleases`, each an object with a `level` and, when that level is `AllowGroupMembers`, the `groupId` of the customer group whose members may download.
See the product schema above for what each level means.
A category you leave out is left unchanged, so you can restrict pre-releases without restating the other two.
Naming a group that does not exist is rejected outright, since a typo would otherwise quietly lock every customer out.
Deprecated, use `releaseAccessControl` instead.
Applies one level to past, current and pre-releases alike, and is ignored when `releaseAccessControl` is supplied.
It cannot express `AllowGroupMembers`, which needs a group to go with it.
Controls when this product is shown in the customer-facing account area. Defaults to `WhenOwned`. See the product schema above for what each value means.
Custom properties to attach to this product.
See [custom properties](#custom-properties) for more details on the shape and types of custom properties.
Licensing configuration for this product.
Maximum number of concurrent activations allowed per license.
Whether offline activation is allowed.
Whether to automatically provision a license on activation.
For an add-on, whether to [include it in its main product's license](/docs/licensing/api/#add-ons).
Left unchanged when omitted, and only an add-on can set it to `true`.
Trial configuration for this product.
Whether trials are enabled for this product.
Whether a customer account is required to start a trial.
Duration of the trial period in days.
Whether trials never expire, `false` when left out. A trial started while this is on has no expiry, and `numberOfDays` only applies again once it is turned off.
Array of pricing variations for this product. Each variation defines a way the product can be purchased.
Unique identifier for this variation.
Display name for this variation.
The type of entitlement granted. Use `{ "type": "PerpetualLicense" }` for a perpetual license, or `{ "type": "SubscriptionLicense", "gracePeriod": "..." }` for a subscription with a grace period.
On a one-off `PerpetualLicense`, add a `releaseAccess` to sell licenses that [cover only some releases](/docs/concepts/#release-access), discriminated by its `type`:
* `{ "type": "TimeLimited", "period": { "count": 12, "unit": "Month" } }`: releases published within the period after purchase. `unit` is `Day`, `Week`, `Month` or `Year`, up to 10 years.
* `{ "type": "MajorVersions", "additionalMajors": 0 }`: the major version current at purchase, plus this many later ones. Needs a published release.
* `{ "type": "UpToMajor", "major": 2 }`: every version up to this major.
* `{ "type": "AllReleases" }`: removes the limit. Leaving `releaseAccess` out keeps the variation's current one.
Older versions are always covered. Not available for add-ons, products with `autoProvisionOnActivation`, or products whose licenses an external system issues.
The billing recurrence. Use `{ "type": "OneOff" }` for a one-time purchase, or `{ "type": "Recurring", "cycleLength": "Monthly" }` for recurring billing. Supported cycle lengths are `Monthly` and `Yearly`. Optionally include `renewalPrice` to set a different price for renewals.
Object mapping currency codes to amounts, e.g. `{ "USD": 29.99, "EUR": 24.99 }`.
Array of tiered pricing levels. Each tier has a `minQuantity` (number) and `price` (object mapping currencies to amounts).
Override the product-level licensing configuration for this specific variation. Same shape as `licensingConfiguration`.
Array of pricing discounts for this product.
Replaces the discounts you manage yourself, so send the full list every time.
Discounts that a promotion put on the product are left out of this: any entry carrying a `promotionId` is ignored here, and the product re-attaches the ones its promotions own after the upsert.
That makes it safe to read a product, change something, and send the whole thing back without stripping a running sale or duplicating it.
Display name for the discount.
Description of the discount.
The discount type. Use `{ "type": "PercentageOffDiscount", "percentage": 0.2 }` for a percentage discount (value between 0 and 1), or `{ "type": "FlatAmountOffDiscount", "total": { "USD": 5.00 } }` for a flat amount off.
Controls which customers can see and use this discount.
To price upgrades and renewals of licenses that [cover only some releases](/docs/concepts/#release-access), use an `OwnsSomeOf` condition with `outdatedLicense`, like `{ "type": "OwnsSomeOf", "productIds": ["example-product"], "includeSubscriptions": false, "outdatedLicense": { "daysBeforeEnd": 30, "daysAfterEnd": 90 } }`.
It applies to an order line that upgrades a license whose updates end within `daysBeforeEnd` days, or ended at most `daysAfterEnd` days ago (no limit when `null`), or that is limited to an older major version than the current release.
Array of variation IDs this discount applies to. If omitted, applies to all variations.
Time range for when this discount is valid. Contains optional `from` and `to` datetime fields.
Number of recurring payments the discount applies to before expiring.
Use this endpoint to set custom properties on a product. This replaces all existing custom properties on the product.
See [custom properties](#custom-properties) for more details on the shape and types of custom properties.
### Request body
The body should be a JSON object where each key is the property name, and the value is a custom property object.
Product release endpoints let you manage the releases for the products in your Moonbase account. The product release object contains the following:
The semantic version of this release.
Changelog for this release if any.
ISO-8601 date and time for when this release was published if any.
URL to download this release, based on the storefront mode of your Moonbase account.
URL to download this release using the Moonbase hosted customer portal.
List of downloadable files for this release. Each download contains the following properties:
File name for this download
Unique key for this download.
The intended platform for this download.
CPU architecture for this download. Omitted when not set. Lets you ship per-architecture binaries on the same release without encoding the arch into the filename.
The size of this file in bytes.
URL to download this specific file, based on the storefront mode of your Moonbase account.
URL to download this specific file using the Moonbase hosted customer portal.
Direct URL to download this file, will depend on authentication based on your product security settings.
Custom properties attached to this release.
See [custom properties](#custom-properties) for more details on the shape and types of custom properties.
Use this endpoint to fetch all releases for a product page by page. For more details on how pagination works, see [pagination](#pagination).
### Optional query parameters
Adjust the size of each page returned.
Creating a new release lets you expose and publish uploaded files to your customers by tying downloads to a product release.
### Required body properties
Semantic version of the new release. Object with a number for each part:
Major version part
Minor version part
Patch version part
Optional description of what this release is about.
List of downloads that this release should contain.
For more information on how to prepare the key for these downloads, see [downloads](#Downloads).
Each object in this array must contain the following:
Name of this file.
Unique key generated by the download prepare endpoint.
The intended platform for this download.
CPU architecture for this download. Omit for arch-agnostic binaries. Two downloads with the same `name` and `platform` but different `arch` will coexist on the release.
### Optional body properties
With `publishImmediately`, the date the release came out, for a release published before it reached Moonbase.
Can't be in the future. See [set release date](#set-release-date).
### Optional query parameters
Flag that can be given to immediately publish this new release.
Updating a release replaces the all downloads, and updates the description if given
### Required body properties
Optional description of what this release is about.
List of downloads that this release should contain.
For more information on how to prepare these downloads, see [downloads](#Downloads).
Each object in this array must contain the following:
Name of this file.
Unique key generated by the download prepare endpoint.
The intended platform for this download.
CPU architecture for this download. Omit for arch-agnostic binaries. Two downloads with the same `name` and `platform` but different `arch` will coexist on the release.
### Optional body properties
The release date of a published release, or of the one this update publishes.
Left out, the date stays as it is.
### Optional query parameters
Flag that can be given to immediately publish this updated release.
```http {{ title: 'HTTP' }}
PUT https://demo.moonbase.sh/api/products/example-product/releases/1.0.0
Api-Key: mb_bbdac119b64649f6937e...
Content-Type: application/json
{
"description": "1.0.0 is the initial release of Example Product",
"downloads": [
{
"name": "Installer.exe",
"platform": "Windows",
"key": "49b8da10-2d72-4bdf-bf9c-47e56c184bfa"
}
]
}
```
```bash {{ title: 'cURL' }}
curl -X 'PUT' https://demo.moonbase.sh/api/products/example-product/releases/1.0.0 \
-H 'Api-Key: mb_bbdac119b64649f6937e...' \
-H 'Content-Type: application/json' \
-d '{
"description": "1.0.0 is the initial release of Example Product",
"downloads": [
{
"name": "Installer.exe",
"platform": "Windows",
"key": "49b8da10-2d72-4bdf-bf9c-47e56c184bfa"
}
]
}'
```
```json {{ title: 'Response' }}
{
"version": "1.0.0",
"description": "1.0.0 is the initial release of Example Product",
"publishedAt": null,
...
}
```
---
## Add download {{ tag: 'POST', label: '/api/products/{productId}/releases/{version}/add-download', authenticated: true }}
Using this endpoint, you can add more downloads to a release.
These are deduplicated based on the platform, architecture, and file name, and is useful if you have separate build steps per platform or architecture that each add their own download to new releases.
If you submit the same `name` and `platform` with a different `arch`, both downloads are kept; submitting the same `name`, `platform`, and `arch` replaces the existing entry. Existing downloads without an `arch` continue to deduplicate by `name` and `platform` as before.
### Required body properties
Name of this file.
Unique key generated by the download prepare endpoint.
The intended platform for this download.
CPU architecture for this download. Omit for arch-agnostic binaries.
Publish an existing product release.
This makes the release available to your customers, and also updates the current version of the product to point to this release.
### Optional query parameters
The date the release came out, for a release published before it reached Moonbase.
Can't be in the future. See [set release date](#set-release-date).
A release dated before the current one is published without becoming the current release, and sends no `ProductReleasePublished` webhook.
Changes the date of a published release, for example to bring over the history of a product you are moving to Moonbase.
The dates decide which releases a license with [updates for a period](/docs/concepts/#release-access) covers, so add older releases with their dates before you sell those licenses.
Changing the date doesn't change which release is current, and sends no webhook.
Responds with `400: Bad Request` if the release isn't published yet, or if the date is in the future.
### Required body properties
The date the release came out.
Use this endpoint to set custom properties on a product release. This replaces all existing custom properties on the release.
See [custom properties](#custom-properties) for more details on the shape and types of custom properties.
### Request body
The body should be a JSON object where each key is the property name, and the value is a custom property object.
Prepare to upload a file to Moonbase.
### Mandatory query parameters
The MIME type of the content in this file.
For binary files, you may use `application/octet-stream`.
This parameter is important so that customers know what file they are downloading later on.
### Response body
The unique key for this file.
Use this when creating product releases to connect the file to the release.
The URL where you may upload the file.
This URL requires no authentication, and you may do a direct PUT with the file content.
For example:
```bash
curl --upload-file Installer.exe {URL} \
-H 'Content-Type: application/octet-stream'
```
Voucher endpoints let you manage vouchers, which are one-time-use codes that grant licenses to products and bundles. The voucher object contains the following:
The Moonbase ID of the voucher.
The name of the voucher.
Description of the voucher.
The number of codes associated with this voucher.
The number of times codes from this voucher have been redeemed.
List of products that this voucher redeems, each wrapped in a quantity/value object.
List of bundles that this voucher redeems, each wrapped in a quantity/value object.
Custom properties attached to this voucher.
See [custom properties](#custom-properties) for more details on the shape and types of custom properties.
Creates a new voucher with product and bundle entitlements.
### Required body properties
Name of the voucher.
Description of the voucher.
### Optional body properties
A map of product IDs to the number of licenses to grant per redemption.
A map of bundle IDs to the number of licenses to grant per redemption.
Use this endpoint to fetch all vouchers page by page. For more details on how pagination works, see [pagination](#pagination).
### Optional query parameters
Adjust the size of each page returned.
Use this endpoint to fetch codes for a voucher page by page. For more details on how pagination works, see [pagination](#pagination).
### Optional query parameters
Adjust the size of each page returned.
Filter to codes redeemed before this ISO-8601 date and time.
Filter to codes redeemed after this ISO-8601 date and time.
### Response content
The inner voucher code objects have the following schema:
The Moonbase ID of the voucher this code belongs to.
The code string.
Flag for if this code has been redeemed.
The Moonbase ID of the customer who redeemed the code, if redeemed.
ISO-8601 date and time of when the code was redeemed, if redeemed.
Use this endpoint to set custom properties on a voucher. This replaces all existing custom properties on the voucher.
See [custom properties](#custom-properties) for more details on the shape and types of custom properties.
### Request body
The body should be a JSON object where each key is the property name, and the value is a custom property object.
Coupon endpoints let you manage coupons, which provide discount codes for products and bundles. The coupon object contains the following:
The Moonbase ID of the coupon.
The name of the coupon.
Description of the coupon.
The number of codes associated with this coupon.
The number of times codes from this coupon have been redeemed.
Flag for if this coupon can be combined with product discounts.
The discount this coupon applies. Can be either a flat amount off or a percentage off discount.
List of products that this coupon can be applied to.
List of bundles that this coupon can be applied to.
Time range during which this coupon is valid, if restricted.
Flag for if this coupon has been deleted.
Custom properties attached to this coupon.
See [custom properties](#custom-properties) for more details on the shape and types of custom properties.
Creates a new coupon with a discount, product and bundle applicability, and an optional validity period.
### Required body properties
Name of the coupon.
Description of the coupon.
The discount this coupon applies. This is a discriminated object based on the `type` field:
### Percentage off
Discount type discriminator.
The percentage to discount, normalized to between 0 and 1.
### Flat amount off
Discount type discriminator.
The flat amount to discount per currency.
### Optional body properties
A map of product IDs to an array of pricing variation IDs that this coupon applies to.
A map of bundle IDs to an array of pricing variation IDs that this coupon applies to.
Time range during which this coupon is valid.
ISO-8601 date and time for when the coupon becomes valid.
ISO-8601 date and time for when the coupon expires.
Use this endpoint to fetch all coupons page by page. For more details on how pagination works, see [pagination](#pagination).
### Optional query parameters
Adjust the size of each page returned.
Adds one or more codes to an existing coupon. You can optionally set a validity period for the individual codes, separate from the coupon's overall validity.
### Request body
The body should be a JSON array of code strings.
### Optional query parameters
ISO-8601 date and time for when these codes become valid.
ISO-8601 date and time for when these codes expire.
Use this endpoint to fetch codes for a coupon page by page. For more details on how pagination works, see [pagination](#pagination).
### Optional query parameters
Adjust the size of each page returned.
### Response content
The inner coupon code objects have the following schema:
The code string.
The number of times this code has been redeemed.
The validity period for this specific code, if set.
ISO-8601 date and time for when the code becomes valid.
ISO-8601 date and time for when the code expires.
Use this endpoint to set custom properties on a coupon. This replaces all existing custom properties on the coupon.
See [custom properties](#custom-properties) for more details on the shape and types of custom properties.
### Request body
The body should be a JSON object where each key is the property name, and the value is a custom property object.
```http {{ title: 'HTTP' }}
PUT https://demo.moonbase.sh/api/coupons/SUMMER2026/custom-properties
Api-Key: mb_bbdac119b64649f6937e...
Content-Type: application/json
{
"tracking_id": {
"type": "text",
"value": "promo_summer_2026",
"public": false,
"includeInToken": false
}
}
```
```bash {{ title: 'cURL' }}
curl -X 'PUT' https://demo.moonbase.sh/api/coupons/SUMMER2026/custom-properties \
-H 'Api-Key: mb_bbdac119b64649f6937e...' \
-H 'Content-Type: application/json' \
-d '{
"tracking_id": {
"type": "text",
"value": "promo_summer_2026",
"public": false,
"includeInToken": false
}
}'
```
```json {{ title: 'Response' }}
{
"id": "SUMMER2026",
"name": "Summer Sale",
...
}
```
---
---
# https://moonbase.sh/docs/concepts/
title: 'Core Concepts',
description: 'On this page, you can learn more about the concepts behind the features powering Moonbase.',
}
{ title: 'Licenses', id: 'licenses' },
{ title: 'Products', id: 'products' },
{ title: 'Bundles', id: 'bundles' },
{ title: 'Coupons', id: 'coupons' },
{ title: 'Vouchers', id: 'vouchers' },
]
# Core concepts
By using Moonbase as the provider for your storefront and delivery needs, it is important to understand the concepts behind the building blocks providing the functionality.
## Licenses
A license is the core of the system, defining ownership of products by your customers.
Trials also fall in under this category, where trials are practically speaking normal licenses but with more restrictions like expiry date, uniqueness per device, etc.
### License activations
Any license will have configuration on it, inherited from the product at the time of creation, that determines how many activations are possible, and if offline activations are allowed. See [product licensing](#product-licensing) for more details on this.
It's important to keep in mind that while online activated devices can at any time revoke the activation in order to move the license to different devices, offline activations does not have the same ability. That is because there would be no way for an offline activated application to know that the license activation has been revoked or moved. As a merchant on Moonbase, you can manually revoke offline license activations if necessary.
## Products
Having products defined is the only way to create licenses in Moonbase, which means it's usually the first thing you set up when starting up with us.
These products define what sort of licenses should be issued, what kind of trials might be allowed and how the product can be purchased.
As a delivery platform, products also let you create releases of the software, to be able to deliver versioned binaries to the customers who need the software.
Every product is either active, inactive, or private.
A private product is the odd one out: licensing, activation and fulfillment behave exactly as they do for an active product, but it never shows up on your storefront or in a customer's account area unless that customer already owns it, and it cannot be bought.
That makes it the right shape for something you keep licensable but hand out yourself, through the Core API or a voucher.
### Product pricing
To be able to offer the same product at different rates or through different purchase models, Moonbase allows you to create pricing variations for all products.
These variations will all be available through the Storefront APIs and SDKs, to enable you to fetch pricing and details of all options on demand.
Variations contain configuration regarding recurrence (one-off purchase or a recurring subscription), entitlements (perpetual access or limited support updates) and pricing.
Every product will have a default variation, which is what will be used when no variation is given as the product is added to the cart.
The default variation is also the one being used if you send customers to the immediate checkout flow.
Pricing in Moonbase is purposefully simple at the moment, giving you max control over what currencies your customers will see.
When you first open an account on Moonbase, you will usually only have one or two currencies enabled, but you can always reach out to support to enable more currencies.
VAT and sales taxes are based on the norm of the given currency, which means that for currencies like USD and CAD, the price configured will be exclusive of sales tax, while for currencies like EUR, the price is inclusive sales tax.
### Licenses that cover some releases {{ id: 'release-access' }}
A one-off pricing variation can sell a perpetual license that covers only some releases: updates for a period ("12 months of updates"), the major version out at purchase plus any number of later majors, or every version up to a fixed major.
Older versions are always covered, and the license never expires because of it.
When a customer's license no longer covers your latest release, they buy an upgrade or renewal of that license, which extends it rather than issuing a new one.
A product discount limited to owners whose license needs updating sets the upgrade price.
Your apps learn what a license covers from its license token, and Moonbase refuses to activate a version the license doesn't cover.
See [licenses that cover some versions](/docs/licensing/api/#release-access) in the licensing API reference.
This is in beta, and switched on account by account.
### Product licensing {{ id: 'product-licensing' }}
Whenever a product is fulfilled by Moonbase, the licenses created will be created on the basis of the product licensing configuration.
Through this configuration you can determine how many activations each license should allow simultaneously, as well as if offline activations should be allowed.
While product activations using the online flow is always a floating activation, offline activations can never be moved to another device unless you as a merchant manually alter the activation.
### Product trials {{ id: 'product-trials' }}
Similarly to the licensing configuration, trial configuration determine what options customers will have to try out your apps before buying.
Trials are for all intents and purposes a normal license, but with a limited expiry date attached to them.
It is the responsibility of the integrating software to ensure the expiry date is still in the future when validating licenses stored locally.
A product can also offer endless trials, which never expire: those have no expiry date at all, and run until the customer buys or you end them.
### Product releases
If you want to use Moonbase to also deliver the actual installers to your customers, you need to create releases of your products.
Releases let you roll out new versions of your software, making it available for all owners to download new installers or binaries.
It's also possible to have un-released binaries stored, for later publishing.
Who may download a release is yours to decide, and it is decided separately for three categories of release: the ones you published before the current one, the current release itself, and pre-releases that have not been published yet.
Each category allows either anyone, any signed-in customer, only customers who own the product, only the members of a customer group, or nobody at all, which keeps withdrawn versions listed without letting anyone download them.
Splitting it that way lets you keep the current installer open to everyone while older versions stay owner-only, or hand an unpublished build to a group of beta testers without opening anything else up.
Where you gate on a group, membership is the whole test: a customer who owns the product but is not in the group is refused.
That is what makes a group the right tool for a beta programme, since owning the software should not enrol anyone in it automatically.
### Add-ons {{ id: 'add-ons' }}
An add-on is a product under a main product, with an ID like `demo-app.preset-pack` and pricing and licenses of its own.
By default it is licensed on its own, and the main product's license only lists which add-ons the customer owns.
Turn on **Include in the main product's license** on the add-on, and a device that activates the main product takes a seat of the add-on too.
Your app then checks one license for both, and can start the add-on's trial or list the add-ons for sale from it.
See [add-ons](/docs/licensing/api/#add-ons) in the licensing API reference.
## Bundles
Predictably, bundles are collections of products sold together as one.
Similarly to products, you can define pricing variations in the exact same way, with the added option of enabling **partial** bundle purchases.
### Partial bundle purchases
A common scenario is that you might want to offer bundles fit for a very specific use case, at a discount from the individual price. Something that will quickly come up in that journey for a customer is being faced with a bundle where the customer already owns one or more of the products in the bundle, but would still like to get the general discount to upgrade to the complete package.
Partial bundle purchases allow that, by adjusting the price of the bundle based on already owned products from the customer purchasing the bundle.
This is one of the big benefits of having a platform that can correctly identify customers as part of the payment flow, to offer relevant discounts and benefits for added incentives to purchase.
## Coupons
If you want to offer discounts by using promotional codes on your products and bundles, coupons are the way to go.
Coupons will let you define either a percentage based discount, or a flat amount off discount to a set of codes that can be applied to orders in progress.
If you want the coupon to only apply to specific products or bundles, that's also possible to configure on the coupon itself.
Discounts applied by coupons are made _after_ any product discounts have been applied, if the coupon is combinable with product discounts.
## Vouchers
If instead of a discount, you rather want to give products away entirely, vouchers is the feature you need.
Vouchers will let you define a set of products or bundles to give away, and like coupons, add a set of codes that can be redeemed to receive the entitlements of the voucher.
Unlike coupon codes, voucher codes have limited uses, only redeemable by one customer, so that you can control how many licenses are issued from the voucher you create.
---
# https://moonbase.sh/docs/guides/github-actions-product-releases/
title: 'Automate product releases with GitHub Actions',
description: 'On this page, you can learn how to automatically release new versions of your products using GitHub Actions, with the Moonbase CLI or the core API.',
}
# Automate product releases with GitHub Actions
This guide will show you how to automatically release new versions of your software built in GitHub Actions on Moonbase, either in a single command with the Moonbase CLI or by calling our core API yourself. {{ className: 'lead' }}
## Getting started
To access the API for your account, start by creating an API key if you don't have one already under [Account settings > Developer](https://app.moonbase.sh/account-settings/developer). API keys allow access to a slew of endpoints documented in our [Core API reference](/docs/api), and can be used by adding an `Api-Key` header to your requests. If you restrict the key, releasing needs **Read & write** access to products, and nothing else.
In GitHub Actions, store the key as a repository secret, like `MOONBASE_API_KEY`, rather than in the workflow file.
## Using the Moonbase CLI
The quickest way to publish a release is the [Moonbase CLI](https://www.npmjs.com/package/@moonbase.sh/cli). One command uploads your files, creates the release from them, and can publish it straight away. It runs through `npx`, so all it needs is Node.js 20 or later, which GitHub's hosted runners already have.
The CLI reads your account's address from `MOONBASE_ENDPOINT` and your API key from `MOONBASE_API_KEY`:
```bash
npx @moonbase.sh/cli release example-product v1.0.0 "dist/Example Setup.exe" "dist/Example.dmg" --notes-file NOTES.md --publish
```
This uploads both files, creates release 1.0.0 of `example-product` from them, and publishes it. Along the way:
- The version is `MAJOR.MINOR.PATCH`. A leading `v` is dropped, so a Git tag like `v1.0.0` works as it is.
- Each download is named after its file.
- A file's platform is guessed from its extension (`.dmg` and `.pkg` are Mac, `.exe` and `.msi` Windows, `.deb`, `.rpm` and `.AppImage` Linux), then from a word in its name (`mac`, `win`, `linux`), and is Universal otherwise. Its architecture is guessed from a word in its name (`arm64`, `x64`, `x86_64`, `universal` and the like) and is left out otherwise. The CLI lists what it guessed before it uploads, and `--platform` and `--arch` set them for every file instead.
- Before it uploads anything, it checks that the product exists, that the release doesn't already exist (unless you pass `--add`), and that every file is there.
- Large files are uploaded in parts, and a part that fails is retried.
Without `--publish`, the release stays unpublished, so you can check it over and publish it from the Moonbase app yourself. The `release` command takes these options:
| Option | Description |
| --------------------- | ---------------------------------------------------------------------------------------------------------------------------------- |
| `--notes ` | The release notes |
| `--notes-file ` | Read the release notes from a file |
| `--platform ` | `Universal`, `Windows`, `Linux`, `Mac`, `iOS` or `Android` |
| `--arch ` | `Universal`, `X86`, `X64`, `Arm` or `Arm64` |
| `--publish` | Publish the release, so customers can download it. Without it the release stays unpublished. |
| `--date ` | With `--publish`, the release date, for a release that came out before. See [release dates](#release-dates). |
| `--add` | If the release exists, add the files to it. A file with the same name, platform and architecture as one already there replaces it. |
| `--json` | Print the release as JSON |
| `--endpoint ` | Your account's address, instead of `MOONBASE_ENDPOINT` |
| `--api-key ` | An API key, instead of `MOONBASE_API_KEY` |
Two more commands round it out: `publish ` publishes a release that already exists, and `upload ` uploads a single file and prints its key, for when you build the release through the [core API](#using-the-core-api) yourself. Run `npx @moonbase.sh/cli help ` to see a command's options.
### Release dates
A release is dated when it is published. To bring over releases that came out before, like the history of a product you are moving to Moonbase, give each its original date with `--date`:
```bash
npx @moonbase.sh/cli release example-product 1.2.0 dist/* --publish --date 2025-03-14
```
`--date` takes a day (`YYYY-MM-DD`, read as midnight UTC) or a timestamp with its time zone, like `2025-03-14T09:30:00Z`, and can't be in the future.
On a release that is already published, `publish --date` changes its date instead.
A release dated before the current one is published without taking its place.
The dates decide which releases a license with [updates for a period](/docs/concepts/#release-access) covers, so add older releases with their dates before you sell those licenses.
### Release on a version tag
This workflow builds your software and publishes a release on Moonbase whenever you push a version tag like `v1.0.0`:
```yaml
name: Moonbase release
on:
push:
tags: ['v*']
jobs:
release:
runs-on: ubuntu-latest
steps:
- name: Checkout
uses: actions/checkout@v4
- name: Build application
run: make build # This depends on how you build your binaries, and should put them in dist/
- name: Release on Moonbase
run: npx @moonbase.sh/cli release example-product ${{ github.ref_name }} dist/* --publish
env:
MOONBASE_ENDPOINT: https://demo.moonbase.sh
MOONBASE_API_KEY: ${{ secrets.MOONBASE_API_KEY }}
```
### Build on several runners
When each platform builds on its own runner, let each job add its files to the release with `--add`, then publish it once they all have:
```yaml
name: Moonbase release
on:
push:
tags: ['v*']
jobs:
build:
strategy:
matrix:
os: [macos-latest, windows-latest, ubuntu-latest]
runs-on: ${{ matrix.os }}
steps:
- name: Checkout
uses: actions/checkout@v4
- name: Build application
run: make build
shell: bash
# bash, so dist/* is expanded on Windows too
- name: Add files to the Moonbase release
run: npx @moonbase.sh/cli release example-product ${{ github.ref_name }} dist/* --add
shell: bash
env:
MOONBASE_ENDPOINT: https://demo.moonbase.sh
MOONBASE_API_KEY: ${{ secrets.MOONBASE_API_KEY }}
publish:
needs: build
runs-on: ubuntu-latest
steps:
- name: Publish the Moonbase release
run: npx @moonbase.sh/cli publish example-product ${{ github.ref_name }}
env:
MOONBASE_ENDPOINT: https://demo.moonbase.sh
MOONBASE_API_KEY: ${{ secrets.MOONBASE_API_KEY }}
```
The first job to finish creates the release, and the rest add to it. Jobs that finish at the same moment are fine, and rerunning a job replaces the files it added before. Give each runner's files their own names, since a file with the same name, platform and architecture as one already on the release replaces it.
`npx` runs the latest version of the CLI. To keep a workflow on a version you have tested, pin it, like `npx @moonbase.sh/cli@ release ...`.
## Using the core API
If you'd rather script the release yourself, or can't run Node.js in your pipeline, the same steps are available through the core API as plain HTTP requests.
### 1. Prepare downloads
A product release in Moonbase can have multiple downloadable files. For each of the files you want part of a release, you need to prepare it and get the URL to upload to:
```bash
curl -X 'POST' 'https://demo.moonbase.sh/api/downloads/prepare?contentType=application%2foctet-stream' \
-H 'Api-Key: mb_a52c7...'
```
Be sure to substitute `demo` with your account ID, and the `contentType` query parameter with the content type of whatever you want to upload. For binaries, `application/octet-stream` is usually the right choice, but for other file types there will be other MIME types.
The above request will respond with a key and a URL in a JSON object like this: `{ "key": "demo/eaefa...", "url": "https://..." }`. Using these, you can proceed to upload the file with a PUT request to the given URL.
### 2. Upload file
Using the URL from the previous response, you can initiate an upload. The API key used previously is not necessary for this step as the URL is pre-authorized:
```bash
curl --upload-file file_key.txt $URL \
-H 'Content-Type: application/octet-stream'
```
Repeat the above to steps for each file you want to be part of your release, and preserve the keys returned for each one.
### 3. Create a release
Once all the files are uploaded, we can create the release in Moonbase. The request needs to contain an array of all files you want part of the release, with a name and platform indicator for each file. Platform can be one of `Windows | Mac | Linux | Universal`, and is used for interface indicators and suggestions when your customers are downloading the software.
You can optionally include an `arch` field per download with values `Universal | X86 | X64 | Arm | Arm64`, which lets you ship a separate binary per architecture on the same release. This is useful for Apple Silicon vs. Intel builds or Windows arm64 vs. x64 builds. Downloads with the same name and platform but different `arch` coexist on the release.
```bash
curl -X 'POST' 'https://demo.moonbase.sh/api/products/example-product/releases/new?publishImmediately=true' \
-H 'Api-Key: mb_a52c7...' \
-H 'Content-Type: application/json' \
-d '{
"version": {
"major": 1,
"minor": 0,
"patch": 0
},
"downloads": [
{
"name": "Installer.exe",
"platform": "Windows",
"key": "'$KEY'"
}
]
}'
```
Releases in Moonbase are versioned based on semantic versioning to allow for a number of strategies regarding pricing and distribution. The `major`, `minor` and `patch` are all components for this semantic version identifier. To learn more about semantic versioning, read more at [https://semver.org](https://semver.org).
If you would rather do a automatic upload, but manual publication, set the `publishImmediately` query parameter to false, or remove it entirely. You can then publish it from the Moonbase app yourself:
### A GitHub Action with curl
With the above, we can build the following action to automatically release software.
```yaml
name: Moonbase Continuous Deployment
on:
push:
branches:
- main
jobs:
moonbase-cd:
runs-on: ubuntu-latest
steps:
- name: Checkout
uses: actions/checkout@v4
- name: Build application
run: make build # This depends on how you build your binaries
- name: Prepare download
run: |
echo "DL_JSON=$(curl -X 'POST' \
'https://demo.moonbase.sh/api/downloads/prepare?contentType=application%2foctet-stream' \
-H 'Api-Key: ${{ secrets.MOONBASE_API_KEY }}')" \
>> $GITHUB_ENV
- name: Upload binary
env:
URL: ${{ fromJson(env.DL_JSON).url }}
run: |
curl --upload-file installer.exe $URL \
-H 'Content-Type: application/octet-stream'
- name: Create Moonbase release
env:
KEY: ${{ fromJson(env.DL_JSON).key }}
run: |
curl -X 'POST' 'https://demo.moonbase.sh/api/products/example-product/releases/new' \
-H 'Api-Key: ${{ secrets.MOONBASE_API_KEY }}' \
-H 'Content-Type: application/json' \
-d '{
"version": {
"major": 1,
"minor": 0,
"patch": 0
},
"downloads": [
{
"name": "installer.exe",
"platform": "Windows",
"key": "'$KEY'"
}
]
}'
```
Be sure to plug in your favourite versioning tool to automatically increment the semantic version too!
## Bonus: notifying users
Once you publish a new release in Moonbase, all customers will immediately have access to download the new version.
But how will they know about it? One way is to use the licensing flow that you might already be using, as in the metadata of any license is the current release version of the product that the license has been issued for. If you opt for a flow where you periodically re-validate license activations, new metadata will contain updated product version numbers. Using this metadata, you can build UIs to notify your users about new versions being available. Learn more about the metadata available for license activations in our [licensing API reference](/docs/licensing/api/#licensing).
---
# https://moonbase.sh/docs/guides/marketing-revenue-tracking/
title: 'Track revenue generated by marketing campaigns',
description: 'Using UTM parameters, you can track revenue generated by marketing campaigns through Moonbase purchases.',
}
# Track revenue generated by marketing campaigns
This guide will show you how you can easily start tracking revenue generated by your marketing campaigns to understand what channels are the most effective tools for you. {{ className: 'lead' }}
## The UTM parameters
Moonbase supports tracking marketing campaigns using the well-known UTM parameters, also known as the Urchin Tracking Module.
These parameters form a collection of identifiers to identify several dimensions of the channel where you attract customers.
You've probably seen them as query parameters before, and Moonbase will track all of them for each purchase made:
| Parameter | Purpose |
| -------------- | --------------------------------------------------------------- |
| `utm_source` | The source site or channel of the campaign |
| `utm_medium` | The type of link used, like ad or email CTAs |
| `utm_campaign` | An identifier for the specific campaign |
| `utm_term` | Search terms used by the customer to find the campaign |
| `utm_content` | Description of what brought the customer to the site originally |
In case you want to track which site lead to the conversion, Moonbase also supports an optional `utm_referrer` parameter, which can be used alongside the `utm_source` parameter.
These parameters can be used both on our hosted purchase pages, as well as through the storefront APIs and SDKs.
They can even be used for running targeted discounts, where discounts are exclusive for certain tracking parameters!
## Hosted purchase pages
All merchants on Moonbase will have hosted purchase pages available, typically at URLs like [https://demo.moonbase.sh/buy/demo-app](https://demo.moonbase.sh/buy/demo-app).
By adding the UTM parameters to these links, the eventual purchase will be tracked automatically by Moonbase, and any UTM targeted discounts will be automatically applied.
Simply add the parameters as necessary to the URL: `https://demo.moonbase.sh/buy/demo-app?utm_source=moonbase.sh&utm_content=docs`.
This page will also add the referrer domain automatically, to give you as much insight as possible.
## Storefront API & SDK
If you are using our storefront APIs and SDKs, there's two endpoints where you should forward any UTM parameters to:
1. `GET /api/customer/storefront`: This endpoint is used for fetching product pricing, and will have UTM exclusive discounts applied only if UTM query parameters are present
1. `PATCH /api/customer/orders/{orderId}`: This endpoint is used for adding products to an ongoing purchase, and can also be used to add UTM parameters to the purchase
For more information about these endpoints, check out our [storefront API reference](/docs/storefronts/api).
All of the above endpoints expect UTM parameters as query parameters as demonstrated in the above examples.
If you are already using our SDKs, all of this will be automatically handled as long as you link to your storefront with UTM parameters included.
Check out our SDK documentation for [Vue.js](/docs/storefronts/sdks/vue) and [React.js](/docs/storefronts/sdks/react) to get started.
## Analyze in the Moonbase app
Once integrated, log in to your Moonbase account to find marketing analytics on the home page.
Here, you can adjust time frames and investigate statistics for all the different UTM parameters:
Through these analytics, you'll be able to see trends across channels, based on quantity and total revenue.
## Bonus: offer targeted discounts
You might find yourself in the position that some of your campaigns are doing better than others, and you would like to keep the best performing ones going.
Often, those campaigns have specific discounts marketed in them, which is critical to the success of the campaign.
Using our discount targeting, you can craft exclusive product discounts that apply only for purchases coming through certain channels:
Be aware that this is not a "secure" solution, since anyone could use the parameters to get the discount.
If you want to ensure that the customer has right to the discount, consider targeting by products owned instead.
This method utilizes our unique ability to correlate customer inventory with exclusive discounts.
---
# https://moonbase.sh/docs/licensing/api/
title: 'Licensing API Reference',
description: 'On this page, you can learn how to use the Licensing API to integrate Moonbase into your apps.',
}
# Licensing API Reference
Do you have a specific scenario you need to support or other questions?\
Reach out to us through the support channel, or at [developers@moonbase.sh](mailto:developers@moonbase.sh).
## Authentication
The licensing endpoints documented below are made to be called from the apps you create, with the customer initiating any actions.\
Therefore, most of the endpoints are publicly available, only some requiring authentication in the form of JWT tokens.\
These JWT tokens can be obtained by authenticating the user through `/api/customer/identity/sign-in`, and the tokens refreshed by handing them in through `/api/customer/identity/refresh`.
---
## Rate limits
Licensing API requests are rate limited per IP address, with limits sized for one customer using your app. Since your apps call these endpoints from each customer's own device, this is rarely a concern. When a limit is exceeded, the API responds with `429: Too Many Requests` and a `Retry-After` header telling you how many seconds to wait.
### Calling from your own server
If your server calls these endpoints on behalf of your customers, for example to validate their license tokens, they all reach Moonbase from your server's IP address and share the limits of one customer.
To avoid this, include one of your [API keys](https://app.moonbase.sh/account-settings/developer) in an `Api-Key` header. Requests with a valid API key are not limited by IP address, and have these limits instead:
| Endpoints | Limit |
| --- | --- |
| All endpoints | 500 requests per minute |
| Sign up | 300 requests per 5 minutes |
| Sign in and other identity endpoints | 1,000 requests per 5 minutes |
Password reset requests are limited further.
- The API key does not sign anyone in. Endpoints that need a signed-in customer still need their access token.
- An invalid or deleted API key is rejected with `401: Unauthorized` on every endpoint, even those that need no key.
- Never include an API key in an app you distribute. Anyone can extract it and use it with the Core API. Any valid key works here, including a [restricted](/docs/api#authentication) one, so your server can use a key with no more access than it needs.
This endpoint allows you to sign in a customer given a combination of email address and password.
The JWT returned contains an access token with a default lifetime of 15 minutes.
Refresh tokens can be used to get new access tokens.
### Required query parameters
The email of the customer.
### Required body content
The password of the customer.
This endpoint allows you to exchange a refresh token + access token for a new pair of tokens.
### Required query parameters
The refresh token you got during the last refresh or sign-in if first time refreshing.
### Required body content
The access token belonging to the refresh token.
This endpoint allows you to sign up a new customer on your account.
Useful if you require accounts to start trials.
If you turn on **Captcha** under Account settings > Storefront > Features, a sign-up from an app is refused with `400: Bad Request` and an `errorType` of `CaptchaRequired`, since the app can't show one. Send customers to your store's sign-up page instead, or see [Sign up in the Storefront API](/docs/storefronts/api#sign-up) to draw the captcha yourself.
### Required body properties
Full name of the user.
Email address of the user. Will be used as username. Can be changed by the user.
The initial password for the user. Must contain lower case characters, uppercase characters, numbers and a symbol.
### Optional body properties
A billing address for the user. Will be used when purchasing new products.\
Contains the following properties:
ISO 3166-1 alpha-2 two-letter country code.
First line of the regular street address.
Second line of the regular street address.
Postal code of the address.
Locality of the address, only required if no region is given.\
Also known as `City`.
Region of the address, only required if no locality is given.\
Also known as `State`.
```http {{ title: 'HTTP' }}
POST https://demo.moonbase.sh/api/customer/identity/sign-up
Content-Type: application/json
{
"name": "Example User",
"email": "user@example.com",
"password": "Password1234!",
"address": {
"countryCode": "NO",
"streetAddress1": "Slottsplassen 1",
"streetAddress2": null,
"postCode": "0010",
"region": "Oslo",
"locality": null
}
}
```
```bash {{ title: 'cURL' }}
curl -X 'POST' https://demo.moonbase.sh/api/customer/identity/sign-up \
-H 'Content-Type: application/json' \
-d '{
"name": "Example User",
"email": "user@example.com",
"password": "Password1234!",
"address": {
"countryCode": "NO",
"streetAddress1": "Slottsplassen 1",
"streetAddress2": null,
"postCode": "0010",
"region": "Oslo",
"locality": null
}
}'
```
```json {{ title: 'Response' }}
{
"id": "e891f4b0-6d73-48ed-8fc1-c6b166c5379a",
"name": "Example User",
"email": "user@example.com",
"tenantId": "demo",
"userType": "Customer",
"accessToken": "eyJhbGciOiJIUzUxMiIsInR5c...",
"refreshToken": "MDAxNDhiZGUtMzY1Yi00MTYx..."
}
```
---
## Licensing
License tokens generated by Moonbase are generated as JWT tokens.
These tokens are signed with your account's private key, while you ship the public key with your apps.
Part of the metadata in these tokens allow you to verify that the token is for the device it's being activated on.
If you are using frameworks or languages that don't have easy ways to deserialize and validate JWTs, reach out to us through support to investigate alternatives.
### License token claims
Identifier of this unique license activation.
Expiration date and time for this license token.
You should have a check that this time is still in the future when validating the license.
Only present on licenses and trials that expire, which includes any license attached to a subscription.
Perpetual licenses carry none, and neither do endless trials (trials of a product whose trials never expire).
This is following the JWT standard and is defined in seconds since epoch.
Date and time at which this license or trial was created.
This is following the JWT standard and is defined in seconds since epoch.
Date and time at which this token becomes valid. Will always be the same as the `iat` claim.
This is following the JWT standard and is defined in seconds since epoch.
Issuer of the license, will be the ID of your Moonbase account, for example `acme-co`.
Audience of the license, will be the ID of the product the license is issued for, same as the `p:id` claim.
Identifier of the user that owns this license.
If the user is anonymous, this ID will be an empty GUID (`00000000-0000-0000-0000-000000000000`).
The name of the user that owns this license.
If the user is anonymous, this will say `anonymous`.
The email of the user that owns this license.
If the user is anonymous, this will say `anonymous`.
The ID of the license that activated this license token.
One license may have multiple tokens active depending on seat configuration of the product.
The ID of the product this license is for, same as the `aud` claim.
You should have a check that this is the same as the current product the user is activating.
The name of the product this license is for.
The current release version of the product.
If there is no current release for the product, this claim will not be included.
Offline tokens never include it.
The number of seats across all of the customer's licenses for this product.
Along with `p:seats:used` and `p:seats:remaining`, which count the seats taken and still free.
Only online license tokens include these claims, not trials or offline tokens.
In case the user of this license owns any sub-products (add-ons) of this product, this claim will have a comma-separated list of their IDs, without the main product's part.
It lists every add-on the customer owns, whether or not it is included in this license, and says nothing about whether it may be used on this device.
If there are no sub-products owned, this claim will not be included.
The [add-ons](#add-ons) included in this product's license that the customer owns or trials, one object each.
Only present when there is at least one, and never on trial tokens.
The add-on's own part of its product ID: `preset-pack` for `demo-app.preset-pack`.
Whether the add-on may be unlocked on this device: the device holds a seat of it, or its trial hasn't ended.
An add-on the customer owns, but with every seat taken on other devices, is listed with `false`.
Whether a trial backs the add-on, rather than a license the customer owns.
Present as `true` when the add-on's seat on this device was revoked, by the customer or by you.
Validating doesn't take the seat back: your app has to [activate the add-on](#activate-an-add-on) again.
When the add-on's license or trial ends, in seconds since epoch.
Check that it's still in the future before unlocking the add-on, especially on offline tokens.
The add-on's seats across the customer's licenses for it, as `total`, `used` and `remaining`.
Not on trials or offline tokens.
The ID of the subscription this license belongs to, if any.
If this is a perpetual license, this claim will not be included.
For a license that [covers only some releases](#release-access): releases published until this time are covered, and every version while it hasn't passed.
Defined in seconds since epoch.
Unlike `exp`, the license keeps working after it for the versions it covers.
For a license that [covers only some releases](#release-access): every version whose major version is at most this is covered.
For a license whose updates have ended, the last version published before `l:rel:until` (`MAJOR.MINOR.PATCH`), which is covered along with every older version.
Only in tokens issued after `l:rel:until` has passed.
The activation method used for activating this license token.
Based on this you can determine if re-validations of the license should take place.
The signature of the device being activated, that was passed in when requesting the license token initially.
You should have a check that this signature is the same as the device the user is activating.
Date and time of the last time this license token was validated online.
You should have a check that this date is not too old for your given re-validation frequency.
Similarly to `exp` and `iat`, this claim is also defined in seconds since epoch.
Flag for if this license token represents a trial, or a owned license.
For compatability reasons, this value may be presented as a string and not a strict boolean value.
Your parsing should handle both.
The name of your Moonbase merchant account.
Custom properties from the product, where `includeInToken` is set to `true`.
Values are flattened to key-value pairs without the type wrapper.
Custom properties from the customer (user), where `includeInToken` is set to `true`.
Values are flattened to key-value pairs without the type wrapper.
Custom properties from the license, where `includeInToken` is set to `true`.
Values are flattened to key-value pairs without the type wrapper.
Custom properties from the trial, where `includeInToken` is set to `true`.
Only present on trial tokens.
Values are flattened to key-value pairs without the type wrapper.
``` {{ title: 'License token' }}
eyJhbGciOiJSUzI1NiIsInR5cCI6IkpXVCJ9.eyJpZCI6IjdhMzg4ZjZiZGE1MTY0NjFmYzcwMzQ2ZDM2ZThlMTI3IiwidmVuZG9yIjoiRGVtbyBDby4iLCJ1OmlkIjoiMDAwMDAwMDAtMDAwMC0wMDAwLTAwMDAtMDAwMDAwMDAwMDAwIiwidTpuYW1lIjoiYW5vbnltb3VzIiwidTplbWFpbCI6ImFub255bW91cyIsImw6aWQiOiI3YTM4OGY2YmRhNTE2NDYxZmM3MDM0NmQzNmU4ZTEyNyIsInA6aWQiOiJkZW1vLWFwcCIsInA6bmFtZSI6IkRlbW8gQXBwIiwicDpyZWwiOiIxLjAuMCIsIm1ldGhvZCI6Ik9ubGluZSIsInNpZyI6InhMVEkzVkRFeU9qZGRkRTJPakE1TGpZMU5UVXlOVE5hSWl3aWRISnBZV3dpT2lKMGNuVmxJaXdpWVhWa0kiLCJ2ZXIiOiIyMDI1LTAxLTA4VDEyOjE1OjI3Ljg0OTYyNDJaIiwidmFsaWRhdGVkIjoxNzM2MzM4NTI3LCJ0cmlhbCI6InRydWUiLCJhdWQiOiJkZW1vLWFwcCIsImlzcyI6ImRlbW8iLCJleHAiOjE3Mzc1NDgxMjcsImlhdCI6MTczNjMzODUyNywibmJmIjoxNzM2MzM4NTI3fQ.UgQwC4KNhPofTvqwn0LkUhtYlk0PnYUBHFm_-cgLH8BuTj0gcVAJFuAWnjTP4pCtXTBN1l_a6zXePoHzZdNFN7DOkBmd5VbiFdLpNJUTrnRT-2Vzn6EC5wrrJxAKtBZb22uOarL2TZCvInDGdTqiQVjIwhFMK9em8PBOuGQ_U3-mfGWnp8dzo02rcDqxTtOTWTu8tPXt9GOYjqmr7myWH0bIdfswCd35VEeLS2n6FRBBOeUZY-DZHCL0feJvOouXXux2BVBZM8AjAPGqfnMi6UyNCI3vrTZgJ21N0kKJKx01NteC5y3qARXpNQ8_rGm5VzmZ3NoRq792_pazLytZIQ
```
```json {{ title: 'Deserialized token' }}
{
"id": "cef3e37be338acabd5da04105099025c",
"vendor": "Demo Co.",
"u:id": "00000000-0000-0000-0000-000000000000",
"u:name": "anonymous",
"u:email": "anonymous",
"l:id": "cef3e37be338acabd5da04105099025c",
"p:id": "demo-app",
"p:name": "Demo App",
"p:rel": "1.0.0",
"p:properties": {
"category": "Audio Tools"
},
"l:properties": {
"seat_name": "Studio A"
},
"method": "Online",
"sig": "xLTI3VDEyOjE2OjA5LjY1NTUyNTNaIiwidHJpYWwiOiJ0cnVlIiwiYXVkI",
"trial": "true",
"aud": "demo-app",
"iss": "demo",
"validated": 1736338527,
"exp": 1737548127,
"iat": 1736338527,
"nbf": 1736338527
}
```
```json {{ title: 'Add-on and release access claims' }}
{
...
"trial": "false",
"l:rel:until": 1767225600,
"sp:owned": "preset-pack,brass",
"sp": [
{
"id": "preset-pack",
"active": true,
"trial": false,
"seats": { "total": 2, "used": 1, "remaining": 1 }
},
{
"id": "drums",
"active": true,
"trial": true,
"exp": 1737548127
}
],
...
}
```
### Licenses that cover some versions {{ id: 'release-access' }}
Licenses that cover only some releases are in beta, and are switched on account by account. Reach out to support if you'd like to sell them.
A perpetual license can cover only some versions of your app, such as 12 months of updates or every version up to 2.x, as described in [core concepts](/docs/concepts/#release-access).
The license itself doesn't expire because of it: it keeps working for the versions it covers.
Its token says what it covers with the `l:rel:until`, `l:rel:major` and `l:rel:upto` claims, and a version is covered when any of these holds:
* The token has neither `l:rel:until` nor `l:rel:major`, so it covers every version.
* The version's major is at most `l:rel:major`.
* `l:rel:until` hasn't passed yet.
* `l:rel:until` has passed, and the version is at most `l:rel:upto`. Without `l:rel:upto`, every version is covered.
Versions are read leniently: a leading `v`, a fourth number and any `-beta` or `+build` suffix are ignored, so `v3.0.0-beta.2` counts as 3.0.0.
A version that can't be read isn't checked.
Send your app's version as the `appVersion` [query parameter](#metadata-for-analytics), and Moonbase checks it when the app requests or validates a license.
For a version the license doesn't cover, it responds with `400: Bad Request` and an `errorType` of `ReleaseNotCovered`, along with what the license covers and an `upgradeUrl` where the customer can buy the upgrade, when you sell one.
Validating also sends the license along as a fresh `license` token: keep it, since it still covers the versions it did.
When another of the customer's licenses covers the version, validating moves the device to that license instead, and responds with its token as usual.
With [browser activation](#browser-activations), the customer is offered the upgrade in the browser instead.
An offline license is checked only on the device, so your app has to check its version against these claims itself.
The Node.js and .NET SDKs do this for you, online and offline.
This endpoint allows you to request a trial license token for the current device.
If you have an authenticated customer, you may attach the access token in the `Authorization` header to authenticate the call.
Will return a `HTTP 401: Unauthorized` if the product requires account to activate trial and you do not have an authenticated customer.
### Required body properties
The name of the device being activated.
Will be shown in the customer portal in case the customer wants to revoke this license activation.
A fingerprint of the current device that will not change.
Should be used when validating future license tokens, that they have indeed been issued for the current device.
This endpoint allows you to request a license token for the current device.
Requires an authenticated customer, and that the customers has free license activations on their account to activate the product.
If none of the customer's licenses covers the app's version, it responds with a [`ReleaseNotCovered`](#release-access) error.
### Required headers
Access token for the authenticated customer in your app, in the form of a JWT bearer token.
### Required body properties
The name of the device being activated.
Will be shown in the customer portal in case the customer wants to revoke this license activation.
A fingerprint of the current device that will not change.
Should be used when validating future license tokens, that they have indeed been issued for the current device.
### Optional query parameters
Set to `false` to stop the device from taking seats of [add-ons](#add-ons) included in the license, so your app can [activate them](#activate-an-add-on) when the customer asks.
Defaults to `true`.
This endpoint allows you to send a license token you have to have it validated.
For all `Online` activated tokens, this should be done regularly to be able to deactivate revoked devices fast.
You will receive an updated token in return, with new valid validation timestamps if the license is still active.
If the license doesn't cover the app's version, it responds with a [`ReleaseNotCovered`](#release-access) error.
### Required body content
The license token you wish to validate.
### Optional query parameters
Set to `false` to stop the device from taking seats of [add-ons](#add-ons) included in the license, so your app can [activate them](#activate-an-add-on) when the customer asks.
Defaults to `true`.
This endpoint allows you to send a license token you have to have it revoked.
By doing this, you will effectively free up a seat for the customer, so that they can activate other devices.
It also frees the device's seats of any [add-ons](#add-ons) included in the license.
Offline activated license tokens will not be accepted by this endpoint as they are not intended to be floating licenses.
### Required body content
The license token you wish to revoke.
```http {{ title: 'HTTP' }}
POST https://demo.moonbase.sh/api/client/licenses/demo-app/revoke
Content-Type: text/plain
eyJhbGciOiJSUzI1NiIsInR5cCI6IkpXVCJ9.eyJpZCI6ImM2Mjg0YTkwZDQ3ZGY4MTQ1MzBjMDE1Z...
```
```bash {{ title: 'cURL' }}
curl -X 'POST' https://demo.moonbase.sh/api/client/licenses/demo-app/revoke \
-H 'Content-Type: text/plain' \
-d 'eyJhbGciOiJSUzI1NiIsInR5cCI6IkpXVCJ9.eyJpZCI6ImM2Mjg0YTkwZDQ3ZGY4MTQ1MzBjMDE1Z...'
```
---
## Add-ons
An add-on is a product under a main product, with an ID like `demo-app.preset-pack`.
When you turn on **Include in the main product's license** on the add-on, a device that activates or validates the main product also takes a seat of the add-on, if the customer owns it and a seat is free.
The main product's license token then lists the add-on in its [`sp` claim](#license-token-claims), saying whether your app may unlock it on that device, so one token answers for both.
An add-on bought after the device activated shows up at the next validation.
The endpoints below let your app act on add-ons from the main product's license token.
Each takes the token as its body, and the add-on as `{subProductId}`, either its own part of the ID (`preset-pack`) or the whole ID (`demo-app.preset-pack`).
---
## List add-ons {{ tag: 'POST', label: '/api/client/licenses/{productId}/sub-products' }}
This endpoint lists the product's add-ons the customer can do something with, for an in-app store or upgrade screen: ones they own or subscribe to, ones for sale, and ones whose trial can be started or is running on this device.
It works from a license or a trial token, and changes nothing.
The currency to show prices in.
The add-ons, each containing:
The add-on's own part of its product ID, as the `sp` claim names it.
The add-on as a [storefront product](/docs/storefronts/api#products), with `owned` and `subscribed` for the customer, and its prices when it's for sale.
Whether the add-on is included in the main product's license.
Whether to unlock the add-on on this device.
For an included add-on, the same as `active` in the token's `sp` claim; for any other, whether the customer owns or subscribes to it.
Whether the add-on's seat on this device was revoked, so your app has to [activate it](#activate-an-add-on) again.
When the license or trial behind an included add-on ends.
The add-on's seats across the customer's licenses for it, as `total`, `used` and `remaining`.
The add-on's trial on this device, with a `status` of `Available` when one [can be started](#start-an-add-on-trial) now, `Active` or `Expired` for the trial the device had, and `Unavailable` otherwise.
Also has `numberOfDays`, `expiresAt` for a running trial, and `requiresNewsletterOptIn`.
Omitted when the add-on doesn't offer trials.
Where the customer can buy the add-on, when it's for sale.
Add `?variation={id}` for one of its variations.
This endpoint takes a seat of an included add-on for the device, and returns the main product's license token with the add-on active in its `sp` claim.
Use it when the add-on's seat on this device was revoked, which validating doesn't undo, or when your app activates add-ons only when the customer asks for them, with `autoActivateSubProducts=false`.
Responds with `400: Bad Request` and an `errorType` of `NoEligibleLicense` when the customer doesn't own the add-on or has no free seat of it, and with `400: Bad Request` when the add-on isn't included in the main product's license or the token is a trial.
### Required body content
The main product's license token.
This endpoint starts the trial of an included add-on on the device, following the add-on's own trial settings, and returns the main product's license token with the trial in its `sp` claim.
It needs an online license of the main product, not a trial or an offline license.
A customer who owns the add-on gets a seat of it instead, as when [activating it](#activate-an-add-on), and once they buy it, the next validation replaces the trial with a seat.
Each device gets one trial of each add-on, so asking again returns the token with the trial it had, ended or not.
Responds with `400: Bad Request` when the add-on doesn't offer trials, and with `403: Forbidden` when its trials require a newsletter opt-in the customer hasn't given.
### Required body content
The main product's license token.
```http {{ title: 'HTTP' }}
POST https://demo.moonbase.sh/api/client/licenses/demo-app/sub-products/preset-pack/trial
Content-Type: text/plain
eyJhbGciOiJSUzI1NiIsInR5cCI6IkpXVCJ9.eyJpZCI6ImM2Mjg0YTkwZDQ3ZGY4MTQ1MzBjMDE1Z...
```
```bash {{ title: 'cURL' }}
curl -X 'POST' https://demo.moonbase.sh/api/client/licenses/demo-app/sub-products/preset-pack/trial \
-H 'Content-Type: text/plain' \
-d 'eyJhbGciOiJSUzI1NiIsInR5cCI6IkpXVCJ9.eyJpZCI6ImM2Mjg0YTkwZDQ3ZGY4MTQ1MzBjMDE1Z...'
```
``` {{ title: 'Response' }}
eyJhbGciOiJSUzI1NiIsInR5cCI6IkpXVCJ9.eyJpZCI6ImM2Mjg0YTkwZDQ3ZGY4MTQ1MzBjMDE1Z...
```
---
## Browser Activations
A good alternative to the above endpoints where you need to authenticate the customer in your apps is to request browser based activation instead.
By requesting an activation, you can open a browser where the customer is in most cases already logged in, where they can choose what to fulfill the request with.
---
## Request activation {{ tag: 'POST', label: '/api/client/activations/{productId}/request' }}
This endpoint allows you to request a activation for the current device.
The returned payload will have two URLs that are relevant:
This URL can be polled to check for the current status of the request.
See `GET /api/client/activations/{requestId}` below.
This URL should be opened in the browser of the current device so the customer can complete the activation process.
### Required body properties
The name of the device being activated.
Will be shown in the customer portal in case the customer wants to revoke this license activation.
A fingerprint of the current device that will not change.
Should be used when validating future license tokens, that they have indeed been issued for the current device.
### Optional query parameters
Set to `false` to stop the device from taking seats of [add-ons](#add-ons) included in the license, so your app can [activate them](#activate-an-add-on) when the customer asks.
Defaults to `true`.
This endpoint allows you to check the current status of a activation request.
By polling this regularly, you can activate the device as soon as the user fulfills the request in their browser.
Be careful not to poll too frequently, or you may be [rate limited](#rate-limits).
One request per 5 seconds is considered a safe frequency.
Until the customer has fulfilled the request, a `HTTP 204: No content` will be returned.
Once fulfilled, the response will contain a license token ready to be used.
A request that is cancelled, or not fulfilled within an hour, responds with `400: Bad Request`. Stop polling, and start a new request if the customer still wants to activate.
To be able to have insights into what version of your software is being used, what platforms it is installed on and any other dimensions that might be interesting to you, you may optionally include metadata in the requests for this API. This should be added to query parameters, and supports the following parameters:
The semantic version of the application, for example `1.0.0`.
It is also the version checked against a license that [covers only some versions](#release-access).
The platform that is being used, must match the enum exactly.
Any additional dimensions you want to track can be added as a key/value pair to the `meta` parameter.
``` {{ title: 'Request URI' }}
/api/client/activations/example-product/request
?appVersion=1.0.0
&platform=Windows
&meta[DAW]=Reaper
&meta[Format]=VST3
```
Some of our licensing SDKs may automatically add some relevant context for you based on the framework you are using, and also allow you to add more parameters on demand.
---
# https://moonbase.sh/docs/licensing/external-systems/
title: 'External licensing systems',
description: 'On this page, you can learn how to integrate Moonbase with external licensing platforms.',
}
# External licensing systems
If you have pre-existing software that relies on other licensing systems than Moonbase, you can integrate the two.
We support two main paths to achieve this integration:
1. Using pre-uploaded key codes
1. Using a HTTP API generator
To make it easier to transition between systems, our HTTP API generator supports several protocols:
1. A modern JSON-based API integration with HMAC security signatures
1. Compatibility modes for popular platforms like Fastspring, MyCommerce, DigitalRiver, ShareIt and others
If you are building APIs for your own licensing backend, using our JSON-based integration is highly recommended, but if you are transitioning from other payment providers, our compatibility mode might let you move over without any changes necessary in your backend systems.
Do you have a specific scenario you need to support or other questions?\
Reach out to us through the support channel, or at [developers@moonbase.sh](mailto:developers@moonbase.sh).
## Pre-uploaded key codes
In the case your licensing system can pre-generate arbitrary key codes for activating your software, you may opt to use our key code list feature.
To get started with this, simply choose the "Key Codes" generator on your product in Moonbase:
At this point, you may start uploading as many key codes as you wish to be used for future purchases. The product overview will indicate whether or not a product has enough key codes remaining, and it's your responsibility to ensure codes don't run out.
## HTTP generator
Using our HTTP generator means that Moonbase will call your API on customer purchases to fulfill the order with licenses.
It's important that your API is always available, so that customers will get access to products when they make their payment.
The API call has a timeout of **5 seconds**, and will retry up to **3 times** if a failure code is returned.
Your endpoint should be able to handle the request payload, and return a JSON object with licenses per product:
### Request payload
The type of fulfillment being requested, `Order` being purchases, `Voucher` being voucher redemptions and `License` being manual license provisioning from the Moonbase app.
A reference to the Order/Voucher/License being fulfilled, this will be unique across all fulfillment requests your backend may receive.
Details about the customer who initiated the fulfillment, it may have the following fields:
Globally unique customer ID for this customer.
Full name of the customer.
If the customer is a business, this will have the name of the business.
If the customer is a business, this will have the tax ID of the business if given.
Email address of the customer, this is always present and used as the login for the customer.
Do note that Moonbase supports customers changing the email address of their account.
The billing address of the customer if given:
ISO 3166-1 alpha-2 two-letter country code.
First line of the regular street address.
Second line of the regular street address.
Postal code of the address.
Locality of the address, only required if no region is given.\
Also known as `City`.
Region of the address, only required if no locality is given.\
Also known as `State`.
A list of license requests with objects of the following shape:
The ID of the product that needs licenses.
The ID of the pricing variation the customer bought or renewed, so you can issue a different license per variation.
Sent only when the product was bought on its own: it's omitted for products included in a bundle, voucher redemptions, manual license provisioning and requests sent with the **Test** button.
The number of licenses that is requested.
ISO 8601 timestamp for when the issued licenses should expire.
Present for subscriptions and other time-limited products, and omitted for perpetual licenses.
This value already includes any grace period configured on the product.
Present when the request fulfills a subscription, and omitted for one-off purchases. It may have the following fields:
The ID of the subscription this license belongs to.
The billing interval of the subscription.
ISO 8601 timestamp for the end of the current billing period (the renewal boundary). This does not include any grace period.
ISO 8601 timestamp for when the license actually stops working. For active subscriptions this is `currentPeriodEnd` plus the configured grace period, and for cancelled subscriptions it equals `currentPeriodEnd`.
The current status of the subscription. An initial purchase is always reported as `Active`.
The number of the current billing cycle of the subscription. Cycles are 1-based, so an initial purchase is cycle `1`, the first renewal is cycle `2`, and so on.
The product's custom properties as plain values, keyed by property name: text, numbers and booleans as JSON values, dates as ISO 8601 strings, and object and list properties as nested JSON objects and arrays.
Every property is included, even those not marked as public. Omitted when the product has none.
See the [Core API documentation](/docs/api#custom-properties) for more details on custom properties.
For perpetual products both `expiresAt` and `subscription` are omitted. For subscriptions, an initial purchase reports `status` as `Active` and `currentCycle` as `1`, while renewals report the subscription's current values. Treat every subscription field as optional, since each is sent only when it is known.
A retried fulfillment sends the same `variationId` as the original request, but the product's `properties` as they are at the time of the retry.
When responding to license requests, your backend should respond with a dictionary where the key is the product ID being fulfilled, and the value an array of licenses to issue to the customer.
Each license returned may either be a string which can contain line feed characters, but should not contain any sort of rich text content or HTML, or a file. In case you return a file object, make sure to include all of the following fields:
The name of the file being returned, including file extension.
The MIME type of the file being returned, e.g. `application/pdf`.
The file data, encoded as a Base64 string.
In the example response listed, we return three licenses for the product with ID `example-product`, where the first two are simple license keys represented as strings, and the third is a text file containing the license key.
It's imperative that the number of values in the list matches the requested quantity of licenses for the given product.
```json
{
"example-product" : [
"LICENSE-KEY-1",
"LICENSE-KEY-2",
{
"fileName" : "license-key-3.txt",
"contentType" : "text/plain",
"data" : "TElDRU5TRS1LRVktMw=="
}
]
}
```
## Revoking licenses
Besides fulfilling orders, Moonbase can notify your backend whenever a license is revoked, so you can deactivate it in your own system as well.
This is optional: when configuring the HTTP generator, set a separate **Revocation Endpoint** URL.
When it's set, Moonbase sends a revocation request to it whenever a license is revoked, either manually from the Moonbase app or automatically when an order is refunded.
When an order is only partially refunded, only the licenses for the refunded units are revoked, so you will receive revocation requests for those licenses only.
If you leave the Revocation Endpoint blank, revocations are not forwarded and no action is taken on your backend.
Revocation requests are signed with the same **HMAC-SHA256** signature as fulfillment requests (see the Security section below) and are retried up to **3 times** on failure.
Acknowledge a revocation by returning any `2xx` status code; no response body is required.
Because Moonbase may retry, your handler should be idempotent.
The type of request, this is always `License` for revocations.
The ID of the license being revoked.
The ID of the customer who owns the license.
The ID of the product the license is for.
The `variationId` the license's fulfillment request carried. Omitted when that request had none, which includes licenses issued before this field was introduced.
The license content originally issued for this license, in the same form your backend returned it during fulfillment: either a string, or a file object with `fileName`, `contentType` and `data`. Use this to identify which license to deactivate.
Present when the revoked license belongs to a subscription, using the same shape as the `subscription` object on fulfillment requests above. Omitted for one-off licenses.
```http {{ title: 'HTTP' }}
POST https://license-backend.your-domain.example/revoke
Content-Type: application/json
X-Signature: HNA0AVKUMOF5CXC8GKELYVYTYK37Q4ONGLJEL2TJTGA=
{
"type" : "License",
"reference" : "8f2c1b4e-3a6d-4f51-9c7a-1d2e3f4a5b6c",
"customerId" : "2d473e34-fc59-4e6e-9f38-4ad379baa8e9",
"productId" : "example-product",
"variationId" : "v802c5",
"license" : "LICENSE-KEY-1",
"subscription" : {
"subscriptionId" : "f6a3c1e2-9b7d-4c3a-8e21-2b9f0a4d7c11",
"interval" : "Monthly",
"currentPeriodEnd" : "2026-07-14T10:44:00Z",
"licenseExpiresAt" : "2026-07-14T10:44:00Z",
"status" : "Cancelled",
"currentCycle" : 4
}
}
```
## Security
To ensure your fulfillment and revocation endpoints are secure and safe from request forgery, we attach a signature to every fulfillment and revocation request being sent.
This signature is using a **HMAC-SHA256** authentication code using the secret set up while configuring the generator in the Moonbase app.
Using the raw request body and the secret, you can calculate a signature, and make sure that the signature you calculate is the same as ours.
```csharp
using var algorithm = new HMACSHA256(Encoding.UTF8.GetBytes(expectedSecret));
var json = await request.Content.ReadAsStringAsync();
var hash = algorithm.ComputeHash(Encoding.UTF8.GetBytes(json));
var signature = Convert.ToBase64String(hash).ToUpperInvariant();
var sentSignature = request.Headers.GetValues("X-Signature").Single();
Assert.Equal(sentSignature, signature);
```
If you're using our compatibility modes for other platforms, security patterns may differ. Reach out to us for more information about maintaining secure endpoints for license fulfillment.
## Compatibility modes
The **Element5 compatible** and **Fastspring compatible** HTTP generators send form-encoded fields in the format of the platform they mimic, rather than the JSON payload above.
Besides that platform's own fields, both also send:
- The ID of the pricing variation, as `VARIATION_ID` for Element5 and `variationId` for Fastspring. It's sent in the same cases as `variationId` in the JSON payload.
- Every custom property of the product, as one field per value named by its path under `properties.`: `properties.edition` for a top-level property, `properties.limits.seats` for a field inside an object property, and `properties.features.0` for the first item in a list. Numbers use `.` as the decimal separator, dates are ISO 8601 and booleans are `true` or `false`.
PHP replaces the dots in field names with underscores, so a PHP backend reads `properties.edition` as `$_POST['properties_edition']`.
For Fastspring, `security_request_hash` covers these fields like any other, with all fields sorted by name in byte order. Verify the hash over every field you receive except `security_request_hash` itself, as Fastspring documents it: a backend that hashes a fixed list of fields will reject requests that carry them.
In PHP, sort the field names as they were sent, since swapping dots for underscores can change their order. `$_POST`, `$_REQUEST` and `parse_str` all rewrite the names, so split the raw request body from `php://input` yourself to verify the hash.
---
# https://moonbase.sh/docs/licensing/offline-activations/
title: 'Offline activations',
description: 'Moonbase licensing supports offline activations, read on to learn more about how it works and how to integrate.',
}
# Offline activations
As described in [activation flows](/docs/licensing/activation-flows/#offline-activation), offline activations works by having the offline device generate a **device token** to be uploaded on your customer portal to exchange it for a **license token** that can be returned to your software.
This enables customers to move tokens between devices without them being connected to the internet, but still employ strong cryptography.
## Device tokens
The device token is a file containing enough metadata for the Moonbase backend to be able to issue a license for the specific product and device.
To generate this file, you should first construct a basic JSON payload containing the following details:
The unique signature for this device, this is what will be returned as the `sig` claim in license tokens.
User-friendly name of the device, which will be shown for your customer when managing license activations.
The ID of the product being activated.
The expected license format to be returned, must be `"JWT"`.
```json {{ title: 'Raw device token' }}
{
"id": "cef3e37be338acabd5da04105099025c",
"name": "Example Device",
"productId": "example-product",
"format": "JWT",
}
```
Once constructed, you may place the [Base64](https://en.wikipedia.org/wiki/Base64) encoded result of the JSON payload into a file, and present the file to the user for upload to the customer portal. The file should have a `.dt` extension to be recognized by the Moonbase hosted customer portal. If using our embedded storefront or APIs, you may choose the extension you want to use as you also control the file input. The above example would result in a file like this:
``` {{ title: 'device-token.dt' }}
ewogICAgImlkIjogImNlZjNlMzdiZTMzOGFjYWJkNWRhMDQxMDUwOTkwMjVjIiw
KICAgICJuYW1lIjogIkV4YW1wbGUgRGV2aWNlIiwKICAgICJwcm9kdWN0SWQiOi
AiZXhhbXBsZS1wcm9kdWN0IiwKICAgICJmb3JtYXQiOiAiSldUIiwKfQ==
```
## Exchanging tokens
Once customers have their device token, they may upload it and exchange it for an offline activated license token.
### Hosted portal
If using the hosted portal, you may redirect the customer to `https://.moonbase.sh/activate`, where they will be prompted to upload their device token (also known colloquially as a **machine file**):
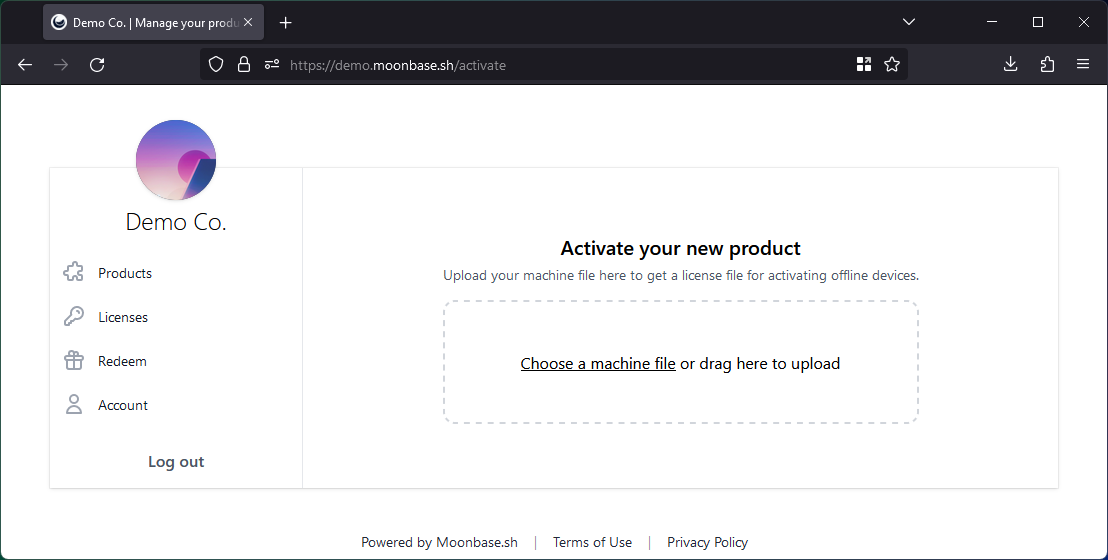
This process will lead the customer to download a license token in a `license-token.mb` file.
### Embedded storefront
If using the embedded storefront, you should add a button to your website or otherwise trigger the `activate_product` intent in the library.
This will prompt the customer to sign in before allowing a device token upload.
```html {{ title: 'index.html' }}
```
If your licensing integration is producing files with an extension other than the default `.dt` extension, you may configure the module to allow other files to be uploaded.
Similarly, you can also configure what the license token being downloaded should be called:
```html {{ title: 'index.html' }}
```
Learn more in our documentation page for the [embedded storefront](/docs/storefronts/embedded).
### Custom storefront
If using our frontend SDKs or APIs directly, you can read more on:
* **Vue.js SDK**: use the `activateProduct` on the `useInventory` composable, [learn more here](/docs/storefronts/sdks/vue/#use-inventory).
* **API**: use the `/api/customer/inventory/activate` endpoint, [learn more here](/docs/storefronts/api/#activate-product).
You will be in full control over what files to accept for upload, as well as what to name the downloaded license token file.
## Loading the license token
Once the customer have their **license token** downloaded from the portal, they should be able to load it into your software, at which point you may treat it as any normal license token you would have gotten from the API.
The key differences are:
* The `method` claim is set to `Offline`
* You should not attempt to validate the token online
* For a license that covers only some releases, your app has to check its own version against the token's [release access claims](/docs/licensing/api/#release-access). The Node.js and .NET SDKs do this for you
---
# https://moonbase.sh/docs/licensing/
title: 'Software licensing',
description: 'Find out exactly how to integrate with Moonbase for software licensing through these docs.',
}
# Software licensing
By using Moonbase as your licensing provider, you have the ability to offer multiple flows for your customers to activate their software.
Our APIs and SDKs have support for browser based license activations, in-app license activations or offline file-based activations.
To learn more about the activation flows, see [Activation flows](./activation-flows).
In the spirit of simplifying and saving time, we've built some SDKs to ensure that you can integrate Moonbase into your software as easy as possible.
If you want absolute control and full customization, you can use our API directly.
Check out the [API reference](./api) for documentation, and reach out to us if you have any questions or feature requests.
If you are using one of the languages or frameworks we've built SDKs for, we advise you to check them out as they make integrating much simpler since they contain framework specific utilities and abstractions.
## Using external licensing platforms
If you are using Moonbase for your payments and e-commerce needs, you can also configure your Moonbase products to provision licenses in external systems.
We support multiple integration patterns, including pre-uploading lists of key codes, to more advanced HTTP API integrations.
To learn how to get started with integrating your licensing platform with Moonbase, see [External systems](./external-systems).
---
# https://moonbase.sh/docs/licensing/sdks/cpp/
title: 'C++ SDK',
description: 'Header-only C++17 SDK for integrating Moonbase license activation into native C++ apps, with two JUCE integration paths.',
}
# C++ SDK
A header-only C++17 SDK for integrating Moonbase license activation into your native applications. It runs on Windows, macOS, and Linux, and ships with two JUCE integration paths for plug-in developers. {{ className: 'lead' }}
The SDK is open-source under the MIT license and lives at [`Moonbase-sh/moonbase-cpp`](https://github.com/Moonbase-sh/moonbase-cpp). It exposes the activation primitives directly, so you can use it from any C++ application: CLI tools, Qt apps, custom plug-in formats, or JUCE plug-ins through the [JUCE module](../juce/) that ships in the same repository.
It supports:
* Browser-based activations with polling
* Local RS256 JWT validation against an embedded public key
* Online re-validation with configurable cadence and grace period
* Cross-SDK device identity implementing the Moonbase device fingerprint spec, so an activation made from a web or Electron app validates in your native app
* Overridable license storage (in-memory by default, file-backed store included)
* Server-side activation revocation
* Two JUCE paths: the drop-in [`moonbase_licensing` module](../juce/) with a built-in activation UI, and a copy-paste bridge wrapping `juce::OnlineUnlockStatus`
## Requirements
* CMake 3.20 or newer
* A C++17 compiler
* Windows, macOS, or Linux
* `CURL::libcurl` and OpenSSL (`OpenSSL::SSL`, `OpenSSL::Crypto`)
* `nlohmann_json` 3.11+ — fetched automatically if not found on the system
## Installation
The fastest way to consume the SDK is through CMake's `FetchContent`. For a system-wide install, build and install from source and pick it up with `find_package`. For vendored copies in your repo, `add_subdirectory` works the same way as `FetchContent`.
```cmake {{ title: 'FetchContent' }}
include(FetchContent)
FetchContent_Declare(moonbase_cpp
GIT_REPOSITORY https://github.com/Moonbase-sh/moonbase-cpp.git
GIT_TAG v4.10.0)
set(MOONBASE_BUILD_TESTS OFF)
set(MOONBASE_BUILD_EXAMPLES OFF)
FetchContent_MakeAvailable(moonbase_cpp)
target_link_libraries(your_app PRIVATE moonbase::licensing)
```
```cmake {{ title: 'find_package' }}
find_package(moonbase_cpp REQUIRED)
target_link_libraries(your_app PRIVATE moonbase::licensing)
```
```bash {{ title: 'Install from source' }}
git clone https://github.com/Moonbase-sh/moonbase-cpp.git
cd moonbase-cpp
cmake -B build -DMOONBASE_BUILD_TESTS=OFF -DMOONBASE_BUILD_EXAMPLES=OFF
cmake --build build
cmake --install build --prefix /your/prefix
```
The exported `moonbase::licensing` target propagates the include directory and transitive dependencies on libcurl, OpenSSL, and nlohmann_json, so your project doesn't need to repeat `find_package` for any of them.
Building the SDK as a top-level project also produces `moonbase_device_id`, a diagnostic that prints the current machine's device ID and how it was derived. Enable it in a subproject build with `-DMOONBASE_BUILD_DEVICE_ID_TOOL=ON`.
## Basic usage
Configure the SDK with your account endpoint, product ID, and embedded RS256 public key, then request an activation and poll until it's fulfilled in the browser:
```cpp
#include
moonbase::licensing_options options;
options.endpoint = "https://your-account.moonbase.sh";
options.product_id = "your-product";
options.public_key = embedded_public_key_pem;
options.account_id = "account-id"; // optional issuer check
moonbase::licensing licensing(options);
auto request = licensing.request_activation();
std::cout << "Open: " << request.browser_url << "\n";
std::optional license;
while (!license) {
std::this_thread::sleep_for(std::chrono::seconds(1));
license = licensing.get_requested_activation(request);
}
licensing.store().store_local_license(*license);
```
The default license store is in-memory. Wire up `moonbase::file_license_store` (or your own implementation) to persist licenses across launches — see [Custom fingerprinting and storage](#custom-fingerprinting-and-storage) below.
## Startup validation
On every launch, run `validate_token_online` against the stored token. It performs the local checks first (signature, device fingerprint, expiry) and then re-validates against the Moonbase API as needed:
```cpp
if (auto local = licensing.store().load_local_license()) {
auto validated = licensing.validate_token_online(local->token);
licensing.store().store_local_license(validated); // persist refreshed token
}
```
Two `licensing_options` knobs control API cadence and offline tolerance:
* `online_validation_min_interval` (default 5 minutes) — skip the API call when the local `validated_at` is newer than this. Keeps the method cheap to call frequently.
* `online_validation_grace_period` (default 7 days) — maximum age the local token may reach without a successful online check. Within grace, transient transport failures fall back to the cached local result; beyond grace, the failure propagates.
Definitive server rejections (`license_invalid_error`, `license_expired_error`) always propagate regardless of grace. Offline-activated tokens (`activation_method::offline`) are validated locally even from `validate_token_online` — the SDK never contacts the API for them. Use `validate_token_local` directly when you only want the local check.
## Revoking activations
Wire `revoke_activation` to a **Deactivate** or **Sign out** button so users can free up the activation seat for the current device:
```cpp
if (auto local = licensing.store().load_local_license()) {
licensing.revoke_activation(local->token);
}
```
On success the SDK tells the server to release the seat and clears the matching license from the local store. Revoke is only meaningful for online-activated paid licenses; calling it for offline or trial tokens raises `operation_not_supported_error` without contacting the API.
## Custom device IDs and storage
The default device ID resolver, `moonbase::moonbase_device_id_resolver`, implements the cross-SDK Moonbase device fingerprint spec, reading SMBIOS on Windows, `IOPlatformUUID` on macOS, and `machine-id` plus world-readable DMI fields on Linux. Because every Moonbase SDK computes the same ID, an activation made from a web or Electron app validates in your native app and the other way round. Override it when you need an exact legacy fingerprint or any other application-specific device ID:
```cpp
class my_resolver final : public moonbase::device_id_resolver {
public:
std::string device_name() const override { return "Studio Mac"; }
std::string device_id() const override { return "stable-device-id"; }
};
auto store = std::make_shared("licenses/license.mb");
auto resolver = std::make_shared();
moonbase::licensing licensing(options, store, resolver);
```
A custom resolver's ID is compared literally, so it does not need to follow the spec's `mbd2_` stamp format, and it gives up cross-SDK compatibility by definition.
These types were renamed in 4.0.0: `fingerprint_provider` is now `device_id_resolver`, `static_fingerprint_provider` is `static_device_id_resolver`, and `licensing::fingerprint()` is `licensing::device_resolver()`. The old names remain as deprecated aliases and will be removed in 5.0.0. Define `MOONBASE_DISABLE_DEPRECATED_ALIASES` to find every remaining use in your codebase.
`file_license_store` persists a JSON representation of the validated license at the path you give it. For per-user storage, point it at your platform's app-data directory (e.g. `~/Library/Application Support/YourApp/license.mb` on macOS).
## JUCE integration
There are two JUCE paths, both built on the same `moonbase::licensing` core SDK.
The **[`moonbase_licensing` module](../juce/)** is the recommended choice for new projects. It's a drop-in JUCE 8 module with a built-in, themeable activation UI and no third-party dependencies, and it ships in this same repository under `modules/moonbase_licensing/`. See the [JUCE Module](../juce/) page for the full guide.
The **`OnlineUnlockStatus` bridge** below is the alternative for products already built on `juce::OnlineUnlockStatus`, teams still on JUCE 7, or anyone who would rather build their own activation UI against the core SDK.
### OnlineUnlockStatus bridge
The SDK includes a copy-paste bridge under [`examples/juce/MoonbaseJuceBridge.h`](https://github.com/Moonbase-sh/moonbase-cpp/blob/main/examples/juce/MoonbaseJuceBridge.h). It provides:
* `moonbase::juce_bridge::MoonbaseUnlockStatus` — subclass of `juce::OnlineUnlockStatus` driven by Moonbase's JWT flow.
* `MoonbaseJuceDeviceIdResolver`: sources the device ID from `juce::SystemStats::getUniqueDeviceID()` instead of the spec fingerprint, for products that already bound licenses to it.
* `applyJuceMetadata(options)` — populates activation metadata from JUCE's system and host helpers (DAW, plug-in format, OS, CPU, JUCE version).
* `tryLoadStoredLicenseAsync(callback)` — non-blocking startup validation. State mutation and the callback are always marshalled to the JUCE message thread, so it's safe to call from `AudioProcessor`'s constructor.
* `revokeActivationAsync(callback)`: releases the device's activation seat server-side, for a **Deactivate** or **Sign out** control.
A runnable standalone example ships with the SDK and is opt-in to avoid pulling JUCE into your build by default:
```bash
cmake -B build -DMOONBASE_BUILD_JUCE_EXAMPLE=ON
cmake --build build --target MoonbaseJuceExample
```
## Reference implementation: HALO by Corino
For a complete, end-to-end example of the JUCE bridge wired into a real application, see the open-source **HALO** reference app. It's a JUCE 8 standalone built to look like a harmonic saturator plug-in — transfer curve, drive knob, animated I/O meters — but it doesn't process audio. The whole point of the project is the surrounding **license-gate workflow**: synchronous local JWT check on launch so the UI unlocks immediately, async online re-validation against the Corino demo account on a background thread, and a cog-menu **Sign out** that calls `revokeActivationAsync` to release the seat server-side.
HALO demonstrates the full set of bridge features in a shippable shape — `tryLoadStoredLicenseAsync` on startup, the browser activation handshake, file-backed license storage under `~/Library/Application Support/Corino/HALO/`, and `revokeActivationAsync` wired to a UI control. It also includes the macOS + Windows CI and release pipeline that publishes signed builds straight to the Moonbase account as product downloads.
For the equivalent reference on the module path, see **DRIFT** on the [JUCE Module](../juce/) page.
## Releases and source
The SDK is MIT-licensed and follows [Conventional Commits](https://www.conventionalcommits.org/) — every push to `main` is released automatically by [semantic-release](https://semantic-release.gitbook.io/), with versioned GitHub Releases and source tarballs at `https://github.com/Moonbase-sh/moonbase-cpp/archive/refs/tags/v.tar.gz`.
---
# https://moonbase.sh/docs/licensing/sdks/dotnet/
title: '.NET Licensing SDK',
description: 'On this page, you can learn how to use the .NET SDK to integrate Moonbase licensing into your .NET apps.',
}
# .NET SDK
This guide will get you all set up with our .NET SDK to integrate the licensing part of Moonbase into your .NET based apps. {{ className: 'lead' }}
## Getting started
Start by adding the [NuGet package](https://www.nuget.org/packages/Moonbase.Net) to your project:
```bash
dotnet package add Moonbase.Net
```
If you haven't already, create a product in the Moonbase app, and check out the **Implementation guide** to get the relevant cryptography keys, endpoints and configuration.
An example configuration could look like this:
```csharp
var licensing = LicensingFactory.CreateInstance(
opts =>
{
opts.Endpoint = new Uri("https://demo.moonbase.sh");
opts.ProductId = "demo-app";
opts.PublicKey = @"
-----BEGIN RSA PUBLIC KEY-----
MIIBCgKCAQEAutOqeUiPMgYjAwQ53CyKhJSqojr2bejce0CshQi9Hd8mNZbkoROx
oS56eIzehFSlX4YwHnF47AR1+fPOe7Q33Cgzd6d9xqksiMH7sWK2mADIlB66vZdW
uk3Me0UMB22Biy1RQbSRMivu79MxCofsympoL/5CFjJLd1u37kxjuRWVLjJS84Rr
3L2W7R7Exnno/giC+L/Dv711mjgstmtlAQm5ZINvFvoLA1eFTDs6nlCs3dpJSiq3
fsBUMT9FtudzS5As54jeT/8MB66fJJ0A1LQ/v5CW8ACQYseFSIoOKErD3xU7QLIJ
ERUn++6CVMPvZo67jVbTY+GCXYfW4gGVZQIDAQAB
-----END RSA PUBLIC KEY-----";
// Optionally adjust the license store with path
// to where the license should be stored.
opts.LicenseStore = new FileLicenseStore(
new FileLicenseStore.Options
{
FullPath = Path.Combine(
Path.GetDirectoryName(Assembly.GetEntryAssembly().Location),
"license.mb"),
});
});
```
{/*
If you have custom domains enabled for your customer portal, use that instead of the moonbase.sh domain.
*/}
This snippet sets up an instance of the licensing client where you will find all the features described below.
The `licensing` instance will come with four main features:
1. `ILicenseStore` that handles license token persistence, either to file or in-memory
1. `ILicenseClient` which is a HTTP client built around the Moonbase licensing API
1. `ILicenseValidator` that can validate license tokens with the given public key
1. `IDeviceIdResolver` which by default generates unique device fingerprints using a number of factors
Like described in [activation flows](../../activation-flows), multiple activation flows are possible through Moonbase, and the .NET SDK supports them all.
Let's take a look at how each would be implemented using the SDK.
## Browser based activations
Using browser based activation is the recommended flow, and the easiest to get going with.
To start, request an activation using the SDK:
```csharp
var activationRequest = await licensing.Client.RequestActivation();
```
This `activationRequest` contains a `browser` URL that the customer can use to fulfill the request, so let's open a browser:
```csharp
Process.Start(new ProcessStartInfo(activationRequest.Browser.ToString()) { UseShellExecute = true });
```
While the customer is activating the license or requesting a trial, we can poll for completion:
```csharp
License? activation = null;
do
{
await Task.Delay(5000);
activation = await licensing.Client.GetRequestedActivation(activationRequest);
} while (activation == null);
```
As soon as the customer has fulfilled the request, a `License` will be ready for us.
The Moonbase SDK will ensure any `License` coming through the API client contains a valid signature, and matches the current device automatically.
Keep in mind that this license activation might be a full license, or a time-scoped trial.
To make sure the customer doesn't have to keep doing this, it's best to persist the license to disk:
```csharp
await licensing.Store.StoreLocalLicense(activation);
```
That way you can easily add a check when your app starts, to see if you can skip product activation entirely:
```csharp
var localLicense = await licensing.Store.LoadLocalLicense();
var validatedLicense = await licensing.Client.ValidateLicense(localLicense);
// License has been re-validated, store updated license for next check
await licensing.Store.StoreLocalLicense(validatedLicense);
```
---
## In-App activations
If you prefer to not redirect customers to the browser, it's perfectly possible to keep the activation flow contained to the app you're building.
For this you need to build your own UI interface to let the customer choose what they want to accomplish.
### Starting a trial
If the user wishes to trial the product, and you have trials enabled in the Moonbase merchant app, then it's as simple as requesting a trial:
```csharp
var trialLicense = await licensing.Client.RequestTrial();
// Also persist to store so we don't have to repeat this at next startup
await licensing.Store.StoreLocalLicense(trialLicense);
```
In the case that you have restricted trials to registered customers only, you need to sign the customer in, or sign them up first:
### Authenticating customers
Signing in existing customers requires you to build a form to collect email address and password, and authenticate those:
```csharp
var user = await licensing.Client.SignIn(email, password);
```
In the case the customer doesn't already have an account, you can also make them one using the SDK:
```csharp
var user = await licensing.Client.Register(name, email, password);
```
If you turn on **Captcha** under Account settings > Storefront > Features, `Register` throws a `UserAuthenticationException`, since an app can't show the captcha. Send the customer to your store's sign-up page in their browser instead.
By authenticating using either of these methods, the SDK will keep the authenticated credentials until the app stops.
That way you are free to call authenticated methods like the above `.RequestTrial()` as the signed in customer.
### Activating an owned license
This path requires an authenticated user, so make sure you've followed the above steps first.
To request activation of an owned license, simply call the appropriate method:
```csharp
var license = await licensing.Client.RequestLicense();
// Also persist to store so we don't have to repeat this at next startup
await licensing.Store.StoreLocalLicense(license);
```
### Check for existing license on startup
As with the browser based activation flow, after you're received a license from the API, you should persist it to the license store.
Whenever the app starts up again, be sure to check for existing licenses to avoid having to re-activate the product:
```csharp
var localLicense = await licensing.Store.LoadLocalLicense();
// Validate the license with the online API to ensure it has not been revoked:
var validatedLicense = await licensing.Client.ValidateLicense(localLicense);
// Optionally, you may perform a local-only license check to ensure
// device ID and signature match the product, without being online:
// var validatedLicense = await licensing.Validator.ValidateLicense(localLicense.Token);
// License has been re-validated, store updated license for next check:
await licensing.Store.StoreLocalLicense(validatedLicense);
```
---
## Offline activations
You might have customers that need to be able to activate devices without connection to the internet.
To facilitate this, Moonbase signs all license tokens we issue with the unique signature of the device being activated.
Since offline devices cannot transmit this device signature over the internet, the app needs to generate a device token.
This device token contains the necessary information to generate a valid license token for offline activations, and can easily be exchanged for a license by the customer in the customer portal.
To start, generate a device token:
```csharp
var bytes = await licensing.GenerateDeviceToken();
var path = Path.Combine(
Path.GetDirectoryName(Assembly.GetEntryAssembly().Location),
"device.dt");
await File.WriteAllBytesAsync(path, bytes);
```
The snippet above generates the token, and then writes the result to a `device.dt` file.
You can change the file name, but keep the extension to ensure compatability with the customer portal interface.
It's up to you to provide the necessary instructions to the customer for how to upload the device token to your customer portal.
What customers receive when they upload the device token in the customer portal is a `license.mb` file.
This file contains a valid offline activated license token that you can read in using the SDK:
```csharp
var licenseBytes = await File.ReadAllBytesAsync(path);
var license = await licensing.ReadRawLicense(licenseBytes);
// License has been read, store license for next check
await licensing.Store.StoreLocalLicense(validatedLicense);
```
Keep in mind that this license will have a `ActivationMethod` of `Offline`, which means trying to re-validate the license is not necessary.
---
## Add-ons
An add-on (a product with an ID like `demo-app.preset-pack`) can be included in its main product's license, with **Include in the main product's license** in the add-on's licensing settings.
When a device activates or validates the main product, it then takes a seat of each included add-on the customer owns.
From version 4.3.0 of the SDK, the license lists them in `License.SubProducts`, so one license answers for both:
```csharp
if (license.HasSubProduct("preset-pack"))
{
// unlock the preset pack add-on
}
```
`HasSubProduct` takes the add-on's own part of its ID or the whole ID, and is true while the license lists the add-on as active and it hasn't expired.
An add-on the customer owns, but with every seat taken on other devices, is listed with `Active` set to false.
An add-on bought after the device activated shows up at the next `ValidateLicense`.
If the customer revokes an add-on's seat on this device, validating doesn't take it back, and the license lists it with `Revoked` set to true.
To take a seat again, or to activate add-ons only when the customer asks for them after setting `opts.AutoActivateSubProducts = false`, call:
```csharp
var license = await licensing.Client.ActivateSubProduct(localLicense, "preset-pack");
await licensing.Store.StoreLocalLicense(license);
```
It throws a `NoEligibleLicenseException` when the customer doesn't own the add-on or has no free seat of it.
To let a customer try an add-on that offers trials, start its trial from the main license.
This needs an online license of the main product, not a trial, and each device gets one trial of each add-on:
```csharp
var license = await licensing.Client.RequestSubProductTrial(localLicense, "preset-pack");
await licensing.Store.StoreLocalLicense(license);
```
To build an in-app store or upgrade screen, list the add-ons the customer can do something with, each with its prices, whether to unlock it, its trial and a buy link:
```csharp
var catalog = await licensing.Client.ListSubProducts(localLicense);
foreach (var addOn in catalog.SubProducts)
{
var price = addOn.Product.DefaultVariation?.Price.GetValueOrDefault(catalog.Currency);
if (addOn.Active)
{
// owned, or trialing, on this device
}
else if (addOn.Trial?.Status == SubProductTrialStatus.Available)
{
// offer "Try it", which calls RequestSubProductTrial
}
else if (addOn.BuyUrl != null)
{
// offer "Buy" for the price, opening addOn.BuyUrl in the browser
}
}
```
`License.SubProductsOwned` still lists every add-on the customer owns, included in the license or not, without saying whether it may be used on this device.
---
## Licenses that cover some versions
Licenses that cover only some releases are in beta, and are switched on account by account. Reach out to support if you'd like to sell them.
A license bought outright can cover only some versions of your app, such as 12 months of updates or every version up to 2.x.
The license never expires because of it: it just stops covering newer versions.
From version 4.3.0 of the SDK, `License.ReleaseAccess` says what it covers, and is null when it covers every version:
- `UpdatesUntilUtc`: releases published until this date are covered, and every version while it hasn't passed.
- `UpToMajor`: every version whose major is at most this is covered.
- `UpToVersion`: once updates have ended, the last version published before they did, covered along with every older one.
A license with both limits covers a version that either of them covers.
The version checked is `opts.ApplicationVersion`, which defaults to your entry assembly's version, so set it if your app's version lives somewhere else.
Activating or validating a license that doesn't cover it throws a `ReleaseNotCoveredException`, and so does `licensing.Validator.ValidateLicense` on the device, offline licenses included.
Set `opts.EnforceReleaseAccess = false` to turn off the check on the device; Moonbase still checks online activations and validations.
Don't delete the stored license when this happens, since it still covers the versions it did.
`ReleaseNotCoveredException` derives from `LicenseInvalidException`, so catch it first.
When validating online, `exception.License` holds a fresh copy of the license to store instead.
Tell the customer what their license covers, and offer the upgrade:
```csharp
try
{
var validatedLicense = await licensing.Client.ValidateLicense(localLicense);
await licensing.Store.StoreLocalLicense(validatedLicense);
}
catch (ReleaseNotCoveredException exception)
{
if (exception.License != null)
{
await licensing.Store.StoreLocalLicense(exception.License);
}
// exception.ReleaseAccess is what the license covers, and exception.UpgradeUrl where the
// customer buys the upgrade (null when the check on the device refused it)
ShowUpgradeDialog(exception.ReleaseAccess, exception.UpgradeUrl);
}
```
To check another version, such as an update before offering it for download, use `license.CoversVersion("3.0.0")`, which applies the same rule as Moonbase.
---
# https://moonbase.sh/docs/licensing/sdks/juce/
title: 'JUCE Module',
description: 'Add Moonbase license activation, with a built-in activation UI, to any JUCE 8 app or plugin using the moonbase_licensing module.',
}
# JUCE Module
`moonbase_licensing` is a drop-in JUCE module that adds Moonbase license activation, and a built-in activation UI, to any JUCE 8 app or plugin. Add the module, fill in three fields, show one component. {{ className: 'lead' }}
It ships inside the open-source [`Moonbase-sh/moonbase-cpp`](https://github.com/Moonbase-sh/moonbase-cpp) repository (MIT licensed) at `modules/moonbase_licensing/`, and talks to the Moonbase licensing API natively. It is not a `juce::OnlineUnlockStatus` wrapper.
Already shipping with our proprietary `moonbase_JUCEClient` module? It stays supported, and nothing you have released changes.
This page covers the newer `moonbase_licensing` module, which is what we recommend for new projects.
The proprietary module is also still available if you would rather use it, with source access granted under your Moonbase service agreement.
Either way, reach out through the support channel or at [developers@moonbase.sh](mailto:developers@moonbase.sh).
The module supports:
* Browser-based activations and offline machine-file activations
* Time-based and endless trials, with a days-remaining screen and an included-features list
* Automatic license re-validation with a configurable grace period
* Server-side deactivation, so users can free up an activation seat
* Cross-SDK device identity, so a license activated in a web or Electron app validates in your plugin
* In-app update notifications with release notes and an installer download
* A themeable UI covering every activation state, plus a headless controller if you would rather build your own
Here is the first thing a customer sees when they open an unlicensed build, with your own product name, logo and accent colour:
## Requirements
* JUCE 8.0.4 or newer
* A C++17 compiler
* macOS, Windows, Linux, iOS or Android
The module has no third-party dependencies. Everything it needs comes from either JUCE or the operating system:
| Concern | How |
| --- | --- |
| HTTP | `juce::WebInputStream`, so no CURL |
| JSON | a bundled `nlohmann/json` single header |
| RS256 token verification | OS-native: Security.framework (macOS, iOS), CNG/bcrypt (Windows), system libcrypto (Linux) |
There is nothing to `brew`, `vcpkg` or `apt` install. The one platform caveat is that on Linux the module links the always-present system `libcrypto`.
## Installation
Pull `moonbase-cpp` into your project, as a git submodule or through `FetchContent`, and point your build at the module folder. On Apple platforms the module compiles an Objective-C++ translation unit for its Security.framework crypto backend, so your CMake project needs the Objective-C languages enabled.
```cmake {{ title: 'Submodule' }}
if(APPLE)
enable_language(OBJC OBJCXX)
endif()
juce_add_module(external/moonbase-cpp/modules/moonbase_licensing)
target_link_libraries(MyPlugin PRIVATE moonbase_licensing)
target_compile_definitions(MyPlugin PRIVATE JUCE_USE_CURL=0)
```
```cmake {{ title: 'FetchContent' }}
if(APPLE)
enable_language(OBJC OBJCXX)
endif()
include(FetchContent)
FetchContent_Declare(moonbase_cpp
GIT_REPOSITORY https://github.com/Moonbase-sh/moonbase-cpp.git
GIT_TAG v4.10.0
SOURCE_SUBDIR modules) # populate only, skip the SDK's root CMake
FetchContent_MakeAvailable(moonbase_cpp)
juce_add_module(${moonbase_cpp_SOURCE_DIR}/modules/moonbase_licensing)
target_link_libraries(MyPlugin PRIVATE moonbase_licensing)
target_compile_definitions(MyPlugin PRIVATE JUCE_USE_CURL=0)
```
Two details are worth knowing about the `FetchContent` variant. `SOURCE_SUBDIR modules` points at a directory that has no `CMakeLists.txt`, so the repository is populated but the C++ SDK's root CMake is never added: that root exposes an interface target pulling in OpenSSL and CURL, and the module needs neither. `JUCE_USE_CURL=0` keeps JUCE on its own HTTP stack, which is the transport the module uses.
For Projucer projects, use *Modules → Add a module → Add a module from a specified folder…* and select `modules/moonbase_licensing`. The bundled SDK headers and `nlohmann/json` resolve from the module's own search paths, so there is nothing else to configure.
## Configuration
The module is configured in code through `ActivationConfig`. Only three fields are required, and you will find all of them in the **Implementation guide** for your product in the Moonbase app.
```cpp
#include
using namespace moonbase::juce_integration;
ActivationConfig config;
config.endpoint = "https://your-account.moonbase.sh";
config.productId = "your-product";
config.publicKey = embeddedPublicKeyPem; // your product's RSA public key
```
In a plugin build, `productName`, `manufacturerName` and `applicationVersion` fill themselves in from the `JucePlugin_Name`, `JucePlugin_Manufacturer` and `JucePlugin_VersionString` macros. Set them yourself in a plain app.
Misconfiguration does not throw out of construction. A missing or malformed `endpoint`, `productId` or `publicKey` puts the component into its error state and reports the underlying reason through the diagnostics sink described below.
## Showing the UI
Add `ActivationComponent` as a modal over your editor, which locks the plugin until it is activated:
```cpp
auto activation = std::make_unique(config);
activation->onClose = [this] { /* dismiss the modal */ };
activation->onActivationChanged = [this](bool isActivated) { /* enable or disable UI */ };
addAndMakeVisible(*activation);
```
Or pop it from a menu item as a standalone window:
```cpp
ActivationDialog::show(config, [](bool wasActivated) { /* update UI */ });
```
### The screens
`ActivationComponent` owns an `ActivationController`, a headless state machine that decides which of these to show. Transitions use JUCE 8's animation API, so screens cross-fade rather than snap.
* **Welcome.** Activate online through the browser, or activate offline.
* **Activating.** Opens the browser and polls for the fulfilled activation. A device chip shows the local fingerprint and platform, and Cancel aborts.
* **Success.** An animated confirmation with a mini license card.
* **Offline.** The two-step machine-file flow: save the request file, then load the response file, which is validated locally.
* **Trial.** Days remaining, a progress bar, the included and excluded feature lists, and an unlock action that routes into online activation. An endless trial shows no countdown, from v4.10.0 on. Earlier versions show it as 0 days left.
* **Trial expired.** A locked screen offering unlock or offline activation.
* **License details.** Who the license is issued to, the plan, activation type, expiry, a seat counter, and a deactivate action that releases the seat server-side.
* **Update available.** Shown when the license reports a newer released version than the running build.
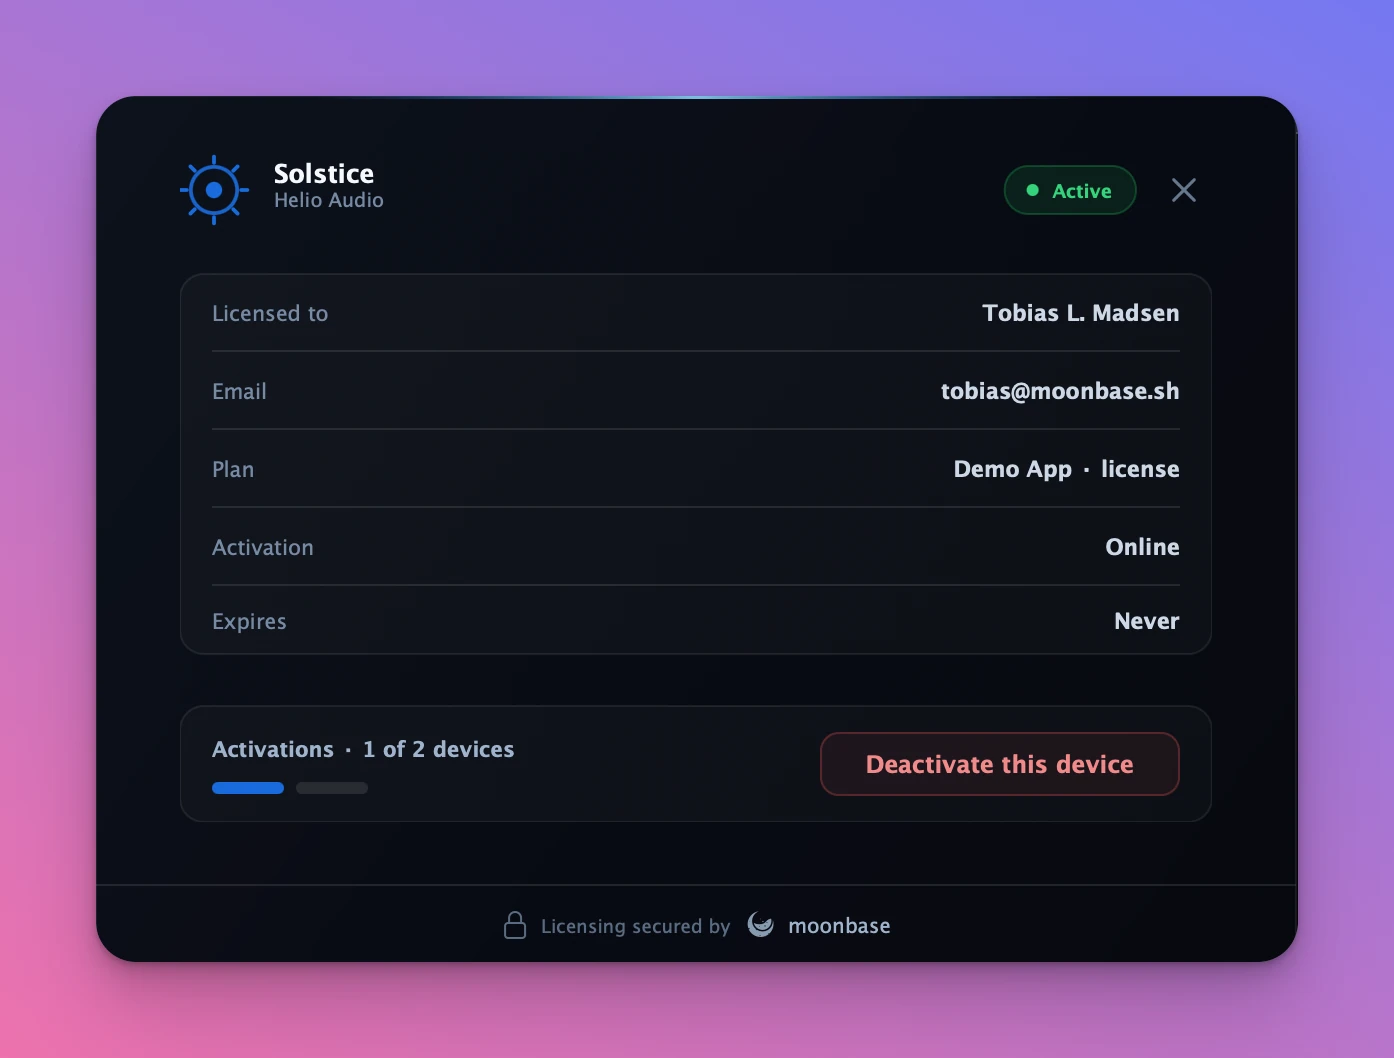
Network calls run on a controller-owned thread pool, while every state change and repaint happens on the message thread. Destroying the controller cancels any in-flight request and joins its workers, so you can call `start()` straight from an editor constructor and destroy the editor at any point, including during plugin scanning or rapid open and close, without guarding it.
## Gating your plugin
In a plugin, license state has to outlive the editor. Give the **processor** the controller and let the **editor** share it, rather than re-syncing two copies:
```cpp
// In your AudioProcessor:
ActivationController activation { makeConfig() }; // persistent
// activation.start(); // load any stored license
// In createEditor(): share the processor's controller with the UI.
auto* editor = new ActivationComponent (processor.activation); // non-owning overload
```
Gate the audio thread on the lock-free flag:
```cpp
void processBlock (juce::AudioBuffer& buffer, ...) override
{
if (! activation.licensedFlag().load())
buffer.clear();
}
```
Or use `LicenseGate` for a click-free fade when the license state changes. The module never silences audio itself, so the gating stays yours:
```cpp
LicenseGate gate; // a member of your processor
void prepareToPlay (double sr, int) override
{
gate.prepare (sr);
gate.reset (activation.licensedFlag().load());
}
void processBlock (juce::AudioBuffer& b, ...) override
{
gate.process (b.getArrayOfWritePointers(), b.getNumChannels(), b.getNumSamples(),
activation.licensedFlag().load());
}
```
For richer decisions, `controller().license()` is the full `moonbase::license`, including `trial`, `expires_at`, `issued_to.email`, `owned_sub_product_ids` and any custom `properties`. Read it on the message thread. `ActivationController` is a `juce::ChangeBroadcaster`, so observing it means reading `screen()` and `license()` on change and repainting.
The validated license is persisted to `userApplicationDataDirectory///license.mb`, which you can override with `config.licenseFile`.
## Offline activations
The offline flow is built into the Welcome and Offline screens, including drag-and-drop for the response file, so most integrations need no code at all. Set `config.enableOffline = false` to hide it.
If you are driving the controller from your own UI, the flow is three calls: `saveOfflineRequest()` writes the device token to a file the customer uploads, `setOfflineResponse()` takes the file they get back, and `activateOffline()` validates it locally and persists it. Offline licenses are permanent and are never re-validated against the API.
See [Offline activations](/docs/licensing/offline-activations/) for the customer-facing side of the flow.
## Branding and theming
Everything in `ActivationConfig` after the connection fields is presentation: the product and manufacturer names, an `accent` colour, a logo `Drawable`, overridable copy through `config.strings`, the `trialLengthDays` and `trialFeatures` list shown on the trial screens, the activation URL, and `showMoonbaseBadge` for the Moonbase co-brand in the footer.
```cpp
config.accent = juce::Colour(0xff186cdc);
config.logo = juce::Drawable::createFromImageData(...);
config.trialLengthDays = 14;
config.showMoonbaseBadge = false;
```
For a deeper re-skin, mutate `ActivationLookAndFeel::palette`, where every colour in the UI is an individual token, and point the `heading`, `body` and `mono` font helpers at your own typefaces.
## In-app updates
A validated license carries the product's current released version in its claims. On launch and after every re-validation, the controller compares that against the running version and, when a newer release exists, shows the update screen instead of the license or trial screen. It loads the release notes from the Moonbase inventory API and downloads the installer for the current platform in-app, with progress.
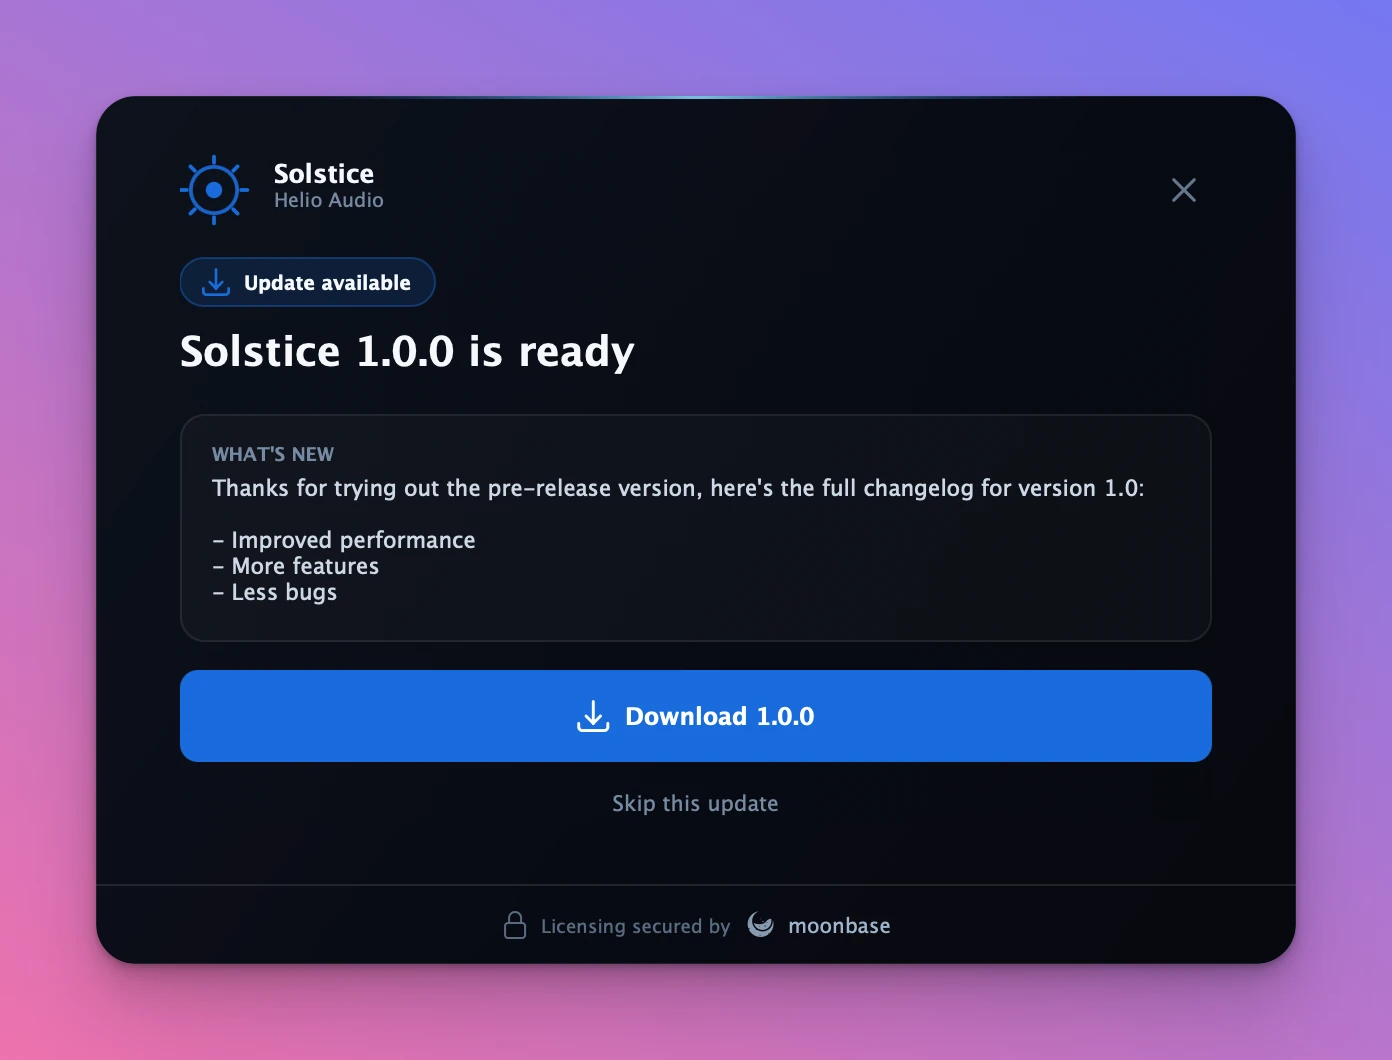
```cpp
config.applicationVersion = "2.3.1"; // or rely on JucePlugin_VersionString
config.enableUpdatePrompt = true; // default, set false to never prompt
config.autoPresentUpdate = true; // default, present it when the plugin opens
config.downloadDirectory = {}; // default, the user's Downloads folder
```
Downloads respect the release access-control level you set on the product. A trial cannot download from an owners-only release, so in that case the screen swaps the download button for an unlock call to action instead of letting the user hit a permission error. "Skip this update" is remembered until a newer version ships, and the license screen keeps a clickable **Update available** badge for anyone who dismissed it.
## Device identity
By default the module identifies the device with `moonbase::moonbase_device_id_resolver`, which implements the cross-SDK Moonbase device fingerprint spec (version 2, ids stamped `mbd2_`). A license activated in a web or Electron app built on `@moonbase.sh/licensing` validates in your plugin, and the other way round.
Nothing is shelled out to and no privileged file is read, so the same id comes back inside a sandboxed host and whether or not the process is elevated. Inspect what it resolved to with `controller().describeDevice()`, which returns the id, spec version, platform tag, and the *names* of the contributing parameters but never their values. That is safe to put behind a "Copy diagnostics" button.
On iOS and Android there is no identifier that unrelated apps can read, so those platforms get a *scoped* id stamped `mbd2s_`, derived from `identifierForVendor` and `ANDROID_ID`. It is stable for the device within the platform's own scope, but it is deliberately not cross-SDK, and `config.allowDeviceNameFallback` is forbidden there rather than merely ignored.
Elsewhere, a machine with no usable hardware identity (a cloned VM image, a minimal container) fails activation rather than binding something weak. Set `config.allowDeviceNameFallback = true` to accept a weaker id derived from the computer name instead; those are stamped `mbd2n_` so they can be told apart from real hardware bindings.
Supply your own resolver with `config.deviceIdResolver` when you need an application-specific device ID.
**Upgrading a plugin that already shipped on 3.x.** The device id changed in 4.0.0. Earlier versions used `juce::SystemStats::getUniqueDeviceID()`, so every already-activated user's license is bound to that value and will fail to validate, locking them out until they re-activate, which consumes a fresh activation seat and resets any device-scoped trial. One line avoids it:
```cpp
config.deviceIdResolver = std::make_shared(
// Current resolver, binds new activations. Pass the platform default, NOT
// moonbase_device_id_resolver directly: on iOS and Android that has no
// identity to read and throws, and a migrating resolver asks its current
// resolver for an id before consulting any historical one, so hard-coding
// it locks mobile users out of validation and activation.
ActivationConfig::defaultDeviceIdResolver(),
// Historical resolver, still accepted when validating existing licenses.
std::make_shared());
```
New activations bind the spec id, existing licenses keep validating, and the fleet migrates as devices naturally re-activate. Drop the wrapper in a later release. Because `getUniqueDeviceID()` is JUCE's own derivation rather than a published format, the historical resolver only vouches for a binding if the plugin still ships the JUCE version that created it, so do not combine this upgrade with a JUCE major bump.
## Re-validation and entitlements
The module never polls on a timer. It validates on launch, and again whenever you ask it to, throttled to no more than once per `onlineCheckInterval`. A license stays usable offline until `onlineGracePeriod` elapses since its last successful online validation.
```cpp
config.onlineCheckInterval = std::chrono::hours (1); // default 5 minutes
config.onlineGracePeriod = std::chrono::hours (24 * 30); // default 7 days
config.httpConnectTimeout = std::chrono::seconds (5);
config.httpRequestTimeout = std::chrono::seconds (15);
```
When a user buys something mid-session, an add-on or an upgrade, re-validate so the new entitlements load without a restart:
```cpp
activation->controller().refreshLicense (/* force */ true, [] (bool refreshed) {
if (refreshed)
reloadFeatures(); // read controller().license() again
});
```
This runs asynchronously and silently, with no screen change. `force` bypasses the throttle, which is what you want straight after a purchase; pass `false` for a polite background re-check. A network failure is non-fatal: the current license is kept and the reason goes to the diagnostics sink.
## Diagnostics and telemetry
The UI shows friendly, end-user-facing copy. To see the underlying reason behind a failure, whether that is bad configuration, a rejected token, an unreachable server or a failed write, wire up a diagnostic sink. It is invoked on the message thread.
```cpp
config.onDiagnostic = [] (const juce::String& message) {
juce::Logger::writeToLog ("[activation] " + message);
};
```
Telemetry is off by default. One flag attaches JUCE system and host metadata to every activation and validation request, and you can add fields of your own:
```cpp
config.analytics.enabled = true; // OS, CPU, JUCE version, memory
config.analytics.includeHostInfo = true; // DAW host and plugin format
config.analytics.includeLocaleInfo = true; // language and region
config.metadata["app.channel"] = "beta";
config.onCollectMetadata = [] (std::map& m) {
m["cohort"] = abTestCohort();
};
```
Host and plugin fields are only captured when `juce_audio_processors` is part of the build, so they light up automatically in a plugin and are skipped in a plain app.
## Sample app and reference plugin
A runnable standalone sample lives in the repository at `examples/juce-native/` and runs against the public Moonbase demo account. It fetches JUCE on first configure and adds the module with `juce_add_module`, exactly the way a downstream project consumes it:
```bash
cmake -B build -DMOONBASE_BUILD_JUCE_NATIVE_EXAMPLE=ON
cmake --build build --target MoonbaseActivationNative
```
For a complete plugin, **DRIFT** is an open-source JUCE 8 audio plugin built around the module, with the full CMake setup, the processor-owned controller, and macOS and Windows release pipelines.
The [full module reference](https://github.com/Moonbase-sh/moonbase-cpp/blob/main/docs/juce-module.md) lives alongside the source.
## The OnlineUnlockStatus bridge
There is a second JUCE integration path, built on the same core SDK: a copy-paste reference header that wraps `juce::OnlineUnlockStatus`. It has no UI of its own, and it is the right choice if your product is already built on `OnlineUnlockStatus`, or you are still on JUCE 7.
| | Native module | `OnlineUnlockStatus` bridge |
| --- | --- | --- |
| **Form** | Drop-in JUCE module | Copy-paste reference header |
| **Built-in UI** | Yes, themeable and animated | No, you build it |
| **JUCE integration** | Native Moonbase API | `juce::OnlineUnlockStatus` wrapper |
| **JUCE version** | 8.0.4+ | 7+ |
| **Device fingerprint** | Spec v2, cross-SDK | Spec v2, cross-SDK |
| **Third-party deps** | None | Inherits the core SDK's CURL and OpenSSL |
| **Entry point** | `ActivationComponent` / `ActivationDialog` | `MoonbaseUnlockStatus` |
| **Best for** | New plugins wanting a ready-made UI | Products already on `OnlineUnlockStatus`, or JUCE 7 |
See the [C++ SDK](../cpp/) page for the bridge, and for using Moonbase licensing from non-JUCE C++ applications.
---
# https://moonbase.sh/docs/licensing/sdks/node/
title: 'Node.js Licensing SDK',
description: 'On this page, you can learn how to use the Node.js SDK to integrate Moonbase licensing into your node-based apps.',
}
# Node.js SDK
This guide will get you all set up with our Node.js SDK to integrate the licensing part of Moonbase into your node-based apps. {{ className: 'lead' }}
Using this SDK is great if you are building Electron apps or other app running on devices directly. It is not suitable for web-apps, since we need to fingerprint the underlying device, and we are currently relying on system information to do that.
Check out our simple Electron sample app for an example of how this integration can work:
## Getting started
Start by adding the [npm package](https://www.npmjs.com/package/@moonbase.sh/licensing) to your project:
```bash {{ title: 'npm' }}
npm install @moonbase.sh/licensing --save
```
```bash {{ title: 'yarn' }}
yarn add @moonbase.sh/licensing
```
If you haven't already, create a product in the Moonbase app, and check out the **Implementation guide** to get the relevant cryptography keys, endpoints and configuration.
An example configuration could look like this:
```typescript
const licensing = new MoonbaseLicensing({
productId: 'demo-app',
endpoint: 'https://demo.moonbase.sh',
publicKey: `-----BEGIN RSA PUBLIC KEY-----
MIIBCgKCAQEAutOqeUiPMgYjAwQ53CyKhJSqojr2bejce0CshQi9Hd8mNZbkoROx
oS56eIzehFSlX4YwHnF47AR1+fPOe7Q33Cgzd6d9xqksiMH7sWK2mADIlB66vZdW
uk3Me0UMB22Biy1RQbSRMivu79MxCofsympoL/5CFjJLd1u37kxjuRWVLjJS84Rr
3L2W7R7Exnno/giC+L/Dv711mjgstmtlAQm5ZINvFvoLA1eFTDs6nlCs3dpJSiq3
fsBUMT9FtudzS5As54jeT/8MB66fJJ0A1LQ/v5CW8ACQYseFSIoOKErD3xU7QLIJ
ERUn++6CVMPvZo67jVbTY+GCXYfW4gGVZQIDAQAB
-----END RSA PUBLIC KEY-----`,
// Optionally adjust the license store with path
// to where the license should be stored, or use
// alternate storage mechanisms to persist the token.
licenseStore: new FileLicenseStore(),
})
```
{/*
If you have custom domains enabled for your customer portal, use that instead of the moonbase.sh domain.
*/}
This snippet sets up an instance of the licensing client where you will find all the features described below.
The `licensing` instance will come with four main features:
1. `ILicenseStore` that handles license token persistence, either to file or in-memory
1. `ILicenseClient` which is a HTTP client built around the Moonbase licensing API
1. `ILicenseValidator` that can validate license tokens with the given public key
1. `IDeviceIdResolver` which by default generates unique device fingerprints using a number of factors
Like described in [activation flows](../../activation-flows), multiple activation flows are possible through Moonbase, and the Node.js SDK currently supports browser based activations and offline activations only.
Let's take a look at how each would be implemented using the SDK.
## Browser based activations
Using browser based activation is the recommended flow, and the easiest to get going with.
To start, request an activation using the SDK:
```typescript
const activationRequest = await licensing.client.requestActivation()
```
This `activationRequest` contains a `browser` URL that the customer can use to fulfill the request, so let's open a browser:
```typescript
open(activationRequest.browser)
```
While the customer is activating the license or requesting a trial, we can poll for completion:
```typescript
let license: License | null = null
do {
await new Promise((resolve) => setTimeout(() => resolve(void 0), 5000))
license = await licensing.client.getRequestedActivation(activationRequest)
} while (license == null)
```
As soon as the customer has fulfilled the request, a `License` will be ready for us.
The Moonbase SDK will ensure any `License` coming through the API client contains a valid signature, and matches the current device automatically.
Keep in mind that this license activation might be a full license, or a time-scoped trial.
To make sure the customer doesn't have to keep doing this, it's best to persist the license to disk:
```typescript
await licensing.store.storeLocalLicense(license)
```
That way you can easily add a check when your app starts, to see if you can skip product activation entirely:
```typescript
const localLicense = await licensing.store.loadLocalLicense();
const validatedLicense = await licensing.client.validateLicense(localLicense);
// License has been re-validated, store updated license for next check
await licensing.store.storeLocalLicense(validatedLicense);
```
Our Electron app sample has a more complete startup guard that might be helpful: [withLicensing](https://github.com/Moonbase-sh/electron-sample-app/blob/main/src/main.ts#L13-L39)
---
## Offline activations
You might have customers that need to be able to activate devices without connection to the internet.
To facilitate this, Moonbase signs all license tokens we issue with the unique signature of the device being activated.
Since offline devices cannot transmit this device signature over the internet, the app needs to generate a device token.
This device token contains the necessary information to generate a valid license token for offline activations, and can easily be exchanged for a license by the customer in the customer portal.
To start, generate a device token:
```typescript
const bytes = await licensing.generateDeviceToken()
const tokenPath = path.join(path.resolve(), 'device.dt')
await fs.writeFile(tokenPath, bytes)
```
The snippet above generates the token, and then writes the result to a `device.dt` file.
You can change the file name, but keep the extension to ensure compatability with the customer portal interface.
It's up to you to provide the necessary instructions to the customer for how to upload the device token to your customer portal.
What customers receive when they upload the device token in the customer portal is a `license.mb` file.
This file contains a valid offline activated license token that you can read in using the SDK:
```typescript
const licenseBytes = await fs.readFile(path);
const license = await licensing.readRawLicense(licenseBytes);
// License has been read, store license for next check
await licensing.store.storeLocalLicense(validatedLicense);
```
Keep in mind that this license will have a `ActivationMethod` of `Offline`, which means trying to re-validate the license is not necessary.
---
## Add-ons
An add-on (a product with an ID like `demo-app.preset-pack`) can be included in its main product's license, with **Include in the main product's license** in the add-on's licensing settings.
When a device activates or validates the main product, it then takes a seat of each included add-on the customer owns.
From version 3.3.0 of the SDK, the license lists them in `subProducts`, so one license answers for both:
```typescript
if (hasSubProduct(license, 'preset-pack')) {
// unlock the preset pack add-on
}
```
`hasSubProduct` takes the add-on's own part of its ID or the whole ID, and is true while the license lists the add-on as active and it hasn't expired.
An add-on the customer owns, but with every seat taken on other devices, is listed with `active: false`.
An add-on bought after the device activated shows up at the next `validateLicense`.
If the customer revokes an add-on's seat on this device, validating doesn't take it back, and the license lists it with `revoked: true`.
To take a seat again, or to activate add-ons only when the customer asks for them after setting `autoActivateSubProducts: false` in the configuration, call:
```typescript
const license = await licensing.client.activateSubProduct(localLicense, 'preset-pack')
await licensing.store.storeLocalLicense(license)
```
It throws a `MoonbaseError` with `ErrorType.NoEligibleLicense` when the customer doesn't own the add-on or has no free seat of it.
To let a customer try an add-on that offers trials, start its trial from the main license.
This needs an online license of the main product, not a trial, and each device gets one trial of each add-on:
```typescript
const license = await licensing.client.requestSubProductTrial(localLicense, 'preset-pack')
await licensing.store.storeLocalLicense(license)
```
To build an in-app store or upgrade screen, list the add-ons the customer can do something with, each with its prices, whether to unlock it, its trial and a buy link:
```typescript
const { currency, subProducts } = await licensing.client.listSubProducts(localLicense)
for (const addOn of subProducts) {
const price = addOn.product.defaultVariation?.price[currency]
if (addOn.active) {
// owned, or trialing, on this device
}
else if (addOn.trial?.status === 'Available') {
// offer "Try it", which calls requestSubProductTrial
}
else if (addOn.buyUrl) {
// offer "Buy" for `price`, opening addOn.buyUrl in the browser
}
}
```
`ownedSubProductIds` still lists every add-on the customer owns, included in the license or not, without saying whether it may be used on this device.
---
## Licenses that cover some versions
Licenses that cover only some releases are in beta, and are switched on account by account. Reach out to support if you'd like to sell them.
A license bought outright can cover only some versions of your app, such as 12 months of updates or every version up to 2.x.
The license never expires because of it: it just stops covering newer versions.
From version 3.3.0 of the SDK, it says what it covers in `license.releaseAccess`, which is absent when it covers every version:
- `updatesUntil`: releases published until this date are covered, and every version while it hasn't passed.
- `upToMajor`: every version whose major is at most this is covered.
- `upToVersion`: once updates have ended, the last version published before they did, covered along with every older one.
A license with both limits covers a version that either of them covers.
Set `appVersion` in the configuration for the version to be checked:
```typescript
const licensing = new MoonbaseLicensing({
productId: 'demo-app',
endpoint: 'https://demo.moonbase.sh',
publicKey: '...',
appVersion: '2.4.1',
})
```
Activating or validating a license that doesn't cover `appVersion` then throws a `ReleaseNotCoveredError`, and so does `licensing.validator.validateLicense` on the device, offline licenses included.
Set `enforceReleaseAccess: false` to turn off the check on the device; Moonbase still checks online activations and validations.
Don't delete the stored license when this happens, since it still covers the versions it did.
When validating online, `err.license` holds a fresh copy of it to store instead.
Tell the customer what their license covers, and offer the upgrade:
```typescript
try {
const validatedLicense = await licensing.client.validateLicense(localLicense)
await licensing.store.storeLocalLicense(validatedLicense)
}
catch (err) {
if (err instanceof ReleaseNotCoveredError) {
if (err.license)
await licensing.store.storeLocalLicense(err.license)
// err.releaseAccess is what the license covers, and err.upgradeUrl where the
// customer buys the upgrade (absent when the check on the device refused it)
showUpgradeDialog(err.releaseAccess, err.upgradeUrl)
}
}
```
To check another version, such as an update before offering it for download, use `coversVersion(license, version)`, which applies the same rule as Moonbase.
---
# https://moonbase.sh/docs/licensing/sdks/
title: 'Licensing SDKs',
description: 'On this page, you can learn how to use the Licensing SDKs to integrate Moonbase into your apps.',
}
---
# https://moonbase.sh/docs/licensing/sdks/rust/
title: 'Rust Licensing SDK',
description: 'On this page, you can learn how to use the Rust SDKs to integrate Moonbase licensing into your Rust-based apps.',
}
# Community-maintained Rust crates
Thanks to our community of developers, there are a number of Rust crates available that make it easy to integrate Moonbase licensing into your Rust-based applications. These crates provide functionality for license token validation, API interfaces, device fingerprinting and more, and are primarily maintained by the community.
---
# https://moonbase.sh/docs/
title: "Moonbase documentation",
description:
"Find out exactly how to integrate with Moonbase through these docs.",
};
{ title: "Guides", id: "guides" },
{ title: "Resources", id: "resources" },
];
# Moonbase Developer Documentation
Use our APIs to achieve the licensing and payments flow you want, either through our SDKs, or by integrating with our APIs directly. {{ className: 'lead' }}
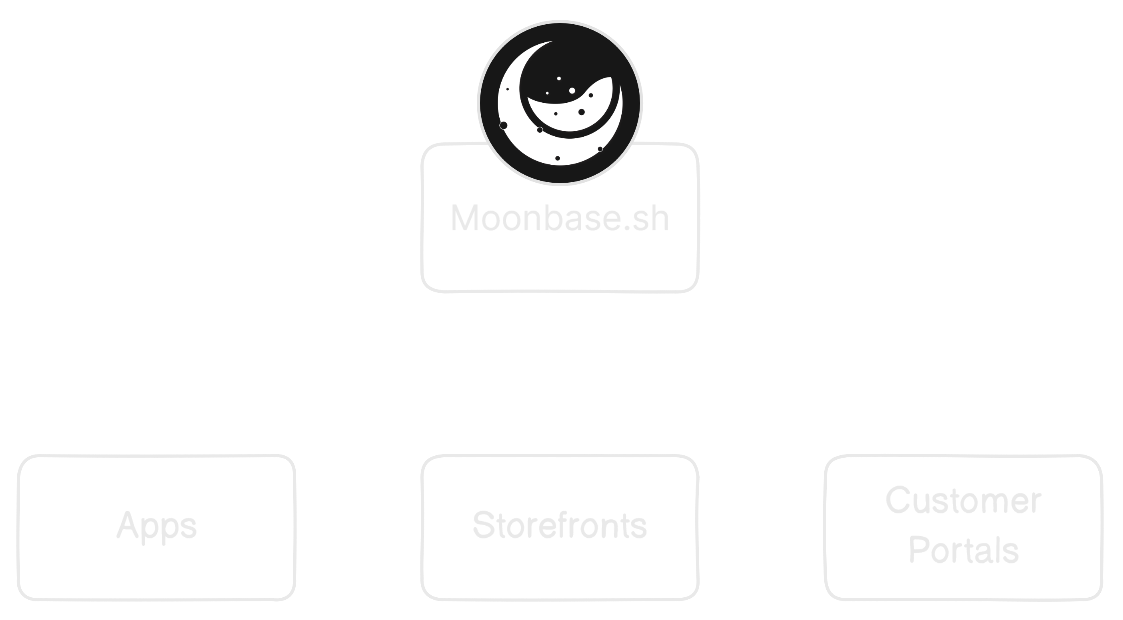
For your apps to integrate with Moonbase, we have SDKs ready to use, but also well documented APIs for the cases where you want to build your own integration.
The same is true for your storefront, where we have multiple patterns available to you.
If you are new to the Moonbase platform, we recommend to start by learning about the core concepts powering the Moonbase features.
## Demo
If you want to get a guided tour of the platform, and see how it works in practice, you can [book a demo](/demo) with our team, and we will walk you through the platform and answer any questions you might have.
You can also check out the video below:
---
# https://moonbase.sh/docs/storefronts/api/
title: 'Storefront API Reference',
description: 'On this page, you can learn how to use the Storefront API to integrate Moonbase into your storefront.',
}
# Storefront API Reference
Do you have a specific scenario you need to support or other questions?\
Reach out to us through the support channel, or at [developers@moonbase.sh](mailto:developers@moonbase.sh).
If you are experiencing CORS issues trying to call Moonbase APIs from the browser, make sure you have whitelisted the URL of your storefront in your Moonbase account settings.
## Rate limits
Storefront API requests are rate limited per IP address, with limits sized for one customer using your storefront. When a limit is exceeded, the API responds with `429: Too Many Requests` and a `Retry-After` header telling you how many seconds to wait.
### Calling from your own server
If your server calls these endpoints on behalf of your customers, for example to submit a sign-up form, they all reach Moonbase from your server's IP address and share the limits of one customer. The same happens on platforms like Cloudflare Workers, where many sites share the same addresses.
To avoid this, include one of your [API keys](https://app.moonbase.sh/account-settings/developer) in an `Api-Key` header. Requests with a valid API key are not limited by IP address, and have these limits instead:
| Endpoints | Limit |
| --- | --- |
| All endpoints | 500 requests per minute |
| Sign up | 300 requests per 5 minutes |
| Sign in and other identity endpoints | 1,000 requests per 5 minutes |
Password reset requests are limited further.
- The API key does not sign anyone in. Endpoints that need a signed-in customer still need their access token.
- An invalid or deleted API key is rejected with `401: Unauthorized` on every endpoint, even those that need no key.
- Only send the key from your own servers, never from a browser. Any valid key works here, including a [restricted](/docs/api#authentication) one, so you can use a key with no more Core API access than your server needs.
```http {{ title: 'HTTP' }}
POST https://demo.moonbase.sh/api/customer/identity/sign-up
Api-Key: mb_bbdac119b64649f6937e...
Content-Type: application/json
{
"name": "Example User",
"email": "user@example.com",
"password": "Password1234!"
}
```
```bash {{ title: 'cURL' }}
curl -X 'POST' https://demo.moonbase.sh/api/customer/identity/sign-up \
-H 'Api-Key: mb_bbdac119b64649f6937e...' \
-H 'Content-Type: application/json' \
-d '{
"name": "Example User",
"email": "user@example.com",
"password": "Password1234!"
}'
```
```http {{ title: '429 response' }}
HTTP/1.1 429 Too Many Requests
Retry-After: 300
```
---
## Identity
The storefront endpoints documented below are made to be called from customer facing storefronts, with the customer initiating any actions.
Therefore, most of the endpoints are publicly available, only some requiring authentication in the form of JWT tokens.
These JWT tokens can be obtained by authenticating the user through `/api/customer/identity/sign-in`, and the tokens refreshed by handing them in through `/api/customer/identity/refresh`.
In addition to providing authentication, the identity endpoints below can also be used to update customer details, request password resets and more.
---
## Sign in {{ tag: 'POST', label: '/api/customer/identity/sign-in' }}
This endpoint allows you to sign in a customer given a combination of email address and password.
The JWT returned contains an access token with a default lifetime of 15 minutes.
Refresh tokens can be used to get new access tokens.
If your Moonbase account has the **Require confirmed email to sign in** feature enabled and the customer has not yet confirmed their email address, this endpoint returns `403 Forbidden` with a problem detail of `Email not confirmed`. A confirmation email is sent as a side effect — customers should follow the link to [confirm their account](#confirm-account) and then retry sign-in.
### Required query parameters
The email of the customer.
### Required body content
The password of the customer.
This endpoint allows you to exchange a refresh token + access token for a new pair of tokens.
### Required query parameters
The refresh token you got during the last refresh or sign-in if first time refreshing.
### Required body content
The access token belonging to the refresh token.
This endpoint allows you to sign up a new customer on your account.
If you call this endpoint from your own server, include an API key. See [Rate limits](#rate-limits).
### Captcha
If you turn on **Captcha** under Account settings > Storefront > Features, customers have to solve one to sign up.
A sign-up without an API key then needs the solution in an `X-MB-CAPTCHA` header, or the API responds with `400: Bad Request` and an `errorType` of `CaptchaRequired`.
Requests from your own server with an API key don't need one.
`GET /api/public/vendors/current` returns the page that draws the challenge as `features.captcha.url`, or `null` when Captcha is off.
Embed it in an iframe, adding `action=signup` to its query, and optionally `theme` (`light`, `dark` or `auto`) and `size` (`normal` or `compact`).
The frame posts messages with `source: 'moonbase-captcha'` and one of these `event` values:
| Event | Meaning |
| --- | --- |
| `token` | Solved. Send `token` in the `X-MB-CAPTCHA` header. |
| `expired` | The solution ran out. A new `token` follows. |
| `resize` | Size the iframe to `width` and `height`. |
| `error` | The challenge could not run. `code` says why. |
A solution works once, so after every sign-up attempt, post `{ source: 'moonbase-captcha', command: 'reset' }` to the frame for a new one.
If your site sets a Content-Security-Policy, allow `https://.moonbase.sh` in `frame-src`.
### Required body properties
Full name of the user.
Email address of the user. Will be used as username. Can be changed by the user.
The initial password for the user. Must contain lower case characters, uppercase characters, numbers and a symbol.
### Optional body properties
A billing address for the user. Will be used when purchasing new products.\
Contains the following properties:
ISO 3166-1 alpha-2 two-letter country code.
First line of the regular street address.
Second line of the regular street address.
Postal code of the address.
Locality of the address, only required if no region is given.\
Also known as `City`.
Region of the address, only required if no locality is given.\
Also known as `State`.
### Optional query parameters
Set this parameter to true if the customer has opted in to marketing communications.\
It will be propagated to any marketing tools you may have integrated with your Moonbase account.
Redeems the confirmation code that was emailed to a customer after sign-up, or as part of a deferred-takeover flow (for example, after the customer was first created as an accountless newsletter subscriber). On success, the response is identical in shape to a sign-in response — frontends should branch on the `status` field rather than checking whether tokens are present.
### Required query parameters
The email of the customer that is confirming their account.
The confirmation code from the email link. Carries either an email-confirmation token or a pending-activation token — the endpoint figures out which.
### Response statuses
The customer's password was already set at sign-up and the confirmation click completed the takeover. The response carries `accessToken` and `refreshToken` — transition the user into the signed-in app shell.
The customer has no password yet. Show a password-setup screen and submit the new password using the `resetPasswordToken` from the response against [`/api/customer/identity/reset-password`](#reset-password).
This endpoint allows you to update a customers details like name, email and communication preferences.
Note that all root properties are optional, and only the defined ones will be updated.
### Required headers
Access token for the authenticated customer in your app, in the form of a JWT bearer token.
### Optional body properties
New full name of the user.
New email address of the user. Will be used as the new username.
A billing address for the user. Will be used when purchasing new products.\
Contains the following properties:
ISO 3166-1 alpha-2 two-letter country code.
First line of the regular street address.
Second line of the regular street address.
Postal code of the address.
Locality of the address, only required if no region is given.\
Also known as `City`.
Region of the address, only required if no locality is given.\
Also known as `State`.
The new communication preferences for the customer.
Flag for whether or not the customer has opted in for newsletters
Can be used to update the password of an existing customer.
Returns a 200 OK on success with no body content.
### Required headers
Access token for the authenticated customer in your app, in the form of a JWT bearer token.
### Required body properties
The current password of the user.
New password for the user. Must meet all password requirements.
If a customer has forgotten their password, call this endpoint to send them a password reset email.
No authentication is required to call this endpoint.
### Required query parameters
The email of the user for which to send a reset email.
Once a user has requested a password reset, they will be linked to the configured website of your account with a code to reset the password.
This code needs to be handed to this endpoint along with a new password for the user.
### Required query parameters
The email of the user to reset password for.
The code coming from the password reset email.
### Required body content
The new password for the user.
```http {{ title: 'HTTP' }}
POST https://demo.moonbase.sh/api/customer/identity/reset-password?email=user@example.com&code=ey9xsal41x...
Content-Type: text/plain
NewPassword042!?
```
```bash {{ title: 'cURL' }}
curl -X 'POST' https://demo.moonbase.sh/api/customer/identity/reset-password?email=user@example.com&code=ey9xsal41x... \
-H 'Content-Type: text/plain' \
-d 'NewPassword042!?'
```
---
## Communications
The communications endpoints handle newsletter and product-update opt-ins for visitors who don't necessarily have a customer account yet — for example, a footer newsletter form on a marketing site. All endpoints in this group are anonymous: the management endpoints are authenticated by a long-lived unsubscribe token that Moonbase emails to the customer alongside every marketing message, not by a customer JWT.
---
## Subscribe {{ tag: 'POST', label: '/api/customer/communications/subscribe' }}
Subscribes an email to the newsletter, product updates, or both. For an anonymous caller, the response follows your account's email confirmation setting rather than the email itself: with confirmation turned on it indicates `confirmation_sent`, and Moonbase sends a double-opt-in confirmation email wherever the address has not been confirmed yet; with confirmation turned off the subscription is recorded directly and it indicates `subscribed`. A caller signed in as the customer who owns the email gets `subscribed` whenever the subscription was recorded directly.
At least one of `newsletter` or `productUpdates` must be `true`, otherwise the endpoint returns `400 Bad Request`.
### Required body properties
The email address being subscribed.
Opt in to general newsletter communications.
Opt in to product update announcements.
### Optional body properties
Display name for the subscriber, used in personalized emails.
Confirms a pending newsletter subscription using the token from the double-opt-in confirmation email. Returns `200 OK` on success.
### Required query parameters
The email of the subscriber being confirmed.
The confirmation token from the email link.
Returns the current communication preferences for a subscriber, identified by the long-lived unsubscribe token included in every marketing email. Use this to back a "manage your preferences" page.
### Required query parameters
The email of the subscriber.
The subscriber's unsubscribe token.
Applies an exact set of preferences for a subscriber, allowing them to drop newsletter while keeping product updates (or vice versa) — granular control that the all-off `unsubscribe` endpoint cannot express. Returns the updated preferences.
### Required query parameters
The email of the subscriber.
The subscriber's unsubscribe token.
### Required body properties
Whether the subscriber wants to receive newsletters.
Whether the subscriber wants to receive product update announcements.
Unsubscribes the subscriber from all marketing communications. This is the one-click "unsubscribe from everything" target for the footer of marketing emails. For granular preference management, use [Update preferences](#update-preferences) instead.
### Required query parameters
The email of the subscriber.
The subscriber's unsubscribe token.
```http {{ title: 'HTTP' }}
POST https://demo.moonbase.sh/api/customer/communications/unsubscribe?email=user@example.com&token=ey9xsal41x...
```
```bash {{ title: 'cURL' }}
curl -X 'POST' 'https://demo.moonbase.sh/api/customer/communications/unsubscribe?email=user@example.com&token=ey9xsal41x...'
```
---
## Storefront
To get all products, bundles, offers, promotions and metadata for your Moonbase account, this endpoint can be used.
The returned items will have pricing evaluated on them based on any customer that might be authenticated, or other factors like tracking parameters.
It is intended to be used when rendering your storefront when you need to reason about current prices and variations.
---
## Get storefront {{ tag: 'GET', label: '/api/customer/storefront' }}
Fetches all products, bundles, offers and promotions, along with a suggested currency to use based on customer geo location.
Since some discounts might be time limited, the response also includes a nullable `validUntil` ISO-8601 date and time that can be considered as the point where any caching of this storefront should be invalidated.
When tax estimation is enabled for your Moonbase account, the response also includes an `estimatedTax` object describing the tax rate that will be applied at checkout for the visitor's detected region — useful for surfacing "incl. VAT" prices on the storefront. The object contains:
The decimal tax rate (for example, `0.25` for 25%).
Whether the rate is added on top of the listed price (`Exclusive`) or already included in it (`Inclusive`).
ISO 3166-1 alpha-2 country code the estimate is for.
Sub-national region code, when the rate varies within the country.
### Optional headers
Access token for the authenticated customer in your app, in the form of a JWT bearer token.
If this is not included, pricing will not consider any personalized pricing for the authenticated customer.
### Optional query parameters
Since discounts might target specific UTM campaign trackers, this endpoint can take in any UTM parameters that you might have captured on page load.
To learn more about marketing tracking, check out our [marketing revenue tracking](/docs/guides/marketing-revenue-tracking) page.
All of the below parameters are therefore optional.
The source site or channel of the campaign.
The type of link used, like ad or email CTAs.
An identifier for the specific campaign.
Search terms used by the customer to find the campaign.
Description of what brought the customer to the site originally.
The referrer that brought the customer to the site originally.
The storefront product payload contains everything you should need to build rich storefronts.
The Moonbase ID of the product.
The name of the product as configured in Moonbase.
The tagline of the product as configured in Moonbase.
The website URL of the product as configured in Moonbase.
URL to the Moonbase hosted icon for the product.
Flag indicating if the authenticated customer owns the product or not.
Custom properties attached to this product that have been marked as public.
Values are flattened to key-value pairs without the type wrapper.
See the [Core API documentation](/docs/api#custom-properties) for more details on custom properties.
The currently released version of the product.
A list of the downloads belonging to the currently released version of the product.
File name of the downloadable file.
Unique key to identify the asset.
The target platform for the downloadable asset.
CPU architecture for the downloadable asset. Present when the merchant has tagged the download with an architecture.
Size of the asset in bytes.
URL to download the asset. Note that this might not be publically available depending on the security configuration you have set in Moonbase.
The default pricing variation for the product.
See the below `variations` schema for examples of this structure.
A collection of available pricing variations for this product.
Unique identifier for this variation.
Name of the variation.
The original price of this variation.
The current price of this variation after discounts have been applied.
Flag for if there has been any discounts applied to the variation.
The discount that has been applied to the variation.
Note that this can be one of two types of discount, discriminated based on the `type` property:
### Flat amount off discount
Discount type discriminator.
Name of the discount.
Description of the discount.
The total amount of money that has been discounted from the variation.
### Percentage off discount
Discount type discriminator.
Name of the discount.
Description of the discount.
The percentage that the discount discounts, normalized to between 0 and 1.
The total amount of money that has been discounted from the variation.
When the price came from a sale you are running, both types also carry:
The promotion that produced this price, matching the `id` of an entry in `promotions`.
A variation only ever shows its single best discount, so this is the way to tell which items a promotion is actually pricing.
ISO-8601 date and time for when the discount became valid.
ISO-8601 date and time for when the discount stops being valid, useful for rendering a countdown.
For a signed-in customer holding licenses of this product that [cover only some releases](/docs/concepts/#release-access), the prices to upgrade or renew them.
One entry per group of licenses that cover the same releases, furthest behind first, each containing:
The customer's licenses this entry prices.
What these licenses cover now, as `updatesUntil`, `upToMajor` and `upToVersion`.
The variations that upgrade these licenses, shaped like `variations` above and priced with any upgrade discount.
To buy one, add the product to the order with the license as `targetLicenseId`, as described under [orders](#orders).
The storefront bundle payload is very similar to the product schema, with the following key differences.
Bundles also include a `properties` field for any public custom properties, just like products.
Flag indicating if the bundle will be a partial purchase.
If true, each product in the `products` array will also have a `included` flag to indicate whether or not they are included in the bundle.
Bundles are partial if they have partial purchases enabled in your Moonbase account, and if the authenticated customer already owns some of the products in the bundle.
Flag indicating whether the authenticated customer currently holds an active subscription that covers this bundle. Use this — instead of `owned` — to decide whether to show a "Manage subscription" affordance for recurring bundles.
Array of products that the bundle contains.
See the above products schema for more details on the shape of these objects.
Offers are conditional discounts that get attached to an order.
An offer is scoped either to a single line item, where it discounts the product or bundle it targets, or to the cart, where it discounts the order as a whole.
Item offers are picked by the customer, by passing the offer ID along when the target item is added to the cart.
Cart offers apply themselves as soon as their condition holds, and drop off again if the cart falls back below it.
Unique ID of this offer.
For an item offer, use this when adding the target product or bundle to cart.
For a cart offer, use it as the `offerId` on the order.
What the discount applies to.
`Item` discounts the targeted line item, `Cart` discounts the order as a whole.
Every offer carries a scope, and the ones you created before cart offers existed report `Item`, which is how they have always behaved.
The products and bundles this offer applies to, each paired with the pricing variations it is restricted to.
A cart offer may have an empty list, in which case every line item in the order is discounted.
A non-empty list on a cart offer narrows which lines are discounted, but the condition is still measured against the whole cart.
Each entry has the following properties:
The target product or bundle, using the schema described above with an additional `type` property of `Product` or `Bundle`.
List of relevant pricing variation IDs on the item for this offer.
If the list is empty, then any variation is relevant.
Offers depend on something being true about the cart.
This is a discriminated object based on the `type` property, and can be one of two conditions:
### Cart contains items
Condition type discriminator.
Minimum number of items there should be in the cart for this condition to be true.
Map of items IDs to list of variation IDs that this condition will include in the count.
Item IDs are prefixed with `Product/` or `Bundle/` to indicate what type of item it is.
This map should be an exhaustive list of all relevant items & variations currently available in the storefront.
### Cart total
Condition type discriminator.
Lowest cart total this offer applies from, given in every enabled currency so you can tell the customer how much further they have to go.
Highest cart total this offer applies to, given in every enabled currency.
The cart total is measured as every line's price less its product discount, times quantity.
It is deliberately measured before offers and coupons, so redeeming a code can neither drop the cart under a threshold nor shrink what a cart offer is calculated on.
Standard discount model, where the name and description are based on the configured Offer in Moonbase.
You can safely apply this discount on top of the prices on items, to calculate final price if the offer is applied to the item.
Note that this can be one of two types of discount, discriminated based on the `type` property:
### Flat amount off discount
Discount type discriminator.
Name of the offer.
Description of the offer.
### Percentage off discount
Discount type discriminator.
Name of the offer.
Description of the offer.
The percentage that the offer discounts, normalized to between 0 and 1.
Both types carry the same set of shared properties:
Whether this discount replaces any other discount on the item instead of stacking on top of it.
The amount taken off, given in every enabled currency.
Always present on a flat amount off discount, and omitted on a percentage off discount that has no resolved amount yet.
Number of recurring payments the discount applies to before it expires, for subscription variations.
Set when the discount comes from a promotion, matching the `id` of an entry in `promotions`.
This is the authoritative signal for which promotion produced a price.
ISO-8601 date and time for when the discount became valid.
ISO-8601 date and time for when the discount stops being valid.
Cart offers always use a percentage off discount, and cannot be limited to a number of recurring payments.
Promotions are sales you coordinate across your catalogue from Moonbase, rather than something a customer opts into.
A promotion discounts the products and bundles it targets, and those discounted prices are already reflected on the pricing variations returned above, so a storefront that renders discounts needs no extra work to run a sale.
The `promotions` list exists so you can also present the sale itself, for example as a banner announcing it.
Only promotions that apply to this visitor right now are returned.
The validity window, the audience restriction, and whether the promotion still has something purchasable to target are all evaluated before the response is sent, so never filter this list again on the client.
The list changes when the customer signs in or out, since that changes who qualifies.
Unique ID of this promotion.
Name of the promotion, suitable as a heading.
Longer description of the promotion.
Artwork for the promotion, uploaded to Moonbase.
Call to action for the promotion, where both properties are always present together:
Where the customer is sent when they act on the promotion.
The label to put on the call to action.
The surfaces you have asked this promotion to be shown on, any of `Banner` and `Popup`.
An empty list means the promotion runs without being announced anywhere.
Treat unrecognized values as surfaces you do not render.
The products and bundles this promotion was aimed at.
Each entry has the following properties:
The targeted item, prefixed with `Product/` or `Bundle/` to indicate what type of item it is.
Note that this differs from `offers`, where the whole product or bundle is embedded.
List of pricing variation IDs on the item this promotion was aimed at.
If the list is empty, then every variation was targeted.
The discount this promotion applies, using the same discount model described under Offers above.
Its `promotionId` matches this promotion's `id`.
ISO-8601 date and time for when the promotion started.
Omitted on a permanent promotion.
ISO-8601 date and time for when the promotion ends.
Omitted on a permanent promotion, and useful for rendering a countdown.
Any custom properties configured on the promotion in Moonbase.
Take care with `targets`: it is what the promotion was aimed at, not what is actually showing the sale price.
Each pricing variation only ever displays its single best discount, so a targeted item may well be showing a better one from elsewhere.
To find out which items a promotion is really pricing, look for `promotionId` on the discount of a pricing variation.
```json {{ title: 'Promotion example' }}
{
"id": "3f1b0c22-8a94-4d2e-b6f1-7c0e5a91d418",
"name": "Summer Sale",
"description": "20% off the whole catalogue until the end of August",
"imageUrl": "https://assets.moonbase.sh/demo/promotions/summer-sale.png",
"cta": {
"url": "https://demo.moonbase.sh/summer",
"label": "Shop the sale"
},
"display": ["Banner"],
"targets": [
{
"referenceId": "Product/example-product",
"variations": []
}
],
"discount": {
"type": "PercentageOffDiscount",
"name": "Summer Sale",
"description": "20% off the whole catalogue until the end of August",
"percentage": 0.2,
"isExclusive": false,
"promotionId": "3f1b0c22-8a94-4d2e-b6f1-7c0e5a91d418"
},
"validFrom": "2026-06-01T00:00:00Z",
"validUntil": "2026-08-31T00:00:00Z"
}
```
---
## Orders
Orders in Moonbase are the main vehicle for performing purchases, and can be considered a "cart" before completely paid.
As customers shop, you can push products and bundles to the order, and then redirect the customer to the checkout URL to finish their purchase.
Asking for checkout URLs returns three of them, and which one you use decides how checkout is presented: `checkoutUrl` follows the storefront mode configured on your Moonbase account, `hostedCheckoutUrl` is always the Moonbase hosted checkout as a full-page navigation, and `embeddedCheckoutUrl` is the same checkout for an iframe on a page of your own.
For a signed-in customer, `checkoutUrl` and `hostedCheckoutUrl` carry a short-lived login token so the hosted checkout can sign them in and prefill their details.
Pass `embedded=false` when you are going to navigate the customer to the hosted checkout yourself, and the token is left off entirely, so a credential never ends up in the address bar, in browser history, or in the logs of everything in between.
The embedded checkout URL never carries one either way.
Unique identifier of the order.
The current status of the order, `Open` if still shopping, `Completed` if paid and fulfilled.
The currency used for this order.
This should be used when rendering cart contents to make sure what you display on the storefront is the same as during checkout.
Collection of items part of the order.
Note that this can be either products or bundles, and they are discriminated using the `type` property.
### Product line item
Discount type discriminator.
The unique ID of the product.
The unique ID of the pricing variation selected.
Quantity of this item.
The customer's license this item upgrades or renews, for a product sold with licenses that [cover only some releases](/docs/concepts/#release-access).
Buying it extends that license instead of issuing a new one.
Such an item always has a quantity of 1, and each license can only be on one item, so add one item per license.
### Bundle line item
Discount type discriminator.
The unique ID of the bundle.
The unique ID of the pricing variation selected.
Quantity of this item.
The cart offer attached to the order as a whole.
This is what the customer is going for, so it stays on the order even while the cart sits below the offer's threshold, letting them build the cart back up without losing it.
Offers picked for a single item live on that item instead.
The cart offer that is actually applied, using the same discount model described under Offers above.
Absent when no cart offer is attached, or while the attached offer's condition does not hold.
Its saving is spread across the line items and totalled in `total.cartOfferDiscount`.
Calculated total for the order, present once the order has a currency. Each value is an object with `currency` and `amount` properties:
* `original`: The original amount before discounts.
* `discount`: The total amount of discounts applied.
* `subtotal`: The total amount after discounts have been removed.
* `taxes`: Total taxes to pay, may be inclusive or exclusive of the `subtotal` depending on configuration, currency and region.
* `due`: How much is being paid in total by the customer.
* `cartOfferDiscount`: How much of `discount` came from a cart offer, so you can show it as one order-wide saving rather than a share on every line. Omitted when no cart offer applied.
URL to pay for the order, pointing at whichever checkout the storefront mode of your Moonbase account is configured for.
Only present when you ask for checkout URLs with `checkout=true`.
URL to pay for the order on the Moonbase hosted checkout, as a full-page navigation.
Only present when you ask for checkout URLs with `checkout=true`.
URL to pay for the order in an iframe on a page of your own.
It never carries a login token, whether or not the customer is signed in.
Only present when you ask for checkout URLs with `checkout=true`.
Fetches a single order based in its unique ID.
The returned order might still be open for modification, but it might also be completed, in which case no further modifications can be done to the order.
When building storefronts, this is usually an indication that the cart is no longer necessary and can be reset with a new order ID.
A completed order can be read by anyone with its ID for an hour after it completes, which covers showing a confirmation once the customer has paid.
After that, only the customer who owns it can read it, by sending their access token. Anyone else gets a `403: Forbidden`, which you should also treat as a sign to start a new order.
### Optional headers
Access token for the authenticated customer in your app, in the form of a JWT bearer token.
If you have an authenticated user, sending this token will automatically attribute the order to that customer, streamlining the checkout process by pre-filling name, address, and business details.
### Optional query parameters
Flag for if checkout URLs should be generated in the response.
Whether you intend to open `embeddedCheckoutUrl` in an iframe rather than navigating the customer to `hostedCheckoutUrl`.
Only consulted when `checkout` is true, and treated as true when omitted.
Where the customer should be sent after a successful purchase, used with the `checkout` parameter.
You can update order content as long as it has not yet been paid for.
This is a partial update, which means you can opt to only update part of the order.
### Optional headers
Access token for the authenticated customer in your app, in the form of a JWT bearer token.
If you have an authenticated user, sending this token will automatically attribute the order to that customer, streamlining the checkout process by pre-filling name, address, and business details.
### Optional query parameters
Flag for if checkout URLs should be generated in the response.
Typically you set this true for the last push before sending the customer to checkout.
Whether you intend to open `embeddedCheckoutUrl` in an iframe rather than navigating the customer to `hostedCheckoutUrl`.
Only consulted when `checkout` is true, and treated as true when omitted.
If using the checkout parameter, you may also pass a return URL for where the customer should get redirected after a successful purchase.
Additionally, since discounts might target specific UTM campaign trackers, this endpoint can take in any UTM parameters that you might have captured on page load.
To learn more about marketing tracking, check out our [marketing revenue tracking](/docs/guides/marketing-revenue-tracking) page.
This endpoint will store the given UTM parameters on order so that you can correctly track marketing campaign revenue.
The source site or channel of the campaign.
The type of link used, like ad or email CTAs.
An identifier for the specific campaign.
Search terms used by the customer to find the campaign.
Description of what brought the customer to the site originally.
The referrer that brought the customer to the site originally.
### Optional body properties
Desired currency to use for the order.
A list of items in the cart, either products or bundles.
The schema of these is the same as described above.
The cart offer to attach to the order as a whole.
Offers picked for a single item stay on that item, as an `offerId` on the item itself.
The cart offer is part of the cart payload, which means a push that sends `items` without an `offerId` clears it.
Always pass the current one straight back through when you push, or use the endpoint below to drop it deliberately.
A push is rejected with `400 Bad Request` if the same offer is used both on the cart and on a line item, and if any offer is applied to a subscription renewal order.
Takes the cart offer off the order without re-sending the cart.
Offers picked for a single item come off by pushing the cart again without them.
Calling this on an order that has no cart offer does nothing and still succeeds, so it is safe to call whenever the customer dismisses an offer.
Orders that have already been paid for cannot be modified, and return `400 Bad Request`.
### Optional headers
Access token for the authenticated customer in your app, in the form of a JWT bearer token.
If you have an authenticated user, sending this token will automatically attribute the order to that customer, streamlining the checkout process by pre-filling name, address, and business details.
Vouchers are one-time-use codes used to redeem licenses to products and bundles.
These are usually distributed through 3rd party channels, or given as part of marketing campaigns.
Unique identifier of the voucher.
Name of the voucher.
Description of the voucher.
The code used to redeem the voucher.
Flag for if the voucher has been redeemed yet or not.
List of products that this voucher redeems, wrapped in a quantity/value object.
The number of licenses for the above product being granted.
The product being granted.
This object is the same shape as the storefront product described above.
List of bundles that this voucher redeems, wrapped in a value/quantity object.
The number of licenses for the above bundle being granted.
The bundle being granted.
This object is the same shape as the storefront bundle described above.
Public custom properties attached to this voucher.
Values are flattened to key-value pairs without the type wrapper.
See the [Core API documentation](/docs/api#custom-properties) for more details on custom properties.
If you want to preview what a code redeems, you can peek the contents of a voucher.
This can be done without any authenticated user, and performs no changes to the voucher itself.
Will return a `403: Forbidden` if the voucher has been redeemed by someone else than the current authenticated user.
### Optional headers
Access token for the authenticated customer in your app, in the form of a JWT bearer token.
If you have an authenticated user, sending this token will allow you to also peek vouchers redeemed by the authenticated user.
### Required query parameters
The voucher code being redeemed.
To redeem a code and issue the licenses to the currently authenticated user, call this endpoint.
### Required headers
Access token for the authenticated customer in your app, in the form of a JWT bearer token.
### Required query parameters
The voucher code being redeemed.
```http {{ title: 'HTTP' }}
POST https://demo.moonbase.sh/api/customer/vouchers/redeem?code=001DC49B-37FB-40D7-AB4C-8E68C6E9093C
Authorization: Bearer eyJhbGciOiJIUzUxMiIsInR5cCI6IkpXVCJ9.eyJuYW1laWQiOiJiY...
```
```bash {{ title: 'cURL' }}
curl -X 'POST' https://demo.moonbase.sh/api/customer/vouchers/redeem?code=001DC49B-37FB-40D7-AB4C-8E68C6E9093C \
-H 'Authorization: Bearer eyJhbGciOiJIUzUxMiIsInR5cCI6IkpXVCJ9.eyJuYW1laWQiOiJiY...'
```
```json {{ title: 'Response' }}
{
"id": "58927685-61ad-4caa-ad6f-8613d7200d4f",
"name": "Demo voucher",
"description": "Used for demo purposes",
"code": "001DC49B-37FB-40D7-AB4C-8E68C6E9093C",
"redeemed": true,
"redeemsProducts": [ ... ],
"redeemsBundles": [...]
}
```
---
## Inventory
To fetch details about what products a customer owns, and their relevant licenses and license activations, you can use our inventory endpoints.
All of the below endpoints expect an authenticated customer, and will implicitly return their owned products and licenses.
By no means do you have to utilize all of these endpoints to build your storefronts; they are merely made to offer flexibility in how you render customer inventory.
Unlike the other endpoints for your storefront, these endpoints have the potential to return a large amount of data in the rare case customers may own many licenses and products.
That's why many endpoints here return paginated responses, which allows for user-controlled pagination of results.
### Pagination
Paginated response are wrapped in a page object:
The `items` contain object of the type that is expected of the particular endpoint.
Flag for if there are any more results to be fetched.
Null if no more items to be fetched, otherwise a path to fetch the next page of results.
Gets all owned products
### Required headers
Access token for the authenticated customer in your app, in the form of a JWT bearer token.
### Response content
The response body will contain a paginated list of products with ownership details.
See above for details on the pagination wrapper, the inner product objects has the following schema:
The Moonbase ID of the product.
The name of the product as configured in Moonbase.
The tagline of the product as configured in Moonbase.
The website URL of the product as configured in Moonbase.
URL to the Moonbase hosted icon for the product.
The currently released version of the product.
Number of licenses the current customer owns.
Number of trials the current customer has started.
Number of license activations the current user has active.
Max number of possible license activations the current user can perform.
Flag for if the products needs an authenticated user to download.
Flag for if the products needs an authenticated owner to download.
Flag for if downloading requires the customer to be a member of a customer group.
The group itself is never named in the response.
Whether this caller actually clears the requirements above, resolved the same way the download endpoints enforce them.
Gate your download UI on this rather than deriving it from the three flags: group membership is not something a client can determine on its own, so a release restricted to a group is indistinguishable from an open one without this verdict.
When it is `false` and all three flags are `false` too, the release is closed to everyone.
Present when the customer's licenses for the product [cover only some releases](/docs/concepts/#release-access).
Has `coversRelease`, whether they cover the release returned, along with `latestCoveredVersion`, the newest version they can download, and an `upgradeUrl` where the customer can buy the upgrade or renewal when you sell one.
Also has `updatesUntil`, `upToMajor` and `upToVersion`, as described for [license tokens](/docs/licensing/api/#release-access).
For a release they don't cover, `downloadsAllowed` is `false`, and downloading it responds with `403: Forbidden` and an `errorType` of `ReleaseNotCovered`.
A list of the downloads belonging to the currently released version of the product.
File name of the downloadable file.
Unique key to identify the asset.
The target platform for the downloadable asset.
CPU architecture for the downloadable asset. Present when the merchant has tagged the download with an architecture.
Size of the asset in bytes.
URL to download the asset. Note that this might not be publically available depending on the security configuration you have set in Moonbase.
The description of the current release, often used as a changelog.
Public custom properties attached to this product.
Values are flattened to key-value pairs without the type wrapper.
See the [Core API documentation](/docs/api#custom-properties) for more details on custom properties.
Public custom properties attached to the current release of this product.
Values are flattened to key-value pairs without the type wrapper.
See the [Core API documentation](/docs/api#custom-properties) for more details on custom properties.
Gets all licenses for a given product.
### Required headers
Access token for the authenticated customer in your app, in the form of a JWT bearer token.
### Response content
The response body will contain a paginated list of licenses with ownership details.
See above for details on the pagination wrapper, the inner license objects has the following schema:
The Moonbase ID of the license.
The product that the license belongs to.
See the above endpoint for object schema.
Number of active activations that the license has.
Max number of possible license activations the license allows.
Public custom properties attached to this license.
Values are flattened to key-value pairs without the type wrapper.
See the [Core API documentation](/docs/api#custom-properties) for more details on custom properties.
ISO-8601 date and time for when the license was created.
For a license that [covers only some releases](/docs/concepts/#release-access), what it covers: `updatesUntil`, `upToMajor` and `upToVersion`, as described for [license tokens](/docs/licensing/api/#release-access).
Also has `coversCurrentRelease`, and an `upgradeUrl` where the customer can buy the upgrade or renewal when you sell one.
Omitted when the license covers every release.
Gets all license activations for a given product.
### Required headers
Access token for the authenticated customer in your app, in the form of a JWT bearer token.
### Response content
The response body will contain a paginated list of license activations for a product.
See above for details on the pagination wrapper, the inner license activation objects has the following schema:
The Moonbase ID of the license activation.
The Moonbase ID of the license.
Name of the device activated.
Enum that indicates in what way the device was activated.
ISO-8601 date and time for when the activation was last validated.
Gets all owned licenses.
### Required headers
Access token for the authenticated customer in your app, in the form of a JWT bearer token.
### Response content
The response body will contain a paginated list of licenses with ownership details.
See above for details on the pagination wrapper, the inner license objects has the following schema:
The Moonbase ID of the license.
The product that the license belongs to.
See the above endpoint for object schema.
Number of active activations that the license has.
Max number of possible license activations the license allows.
Public custom properties attached to this license.
Values are flattened to key-value pairs without the type wrapper.
See the [Core API documentation](/docs/api#custom-properties) for more details on custom properties.
ISO-8601 date and time for when the license was created.
For a license that [covers only some releases](/docs/concepts/#release-access), what it covers: `updatesUntil`, `upToMajor` and `upToVersion`, as described for [license tokens](/docs/licensing/api/#release-access).
Also has `coversCurrentRelease`, and an `upgradeUrl` where the customer can buy the upgrade or renewal when you sell one.
Omitted when the license covers every release.
Gets all license activations for a given license.
### Required headers
Access token for the authenticated customer in your app, in the form of a JWT bearer token.
### Response content
The response body will contain a paginated list of license activations for a license.
See above for details on the pagination wrapper, the inner license activation objects has the following schema:
The Moonbase ID of the license activation.
The Moonbase ID of the license.
Name of the device activated.
Enum that indicates in what way the device was activated.
ISO-8601 date and time for when the activation was last validated.
Lets a customer revoke a license activation from one of their licenses.
Note that this might not always be possible due to activation method or Moonbase configuration.
### Required headers
Access token for the authenticated customer in your app, in the form of a JWT bearer token.
Takes a **device token** as a plain text body and exchanges it for a **license token** usable for activating products offline.
To learn more, check out our documentation on [offline activations](/docs/licensing/offline-activations).
### Required headers
Access token for the authenticated customer in your app, in the form of a JWT bearer token.
### Required query parameters
The desired activation method, use `Offline` to get an actual offline license token back.
### Required body content
The **device token** for the device and product to activate.
### Response headers
The response headers will contain a `location` header that contains a URL that can be visited to actually download the **license token**.
URL for where to fetch the newly exchanged license token.
### Response content
The response body will contain a summary of the license that was just used to activate the device.
The Moonbase ID of the license.
The product that the license belongs to.
See above endpoints for object schema.
Number of active activations that the license has.
Max number of possible license activations the license allows.
Public custom properties attached to this license.
Values are flattened to key-value pairs without the type wrapper.
See the [Core API documentation](/docs/api#custom-properties) for more details on custom properties.
ISO-8601 date and time for when the license was created.
```http {{ title: 'HTTP' }}
POST https://demo.moonbase.sh/api/customer/inventory/activate?method=Offline
Authorization: Bearer eyJhbGciOiJIUzUxMiIsInR5cCI6IkpXVCJ9.eyJuYW1laWQiOiJiY...
Content-Type: text/plain
eyJpZCI6IjVXUzA0RUg5Q003TkJQVEQ4R1JQRzZUQjAwWEJGR0UzTTQ5TlQyWVAxNkhRMDhTSkJLQjAiLCJuYW1lIjoiRXhhbXBsZSBkZXZpY2UiLCJwcm9kdWN0SWQiOiJleGFtcGxlLXByb2R1Y3QiLCJmb3JtYXQiOiJKV1QifQ==
```
```bash {{ title: 'cURL' }}
curl -X 'POST' https://demo.moonbase.sh/api/customer/inventory/activate?method=Offline \
-H 'Authorization: Bearer eyJhbGciOiJIUzUxMiIsInR5cCI6IkpXVCJ9.eyJuYW1laWQiOiJiY...' \
-H 'Content-Type: text/plain' \
-d 'eyJpZCI6IjVXUzA0RUg5Q003TkJQVEQ4R1JQRzZUQjAwWEJGR0UzTTQ5TlQyWVAxNkhRMDhTSkJLQjAiLCJuYW1lIjoiRXhhbXBsZSBkZXZpY2UiLCJwcm9kdWN0SWQiOiJleGFtcGxlLXByb2R1Y3QiLCJmb3JtYXQiOiJKV1QifQ=='
```
```json {{ title: 'Response' }}
{
"id": "fb886728-aa63-4f1b-af93-07f739bb499c",
"status": "Active",
"product": { ... },
"activeNumberOfActivations": 1,
"maxNumberOfActivations": 1,
"createdAt": "2024-11-06T14:01:54.4380108Z"
}
```
---
---
# https://moonbase.sh/docs/storefronts/embedded/
title: 'Embedded Storefront',
description: 'Easily add e-commerce capabilities to your website by embedding our storefront.',
}
# Embedded Storefront
The fastest path to a native look and feel for your Moonbase-powered e-commerce is using our embedded storefront.
It comes with pre-built UI for customer authentication, cart management, checkout flow, license activations and much more.
Although the UI is included, we've exposed a number of style variables so that you can make it yours.
The embedded storefront can be included in your own websites, no matter what platform you use.
On this page you will find instructions for popular platforms, but if yours is missing, reach out to us through the support channel, or at [developers@moonbase.sh](mailto:developers@moonbase.sh).
To make sure the module works on your website, take care to add your domain to the whitelisted domains of your Moonbase account in your [account settings](https://app.moonbase.sh/account-settings). If you experience CORS errors, the domain is not whitelisted correctly. If your site sets a Content-Security-Policy, allow `https://.moonbase.sh` in `frame-src`, since that is where the sign-up captcha is drawn when you turn on **Captcha** under Account settings > Storefront > Features. Once live, you should also switch the storefront mode of your Moonbase account to direct customers to your website instead of the Moonbase hosted customer portal.
## Getting started
To add e-commerce capabilities to your website, include our storefront script using the appropriate method for your platform:
### Static websites and Javascript apps
A simple `
```
These scripts can be placed anywhere on the page, and should be included on every page you want storefront features available on.
The script exposes a global `Moonbase` object, so in a Javascript app you can call `Moonbase.setup()` from your own code whenever your UI is ready.
The CDN always serves the latest version, so you automatically get our improvements and bug fixes.
Read on for more details on how to configure buttons and render dynamic content.
### Wordpress
In case you're running a Wordpress site, you can install the [Moonbase plugin](https://wordpress.org/plugins/moonbase/) on your instance.
This plugin will add the necessary scripts to your pages, and also give you the option to insert "Add to cart" buttons as part of your content, either using short codes, or as blocks in your content. The features of this plugin is quite minimal; if you need more extensive customization you should edit your theme directly.
### Website builders
For other website builders, we've written some articles on how to get started:
## Customize the experience
Everything from here on is **optional**, and only required if you need customizations.
## Look & Feel
The Moonbase embedded storefront is themeable to some degree; you may tweak the brand color, select fonts, style buttons and cards, and more.
This is done using the `theme` property of the options given when first setting up the module:
```ts
{
theme: {
dark: true | false,
colors: {
primary: '#1A77F2',
background: 'white' | 'gray',
},
fonts: {
// Any built-in family, `inherit`, `system`, or a family of your
// own. Defaults shown here, see Fonts below for the full set.
heading: 'Montserrat',
body: 'Inter',
},
corners: 'sharp' | 'soft' | 'round',
buttons: 'outlined' | 'light',
cards: 'outlined' | 'shadow' | 'white',
}
}
```
Any further customizations done by your website is not officially supported.
If you are noticing styles from your own website bleed in to the Moonbase storefront, then try to avoid any `!important` style rules on your own website.
### Fonts
`theme.fonts` sets two roles: `heading` for headings and display text, and `body` for everything else.
Each slot takes one of the built-in families, a keyword, or a family of your own.
The eight built-in families are `Inter`, `Roboto`, `EB Garamond`, `Merriweather`, `Poppins`, `PT Serif`, `Montserrat`, and `Aleo`.
The storefront loads them from `https://assets.moonbase.sh`.
```ts
{
theme: {
fonts: {
// A built-in family, loaded for you
heading: 'Poppins',
body: 'EB Garamond',
},
}
}
```
Two keywords cover the cases where the storefront should load nothing at all:
- `'inherit'` renders in whatever font your page already uses at that spot.
- `'system'` uses the storefront's own system stack.
```ts
{
theme: {
fonts: {
heading: 'inherit',
body: 'inherit',
},
}
}
```
For any other family, pass an object instead of a name:
```ts
{
theme: {
fonts: {
// Name the family, and where to load the face from
heading: {
family: '"Noto Sans SC", sans-serif',
stylesheet: 'https://cdn.example.com/noto-sans-sc.css',
},
// Or name a family your page already loads
body: { family: 'Satoshi' },
},
}
}
```
`family` is used verbatim as a CSS `font-family` value, so it accepts a full stack as well as a single name.
`stylesheet` is added to your page as a `` and may be absolute or relative to the page; leave it out when your page already loads the family.
## Configure options
When adding the storefront to your site, you can configure other parts of the experience by overriding any the settings listed below, this is their default values:
```js
{
toolbar: {
// Whether or not to show the toolbar
enabled: true,
// The location of the toolbar, can be one of:
// `top-right`, `top-left`, `bottom-right`, `bottom-left`
location: 'top-right',
show: {
// Whether or not to show the cart button of the toolbar
cart: true,
// Whether or not to show the account button of the toolbar
account: true,
// Whether or not to show the Moonbase logo in the toolbar
moonbase: true,
},
},
auth: {
signIn: {
// Enables or disables customer log-ins
enabled: true,
// Hint can be a string with text to show during sign in
hint: undefined,
},
signUp: {
// Enables or disables customer sign-ups
enabled: true,
// Changes the behavior of the newsletter toggle, can be one of:
// `OptIn`, `OptedInByDefault`, `OptOut` - GDPR may be relevant for you
marketingConsent: 'OptIn',
},
// Controls password strength requirements during sign-up and reset, one of:
// `default` (recommended) or `lax`
passwords: 'default',
},
communicationPreferences: {
show: {
// Whether the newsletter opt-in checkbox is shown in the Subscribe,
// Account, and Manage preferences views.
newsletter: true,
// Whether the product updates opt-in checkbox is shown in the same
// views. Set to false to drop product updates from your storefront
// entirely.
productUpdates: true,
},
},
checkout: {
// Where checkout happens, one of:
// `auto` (overlay on desktop and tablet, full-page redirect on phones),
// `always` / `true` (always redirect), `never` / `false` (always overlay)
redirect: 'auto',
},
cart: {
// Overrides the quantity behaviour of the add to cart intents, one of:
// `selectable`, `single`
quantity: 'selectable',
bundles: {
// What happens when a bundle is added to a cart that already contains
// one of its products: `replace` takes out the products that are sold
// the same way as the bundle (subscription or one-off), `append`
// keeps both side by side
onAdd: 'replace',
// Whether to list the contained products underneath the bundle in cart
showProducts: true,
},
offers: {
// Overrides what we show above relevant offers
label: 'You might also like:',
// Whether an eligible item offer is applied to the line it discounts
// without the customer pressing its upsell card
autoApply: false,
cartWide: {
// Whether to show progress towards the next cart offer
showProgress: true,
// Label for the saving row in the cart totals
savingLabel: 'You save',
},
},
leadMagnets: {
// Quantity behavior specifically for lead magnets, one of:
// `selectable`, `single`
quantity: 'single',
},
// The smallest order the cart will check out, per currency in major
// units, e.g. `{ USD: 25, EUR: 25 }`. No minimum by default
minimumTotal: {},
},
promotions: {
// Whether to show the sales you are currently running
enabled: true,
// Where the banner pins when the page has no promotion slot, one of:
// `top`, `bottom`
location: 'top',
// The label on the dismiss button of banners and popups
dismissLabel: 'Dismiss',
},
activation: {
// Determines what device token files should be uploadable
deviceTokenFileExtension: '.dt',
// Sets the name of the downloaded liense token file
licenseTokenFileName: 'license-file.mb',
websiteLink: {
// Whether or not to show a link to the product's website during activation
enabled: false,
// The label shown on the website link button
label: 'Visit website',
},
},
theme: {
// See the above section for details on look and feel
},
pricing: {
// How a price that lands on a whole number renders, one of:
// `auto` (drops the fraction, so 10 renders as $10), `always`
// (keeps the currency's own fraction digits, so 10 renders as $10.00)
trailingZeros: 'auto',
// Which marker identifies the currency, one of:
// `narrowSymbol` ($10), `symbol` (US$10), `code` (USD 10),
// `name` (10 US dollars)
currencyDisplay: 'narrowSymbol',
},
// Opt out of automatic CSS zoom counter-scaling on hosts that ship a
// fixed-width mobile viewport meta tag (e.g. Wix's `width=320`).
// Leave this at false unless you specifically want the storefront to
// render at the host's upscaled density.
disableViewportCompensation: false,
}
```
To override them, simply pass in options with your configuration when setting up the storefront:
```html
```
## Checkout
`checkout.redirect` decides where checkout happens.
| Value | Behavior |
| --- | --- |
| `'auto'` (default) | Overlay on desktop and tablet, full-page redirect to the hosted checkout on phones. |
| `'always'` / `true` | Always redirect to the hosted checkout. |
| `'never'` / `false` | Always use the overlay. |
The overlay keeps customers on your page, but it can never show Apple Pay or Google Pay.
Redirecting to the hosted checkout is what brings those wallets back.
`'auto'` takes that trade only on phones, where wallet usage concentrates, and keeps the overlay on tablets and desktops.
`'auto'` is the default, which is a change from earlier versions of the storefront where checkout always opened as an overlay.
Since the embedded script updates itself, set `checkout: { redirect: 'never' }` if you would rather keep the overlay everywhere.
A redirected customer is always brought back to the page they left, query string and hash included, once they have paid.
The `checkout-completed` event fires and the cart clears exactly as they do with the overlay, so your own listeners and the [analytics forwarding](#forward-events-to-analytics-tools) need no change.
The hosted checkout also stays anonymous for the trip, prefilling from the order rather than signing the customer into a Moonbase account, which matches what the overlay does.
### Minimum order total
`cart.minimumTotal` sets the smallest order the cart will check out.
Below it, the cart's checkout button gives way to a progress bar of the same size, which fills as the cart grows and tells the customer how much more to spend, for example "Spend $8 more to check out".
Once the cart reaches the minimum, the bar turns back into the checkout button.
An empty cart shows the bar too, so customers learn about the minimum before they add anything.
```js
Moonbase.configure({
cart: {
minimumTotal: { USD: 25, EUR: 25, GBP: 20 },
},
})
```
Amounts are keyed by currency code and given in major units, so `25` means 25 dollars rather than 25 cents.
Each visitor shops in a single currency and the storefront never converts one into another, so list every currency you sell in: a currency you leave out has no minimum.
## Price formatting
Every price the storefront renders is formatted for the visitor's own locale, so the same amount reads naturally whether the visitor is in London, Berlin, or Tokyo.
The `pricing` options let you decide two things about that output: whether whole prices keep their decimals, and which marker identifies the currency.
```ts
{
pricing: {
// Whether a price landing on a whole number keeps its decimals:
// `auto` renders 10 as $10, `always` renders it as $10.00
trailingZeros: 'auto' | 'always',
// Which marker identifies the currency, shown here as a British
// visitor would see a price of 10 USD:
// `narrowSymbol` = $10, `symbol` = US$10,
// `code` = USD 10, `name` = 10 US dollars
currencyDisplay: 'narrowSymbol' | 'symbol' | 'code' | 'name',
}
}
```
`trailingZeros` only affects prices that land on a whole number.
Anything with a fraction, like 9.99, always shows its decimals no matter which setting you pick.
Choosing `always` follows each currency's own convention rather than blindly appending two decimals, so 10 USD becomes `$10.00` while 1000 JPY stays whole, because yen amounts are never written with decimals.
`currencyDisplay` picks which of the four currency forms to use, and nothing more.
The symbol itself, and whether it sits before or after the amount, always follows the visitor's locale.
The examples above are what a British visitor sees for a price in US dollars, and a visitor elsewhere sees the same option rendered the way their own locale writes it.
Both options apply everywhere the storefront prints a price, including the prices you render into your own page with `data-moonbase-render`.
## Cart offers
Offers are conditional discounts you configure in Moonbase, and they come in two scopes.
An **item offer** discounts one product or bundle, and is the upsell the storefront shows in the cart under the "You might also like" label.
The customer opts into it, either by using the offer button the storefront renders or by passing `offer_id` to `add_to_cart` yourself.
A **cart offer** discounts the whole order once the cart clears a threshold, for example 10% off orders over 100 euros, or 15% off once there are three items in the basket.
There is nothing to opt into and nothing to wire up: the storefront attaches the best cart offer on its own as the customer shops, and drops it again if the cart falls back below the threshold.
While a cart offer is still out of reach, the cart shows a progress meter with how much further the customer has to go, whether that is an amount to spend or a number of items to add.
If you run tiered offers, the meter keeps working after the first one applies, and starts tracking the next, more valuable tier.
Turn the meter off with `cart.offers.cartWide.showProgress`.
The cart totals also gain a saving row, labelled by `cart.offers.cartWide.savingLabel`.
Note that this row reports every saving on the order, not only the part that came from the cart offer, so product discounts and item offers are counted in it too.
Two limits are worth knowing about: cart offers always use a percentage discount, and they are never applied to subscription renewal orders.
Cart offers do not raise events of their own.
To react to one being applied, listen for `storefront-updated` and read the current cart.
### Applying item offers automatically
An item offer only reaches a cart line when the customer presses its upsell card, and that card is hidden once the offer's product is already in the cart.
A customer who adds that product *before* the one that qualifies them for the offer therefore ends up with a real discount and no way to claim it.
`cart.offers.autoApply` closes that gap.
```js
Moonbase.configure({
cart: {
offers: {
autoApply: true,
},
},
})
```
With it on, the cart attaches an eligible offer to the product it discounts by itself, once every product that offer names is in the cart.
It never adds anything to the cart on the customer's behalf, and it never takes an offer the cart is still selling: an offer naming a product they have not added keeps showing as a card and still takes a press, since an offer is good for one line only and spending it early would take that card away.
Nor does it replace an offer a line already carries.
Where several lines and offers compete, they are paired for what they save together rather than by taking the biggest single saving first.
That governs when an offer is taken rather than where it stays.
Remove one of the products that qualified an offer and it stays on the line it landed on, exactly as an offer claimed from a card does.
It is off by default, because an offer is yours to give and applying one unasked discounts a cart the customer never asked to have discounted.
## Promotions
A promotion is a sale you run across your catalogue from Moonbase, rather than something a customer opts into.
The discounted prices reach the storefront automatically, which means everything already rendering a price shows the sale price without any change on your side.
That includes the elements you render yourself: `discount_name`, `discount_description` and `discount_total` fill in from the promotion, `price` drops to the sale price with `original_price` keeping the old one, and `has_discount` starts matching.
Promotions are shown by default.
If you already have the storefront embedded and start running a campaign in Moonbase, it will appear on your site with no code change.
Set `promotions.enabled` to `false` if you would rather present the sale entirely yourself.
On top of the pricing, a promotion can announce itself as a banner or a popup.
Which of the two it uses is part of the promotion in Moonbase, so you can run one campaign as a quiet banner and the next as a popup without touching your site.
By default the banner pins itself to the top of the viewport, or the bottom if you set `promotions.location`.
If you would rather place it in your own layout, add an empty element with the `data-moonbase-promotion` attribute and the banner renders there instead:
```html
```
Only the first matching element is used, and you can add or remove it at runtime.
When the banner is pinned rather than placed, it sets a `--moonbase-promotion-offset-top` or `--moonbase-promotion-offset-bottom` custom property on the document, so a fixed header of your own can move out of its way:
```css
.site-header {
top: var(--moonbase-promotion-offset-top, 0px);
}
```
Popups hold back until their artwork has loaded, show at most once per page load, and stay out of the way while the customer is in checkout or has a storefront drawer open.
Customers can dismiss both surfaces, and the storefront remembers that in their browser for 180 days, separately per promotion and per surface.
Dismissals are local to the browser and are not tied to the signed-in customer, since there is nowhere to sync them to.
Clicking the call to action on a popup retires it for that visitor, while clicking one on a banner leaves the banner up.
Promotion copy is not available through `data-moonbase-render`.
If you want to build the announcement yourself, listen for the promotion events described below, or reach for `usePromotions` in the [Vue.js SDK](/docs/storefronts/sdks/vue/#use-promotions).
## Call methods
The Moonbase embedded storefront supports a whole range features, from authentication, to e-commerce and licensing.
By default, it will pick up on URL parameters that contains intents, but you can also trigger these yourself.
Below is the full list of intents you can initiate:
```ts
type MoonbaseInstance = {
// Setup
setup(url: string, options?: DeepPartial): Promise
// Update options at runtime, e.g. to switch theme after page load
configure(options: DeepPartial): void
// Events (see "Listen for events" below)
on(
eventType: TEvent,
callback: (event: MoonbaseEventArgs[TEvent]) => void,
): void
// Identity
sign_in(parameters?: { email?: string; }): void
sign_up(parameters?: { email?: string; }): void
forgot_password(parameters?: { email?: string; }): void
reset_password(parameters: { email: string; code: string; }): void
confirm_account(parameters: { email: string; code: string; }): void
confirm_email(parameters: { email: string; code: string; }): void
confirm_email_change(parameters: { email: string; code: string; }): void
connect_account(parameters: { provider_id: string; }): void
// Communication preferences
subscribe(parameters?: { email?: string; name?: string; }): void
confirm_communication_preferences(parameters: { email: string; token: string; }): void
manage_communication_preferences(parameters: { email: string; token: string; }): void
// Customer
view_account(): void
view_products(): void
view_subscriptions(): void
redeem_voucher(parameters?: { code?: string; }): void
// Products
view_product(parameters: { product_id: string; version?: string; }): void
download_product(parameters: { product_id: string; version?: string; key?: string; }): void
activate_product(parameters?: { token?: string; }): void
// Subscriptions
manage_subscription(parameters: { subscription_id: string; }): void
// Orders
view_cart(): void
add_to_cart(parameters?: {
product_id?: string;
bundle_id?: string;
variation_id?: string;
quantity?: number;
offer_id?: string;
license_id?: string;
show_cart?: boolean;
}): Promise
purchase(parameters?: {
product_id?: string;
bundle_id?: string;
variation_id?: string;
quantity?: number;
coupon_code?: string;
license_id?: string;
} | {
product_id?: string;
bundle_id?: string;
variation_id?: string;
quantity?: number;
coupon_code?: string;
license_id?: string;
}[]): Promise
checkout(parameters?: { complete?: boolean; }): void
close_checkout(): void
// Meta
view_about(): void
}
```
To actually trigger the UI elements, you can add onclick handlers to buttons like so:
```html
```
Or you can call them from your own scripts using the global `Moonbase` object:
```ts
const onAddToCartButtonClick = () => {
Moonbase.add_to_cart({ product_id: 'example-product' })
};
```
The `purchase` intent also accepts an optional `coupon_code` that is applied to the freshly-created order before checkout opens.
If the backend rejects the code (invalid, expired, not applicable, etc.) checkout still opens without the discount and a `coupon-rejected` event fires so you can react in your own UI:
```ts
Moonbase.purchase({ product_id: 'example-product', coupon_code: 'SUMMER25' })
```
In the rare case you want to trigger these directly through a URL, you may use query parameters by prepending a `mb_` prefix to a `intent` parameter along with all other parameters that the method expects.
The add-to-cart example above can be triggered using the following URL:
```
https://example.com?mb_intent=add_to_cart&mb_product_id=example-product
```
The same pattern works for `purchase` with a coupon — useful for marketing emails and campaign landing pages:
```
https://example.com?mb_intent=purchase&mb_product_id=example-product&mb_coupon_code=SUMMER25
```
### Upgrades and renewals
For a product sold with [licenses that cover only some releases](/docs/concepts/#release-access), pass the ID of the customer's license as `license_id` to `add_to_cart` or `purchase` to sell an upgrade or renewal of it.
The purchase then extends that license instead of issuing a new one, always as a quantity of 1, and gets any upgrade discount the product has.
Any purchase without `license_id` issues a new license.
```ts
Moonbase.purchase({ product_id: 'example-product', license_id: '32016591-73c5-4956-938c-e34366599bc7' })
```
In a link, the parameter is `mb_license_id`.
The storefront's own product, download and activation views already offer the upgrade to a signed-in customer whose license needs it.
## Render dynamic content
The embedded storefront will fetch and cache data related to products & bundles, the authenticated customer, and the current cart.
To make your web site dynamic, we support rendering and conditionally hiding/showing elements part of your site.
Rendering content is as simple as adding the `data-moonbase-render` attribute to the elements you want dynamic content to appear in:
```html
```
Any initial content will be replaced with data loaded by the embedded storefront, if present.
In the above example, the button will show "Account" until a customer signs in, after which it will show the user's name.
The available properties to render are:
```sh
# User properties
user.name
user.email
# Cart properties
cart.item_count
# Product properties
product..name
product..price
product..original_price
product..discount_name
product..discount_description
product..discount_total
# Bundle properties
bundle..name
bundle..price
bundle..original_price
bundle..discount_name
bundle..discount_description
bundle..discount_total
# You can also access data for specific pricing variations:
product..variation[].price
product..variation[].original_price
product..variation[].discount_name
product..variation[].discount_description
product..variation[].discount_total
```
Using these, you can enrich your static websites with dynamic data based on the current pricing configured in Moonbase, as well as the context of the customer currently logged in, including segmented discounts they may have access to.
The price properties (`price`, `original_price`, and `discount_total`, plus their variation equivalents) use the same [price formatting](#price-formatting) options as the rest of the storefront, so your own markup stays consistent with the widget.
If you have sub-products (a `parent-product.child-product` style ID), reference them with the same dotted ID — every segment is treated as part of the product ID, with the property name still trailing after the last dot:
```html
$0.00
```
In case you have elements you want to only conditionally show based on properties, we support a `data-moonbase-if` attribute:
```html
```
Any elements with `data-moonbase-if` attributes will have their `hidden` attribute set based on storefront context.
In the above example, we add the `hidden` attribute to ensure it's hidden by default, and only when a user is authenticated will it show.
All of these can also be negated by prefixing them with a `!`, enabling more complex use-cases like conditionally showing a add-to-cart button based on if the customer owns the product or not:
```html
Already in your library
```
The available properties to conditionally render based on are:
```sh
# User properties
user
# Cart properties
cart.has_items
cart.contains_product.
cart.contains_product..variation[]
cart.contains_bundle.
cart.contains_bundle..variation[]
# Product properties
product.
product..owned
product..has_discount
product..has_discount_description
product..variation[].has_discount
product..variation[].has_discount_description
# Bundle properties
bundle.
bundle..has_discount
bundle..has_discount_description
bundle..variation[].has_discount
bundle..variation[].has_discount_description
```
The `owned` conditional is only available at the product level, since ownership doesn't depend on which variation was purchased.
Make sure your CSS sheets include a rule to actually hide elements that are `hidden`!
Most modern CSS resets have this, but you can also add a `[hidden] { display: none !important; }` rule yourself.
## Newsletter sign-up forms
A newsletter sign-up form on your own page, in your own design, can send sign-ups straight to Moonbase.
Mark the form with `data-moonbase-form="subscribe"` and the storefront sends it in the background instead of letting the browser load a new page:
```html
```
The storefront reads the fields by name:
| Field | Description |
| --- | --- |
| `email` | Required. The address to subscribe. |
| `name` | Optional, up to 200 characters. |
| `groups` | Optional customer group IDs to add the subscriber to, comma-separated in one field or repeated (a set of checkboxes, say). Only groups you have opened to sign-ups in Moonbase are joined, other IDs are skipped without an error, and at most five are applied per sign-up. |
A sign-up covers the emails that `communicationPreferences.show` enables, exactly as the storefront's own subscribe form does.
Whether the visitor has to confirm by email first follows the email confirmation setting in your [account settings](https://app.moonbase.sh/account-settings).
The form is yours, so the consent wording is too: tell visitors what they are signing up for, the way the storefront's own form does.
### Showing the result
By default, the storefront drawer opens on the outcome: "You're subscribed!", or "Check your email to finish" when the visitor has to confirm by email.
If the email is turned down, for example because it is not a valid address, the drawer opens its own subscribe form instead, filled in from yours, with the reason under the button so the visitor can correct it there.
To keep everything on your page, add `data-moonbase-feedback="inline"`.
The drawer then stays closed, and the storefront reports progress on the form itself for you to style:
```html
```
The form's `data-moonbase-state` attribute tells you where the sign-up is:
| `data-moonbase-state` | When |
| --- | --- |
| `submitting` | The sign-up is being sent. The form's submit buttons are disabled until it returns. |
| `subscribed` | The visitor is on the list. |
| `confirmation_sent` | A confirmation email went out, and the visitor is on the list once they click the link in it. |
| `error` | The email was turned down, or the request failed. |
A `[data-moonbase-message]` element inside the form receives the outcome as text, worded the way the drawer words it, and screen readers announce it.
Leave it out to show your own wording instead:
```css
.newsletter[data-moonbase-state="subscribed"] .fields,
.newsletter[data-moonbase-state="confirmation_sent"] .fields {
display: none;
}
.newsletter[data-moonbase-state="error"] [data-moonbase-message] {
color: #c00;
}
```
Style both success states.
For a visitor who is not signed in, the state follows your email confirmation setting rather than whether the address was already on your list, so with confirmation turned on, nearly every sign-up ends in `confirmation_sent`.
`data-moonbase-state` is set without `data-moonbase-feedback="inline"` as well, so you can show a spinner for the moment before the drawer opens.
### Reacting in code
Every successful sign-up emits a `subscribed` event, from these forms as well as from the drawer's own subscribe form:
```ts
Moonbase.on('subscribed', ({ email, status, source }) => {
// `source` is 'form' for a data-moonbase-form form, 'drawer' for the storefront's own
})
```
### Good to know
- The attribute hands the form over to Moonbase. The storefront claims the submit before any other script on your page sees it, so a website builder's own form handling won't post it somewhere else as well. Your own submit listeners on that form won't run either, so listen for the `subscribed` event instead.
- A form submitted before the storefront has finished loading is held, and sent once `setup()` has run, rather than putting the visitor's email in the page URL.
- A signed-in customer subscribes the address they type in, which is usually their own.
- Forms inside a shadow root are not picked up.
- A form with a misspelled `data-moonbase-form` value is not sent at all, and logs a warning to the browser console.
- To open the drawer's own subscribe form instead, prefilled, call `Moonbase.subscribe({ email, name })` or link to `?mb_intent=subscribe&mb_email=...&mb_name=...`.
## Recipes
By combining `data-moonbase-if`, `data-moonbase-render`, and intent calls, you can build most of the patterns you'd otherwise reach for a framework to handle. The snippets below are copy-pasteable starting points — adapt the markup and class names to fit your own design system.
All recipes assume `[hidden] { display: none !important; }` is present in your stylesheet so that elements with the `hidden` attribute actually disappear.
### Account link that adapts to sign-in state
Show a "Sign in" button to anonymous visitors, and swap it for a personalized account link once a customer signs in:
```html
```
### Cart button with item-count badge
A cart button that stays out of the way when empty, and shows a live item count when the customer has added something:
```html
```
### Buy vs. owned toggle
Hide the purchase button once a customer already owns the product, and replace it with a confirmation message (or an activation/download call):
```html
Already in your library
```
### Discounted price display
Show a clean price by default, and reveal the original (struck-through) price plus a discount label only when a discount is actually applied:
```html
$0.00$0.00
```
### Variation-aware pricing card
Render pricing for a specific variation (here, the `starter` tier) and gate the savings line on that variation's own discount state, so a sale on a different variation doesn't bleed into this card:
```html
Example product
$0.00$0.00
Save $0.00
```
### Voucher redemption entry point
A simple button to open the voucher redemption flow. For marketing emails or landing pages, you can also pre-fill the code via the URL parameter form (`?mb_intent=redeem_voucher&mb_code=WELCOME10`):
```html
```
## Reference implementation
For a complete, end-to-end example of everything on this page composed into a real site, see the open-source **Corino** reference site. It's a single `index.html` for a fictional audio-plugin company, wired to the public `demo.moonbase.sh` Moonbase account — it exercises `Moonbase.setup` with theming, intent links, `data-moonbase-if` for conditional UI, `data-moonbase-render` for live pricing, and owned/unowned product CTAs.
Try it live at [corino.moonbase.sh](https://corino.moonbase.sh) — sign up with any email, add a plugin to your cart, and walk through the embedded checkout against the demo Moonbase account. Then read the source:
## Forward events to analytics tools
The embedded storefront can forward its commerce and authentication events straight to the marketing and analytics tools you already use, with no event wiring or glue code required.
Just hand Moonbase the same ids you use with each vendor, and it takes care of the rest:
```html
```
Meta Pixel, Google Analytics 4, Google Tag Manager, Klaviyo, and TikTok Pixel are supported out of the box.
Enable only the providers you need, and leave the rest out.
The storefront never loads any of these SDKs for you.
It only forwards to the globals your page has already initialized with each vendor's own snippet (`window.fbq`, `window.gtag`, `window.dataLayer`, `window.klaviyo`, `window.ttq`).
Load order doesn't matter: if a global only appears after `setup()`, forwarding simply begins once it's there.
And if a provider is enabled but its global is never found, forwarding is a silent no-op, with a one-time `console.warn` so the misconfiguration is easy to spot.
Forwarding relies on **each SDK's own consent state** (for example Google Consent Mode, or your cookie banner gating `fbq`).
To hold off forwarding until a visitor opts in, leave the provider out of `setup()` and add it once consent is granted with `Moonbase.configure(...)`.
Merge semantics apply per provider: pass one to add or update it, pass `undefined` to remove it, or omit it to leave it untouched, so enabling a provider after consent never disturbs the others.
```ts
// Start forwarding to Meta Pixel once the visitor has consented
onConsentGranted(() =>
Moonbase.configure({ integrations: { metaPixel: { pixelId: '1234567890' } } }))
// Later, stop forwarding to Meta Pixel while leaving the rest running
Moonbase.configure({ integrations: { metaPixel: undefined } })
```
Your key commerce events (`added-to-cart`, `checkout-initiated`, and `checkout-completed`) are forwarded as each platform's equivalent (add to cart, begin checkout, and purchase), alongside the `signed-in`, `signed-up`, and `signed-out` events for identifying customers.
A couple of conventions are worth knowing: the forwarded order `value` is the amount the customer actually pays (post-discount and tax-inclusive), and completed purchases carry the order id as a deduplication key, so a single order is never counted twice.
For any event or provider the built-in integrations don't cover, you can still listen for events and forward them by hand, as described below.
## Listen for events
For analytics destinations or events the built-in integrations above don't cover, or any time you simply want to react to the storefront yourself, you can register event listeners directly on the Moonbase instance.
These work much like native HTML event listeners:
```ts
Moonbase.on('checkout-completed', event => console.log('Purchase completed:', event.order))
```
Event names are passed as plain strings, and each event comes with a matching payload (for example the completed `order` above).
These are all the available events you can currently listen for:
```ts
// Identity related events
'signed-in': {
user: User
}
'signed-up': {
user: User
}
'signed-out': {
user: User
}
// Newsletter related events
// Fired for sign-ups through the drawer's own subscribe form and through
// your own `data-moonbase-form="subscribe"` forms.
'subscribed': {
email: string
name: string | null
// `confirmation_sent` when the visitor still has to confirm by email
status: 'subscribed' | 'confirmation_sent'
// The customer group IDs requested, not necessarily the ones joined
groupIds?: string[]
source: 'drawer' | 'form'
user?: User | null
}
// Voucher related events
'redeemed-voucher': {
voucher: Voucher
user: User
}
// Storefront related events
// Fired whenever the cached storefront data (products, pricing, ownership,
// cart) changes — useful as a single hook for re-rendering custom UI.
'storefront-updated': {
storefront: Storefront
user?: User | null
}
// Product related events
'downloaded-product': {
product: OwnedProduct
download: Download
user?: User | null
}
'activated-product': {
product: StorefrontProduct
fulfillmentType: ActivationRequestFulfillmentType
user?: User | null
}
// Promotion related events
// The surface is the one the promotion was rendered on, either
// 'banner' or 'popup'.
'promotion-shown': {
promotion: StorefrontPromotion
surface: PromotionSurface
user?: User | null
}
'promotion-clicked': {
promotion: StorefrontPromotion
surface: PromotionSurface
// Where the customer is being sent, the promotion's own call-to-action URL
url: string
user?: User | null
}
'promotion-dismissed': {
promotion: StorefrontPromotion
surface: PromotionSurface
user?: User | null
}
// Cart related events
'added-to-cart': {
item: CartItem
currency: string
user?: User | null
}
'coupon-rejected': {
code: string
// Why, as the buyer was told, when they typed the code into the checkout
message?: string
user?: User | null
}
'checkout-initiated': {
order: OpenOrder
total: Money
user?: User | null
}
'checkout-closed': {
// The cart. For a direct purchase, read `checkoutOrder` instead
order: Order
// The order the checkout was open for, absent if it closed before loading
checkoutOrder?: Order
// Whether the order completed before the checkout closed
completed: boolean
user?: User | null
}
'checkout-completed': {
order: Order
user?: User | null
}
```
One quirk on the promotion events: acting on a popup's call to action retires that popup, but it reports `promotion-clicked` only, never `promotion-dismissed`.
Reserve `promotion-dismissed` for measuring how often a campaign gets waved away.
For worked examples of forwarding events to analytics by hand (handy when you need a destination or custom mapping the built-in integrations don't provide), check out these articles:
---
# https://moonbase.sh/docs/storefronts/
title: 'Storefronts & Payments',
description: 'Find out exactly how to integrate with Moonbase for storefront and payments through these docs.',
}
# Storefront & Payments
Moonbase has features to handle all functional aspects of your storefronts, like:
* [Products](/docs/concepts/#products) {{ className: 'my-0' }}
* [Bundles](/docs/concepts/#bundles) {{ className: 'my-0' }}
* [Coupons](/docs/concepts/#coupons) {{ className: 'my-0' }}
* [Vouchers](/docs/concepts/#vouchers) {{ className: 'my-0' }}
* Carts {{ className: 'my-0' }}
* Payments {{ className: 'my-0' }}
* Authentication {{ className: 'my-0' }}
By bundling it all together, you can skip having to integrate different products for all concerns, often costing way more time than it's worth.
We're also able to offer a much smoother journey, taking customers throught the least amount of steps possible before being able to download, install and activate the software you sell.
If you are looking for the simplest option, check out our [embedded storefront](/docs/storefronts/embedded) to integrate all of the above features within minutes.
It will let you tweak the look and feel to blend in with your own brand, extending the capabilities of your site significantly.
If on the hand you are building your website fully custom, we've built some SDKs to ensure that you can integrate Moonbase into your storefront as easy as possible.
Should you need absolute control and full customization, you can use our API directly.
Check out the [API reference](./api) for documentation, and reach out to us if you have any questions or feature requests.
If you are building your own storefront using React.js or Vue.js, check out our SDKs which make integrating much simpler since they contain framework specific utilities and abstractions.
---
# https://moonbase.sh/docs/storefronts/sdks/node/
title: 'Node.js API Client',
description: 'On this page, you can learn how to use the Node.js API client to integrate Moonbase into your storefront.',
}
# Node.js API Client
This guide will get you all set up with our Node.js API Client, ready to integrate pricing, payments, authentication and more into your storefront. {{ className: 'lead' }}
The client is intended to be used for customer facing applications, with built-in security token handling including automatic refreshing of access tokens.
Make sure to add your local development or test environment URLs to the whitelisted
URLs of your Moonbase account if you are using this package in the browser.
Otherwise, you will see CORS issues when calling endpoints.
## Getting started
Start by adding the package to your project
```bash {{ title: 'npm' }}
npm install @moonbase.sh/storefront-api --save
```
```bash {{ title: 'yarn' }}
yarn add @moonbase.sh/storefront-api
```
Now you're ready to instantiate the client itself:
```ts
const client = new MoonbaseClient({
endpoint: 'https://{YOUR-ACCOUNT-ID}.moonbase.sh',
});
```
{/*
If you have custom domains enabled for your customer portal, use that instead of the moonbase.sh domain.
*/}
## Endpoint collections
The client exposes a number of endpoint collections:
* **Identity** - For all authentication concerns
* **Inventory** - For getting customer inventory of licenses & products
* **Orders** - For handling order & cart contents
* **Storefront** - For getting storefront products and bundles
* **Vouchers** - For redeeming vouchers
All endpoint collections come with TypeScript types that explain the models.
---
# https://moonbase.sh/docs/storefronts/sdks/
title: 'Storefront SDKs',
description: 'On this page, you can learn how to use the Storefront SDKs to integrate Moonbase into your storefront.',
}
---
# https://moonbase.sh/docs/storefronts/sdks/react/
title: 'React.js Storefront SDK',
description: 'On this page, you can learn how to use the React.js SDK to integrate Moonbase into your storefront.',
}
# React.js SDK
Our React.js SDK is currently in private beta.
Do you have a specific scenario you need to support or want early access?\
Reach out to us through the support channel, or at [developers@moonbase.sh](mailto:developers@moonbase.sh).
---
# https://moonbase.sh/docs/storefronts/sdks/vue/
title: 'Vue.js Storefront SDK',
description: 'On this page, you can learn how to use the Vue.js SDK to integrate Moonbase into your storefront.',
}
# Vue.js SDK
This guide will get you all set up with our Vue.js SDK, ready to integrate pricing, payments, authentication and more into your storefront. {{ className: 'lead' }}
The Moonbase Vue.js SDK comes with a set of composables to let you easily access products & pricing, cart and authentication, customer inventory and more.
It is made using TypeScript, so you will have typed models everywhere, but you can just as easily use it in your JavaScript projects.
Make sure to add your local development or test environment URLs to the whitelisted
URLs of your Moonbase account. Otherwise, you will see CORS issues when calling endpoints.
If you want to see the SDK in use end-to-end, our Corino reference site is a complete Nuxt 4 storefront wired to the public Corino demo Moonbase account — landing page, embedded checkout, account area, license activation, and voucher redemption. The [Reference implementation](#reference-implementation-corino) section at the bottom of this page walks through what it demonstrates.
## Getting started
Start by adding the package to your project:
```bash {{ title: 'npm' }}
npm install @moonbase.sh/vue --save
```
```bash {{ title: 'yarn' }}
yarn add @moonbase.sh/vue
```
Then add it to your Vue.js app by passing the proper configuration:
```ts
const storefront = createStorefront('https://{YOUR-ACCOUNT-ID}.moonbase.sh')
createApp(App)
.use(storefront)
.mount('#app')
```
{/*
If you have custom domains enabled for your customer portal, use that instead of the moonbase.sh domain.
*/}
## Nuxt SSR support
The Moonbase Vue.js SDK is made to also support server side rendering.
To avoid state leakage and support state hydration in Nuxt, you need to replace the state factory when instantiating the storefront.
The appropriate place to configure this is through a Nuxt plugin:
```ts
const storefront = createStorefront(
nuxtApp.$config.public.moonbaseEndpoint,
(key, state) => useState(key, () => state),
{ persistUtm: true },
)
// Hydrate the catalog (and current user, if a session cookie is present)
// into the SSR payload so the first paint already has real data.
if (import.meta.server)
await storefront.updateStorefront()
// Optional: react to checkout completion in the browser — for example,
// redirect to an order-confirmation page.
// if (import.meta.client) {
// storefront.onCheckoutCompleted((order) => {
// navigateTo(`/order-completed?id=${order.id}`)
// })
// }
nuxtApp.vueApp.use(storefront)
})
```
Passing Nuxt's `useState` as the state factory means every reactive store the SDK owns — catalog, current user, cart and inventory — is serialized from the server into the client payload. The SDK rehydrates from that payload on the client instead of refetching, so the first paint has real prices, product names and login state.
The `{ persistUtm: true }` option stores detected UTM parameters in `localStorage` (instead of the default `sessionStorage`), which lets attribution survive across tabs and follow a visitor all the way through to a future checkout — useful when you've set up [marketing revenue tracking](/docs/guides/marketing-revenue-tracking).
`onCheckoutCompleted` only fires in the browser, so register it inside an `import.meta.client` branch. It's the right place to send users to an order-confirmation page or trigger any post-purchase cleanup. The handler pairs naturally with the embedded checkout overlay — see [`useCart`](#use-cart) below.
## Composables
All composables use the same core storefront context that you set up using the above instructions.
## useAuth {{ label: 'Authentication' }}
The `useAuth` composable contains functions to handle user authentication, as well as a computed property of the currently logged-in user and whether the user has been loaded yet.
```ts
const {
user,
loaded,
signIn,
signUp,
signOut, // 🔒 Needs authenticated user
update, // 🔒 Needs authenticated user
setPassword, // 🔒 Needs authenticated user
forgotPassword,
resetPassword,
confirmAccount, // ! Returns password reset token to set initial password
confirmEmail,
confirmEmailChange, // 🔒 Needs authenticated user
} = useAuth()
```
If you turn on **Captcha** under Account settings > Storefront > Features, pass the customer's solution to `signUp` as `{ captchaToken }` in its last argument, or it throws a `CaptchaRequiredError`. See [Sign up in the Storefront API](/docs/storefronts/api#sign-up) for how to draw the captcha.
The SDK will try to load the user on page load, if a valid user access token is found in localStorage.
Refreshing the access token is also handled by the SDK, so you don't need to worry about refreshing tokens yourself.
---
## useInventory {{ label: 'Customer Self Service' }}
The `useInventory` composable exposes a number of endpoints to fetch customer inventory, or in other words; what products and licenses the authenticated customer owns.
To be able to build a fully self-service licensing experience, the composable also allows fetching activations for licenses, as well as revoke them on demand.
All of the methods from this composable requires an authenticated user, and all `get` methods returns paginated responses that needs to be iterated through.
If you are using offline activations, that can also be handled using the `activateProduct` endpoint, which takes in a device token and returns a license token usable for offline activations.
To learn more about offline activations, check out our documentation on [activation flows](/docs/licensing/activation-flows).
```ts
const {
getLicenses,
getLicenseActivations,
getProduct,
getProducts,
getProductLicenses,
getProductActivations,
revokeActivation,
activateProduct,
downloadProduct,
getSubscription,
getSubscriptions,
} = useInventory()
```
When setting up products in Moonbase, you have the ability to control who can download releases of your products: opening it up for everyone, requiring authenticated users, requiring downloaders to own the software, restricting downloads to the members of a customer group, or closing them to everyone.
That choice is made separately for past releases, the current release and pre-releases, so the same product can answer differently depending on which version is being downloaded.
In the case you pick anything but the first option, it's important that you use the `downloadProduct` method to fetch and open authenticated download links in order to avoid authentication errors for users of your storefront.
On the other hand, if you don't have any authorization policy in place, you can simply redirect users to the `path` of the product downloads as necessary.
Every owned product carries `downloadsAllowed`, the API's own verdict on whether the current customer clears every requirement for the release being returned, resolved by the same code the download endpoints enforce.
Gate your download UI on that flag rather than working eligibility out yourself: nothing in the customer model says which groups a customer belongs to, so a group-gated release is indistinguishable from an open one without it.
The `downloadsNeedsUser`, `downloadsNeedsOwnership` and `downloadsNeedsGroupMembership` flags next to it are there to pick which requirement you explain when the verdict is `false`. When all three are `false` as well, the release is closed to everyone.
For a product sold with [licenses that cover only some releases](/docs/concepts/#release-access), owned products and licenses also carry a `releaseAccess` saying what the customer's licenses cover, with an `upgradeUrl` to buy the upgrade.
`downloadProduct` throws a `ReleaseNotCoveredError`, a `NotAuthorizedError` that carries the `upgradeUrl`, for a release they don't cover.
The `getProduct` method returns the full owned-product detail for a single product the customer owns — downloads, external licenses (key codes, file licenses, iLok deposits), and metadata — and is what backs a per-product page in an account area. `getSubscription` returns the detail for a single subscription and is the handler for the `ManageSubscription` callback URL (see [Custom storefront mode](#custom-storefront-mode)).
---
## useActivationRequest {{ label: 'License Activation' }}
The `useActivationRequest` composable wraps an in-progress activation request, identified by a token. Moonbase issues these tokens to the `AutoActivation` custom-storefront URL when a customer kicks off an online activation from inside your application — either to redeem an offer (a paid license) or to start a free trial. The composable resolves the token to the underlying request, exposes eligibility and loading state, and returns methods to complete or abandon the flow.
```ts
const {
activationRequest, // computed ref of the loaded ActivationRequest
loading, // initial token resolve in progress
fulfilling, // a fulfill call is currently running
completing, // post-fulfill polling for the license to land
error, // user-facing error message, if any
isInstalled, // true once the resulting license is provisioned
fulfillLicense, // complete the request by purchasing / claiming the license
fulfillTrial, // complete the request by starting a free trial
cancel, // abandon the request server-side
} = useActivationRequest(token)
```
Typical usage is on an `/activate` page that reads `?token=…` from the URL: pass the token to `useActivationRequest`, render the product and pricing from `activationRequest.value`, and wire two buttons to `fulfillLicense()` and `fulfillTrial(newsletterOptIn)` based on what the request is eligible for. After `fulfillLicense()`, the SDK opens the embedded checkout overlay for payment; after `fulfillTrial()`, the license is provisioned directly. In both cases `isInstalled` flips to `true` once the license has been delivered to the user.
Trial eligibility is exposed on `activationRequest.value.trialEligibility`. When the Moonbase account requires a newsletter opt-in to start a trial, `trialEligibility.requiresNewsletterOptIn` is `true` — in that case show a required opt-in checkbox in your UI and only enable the "Start trial" button once it's checked, then forward the value to `fulfillTrial(true)`. When `requiresNewsletterOptIn` is `false` you can call `fulfillTrial()` directly (it defaults to `false`). The SDK takes care of updating the customer's communication preferences server-side before provisioning the trial.
For a deeper look at the activation flow this composable participates in, see [activation flows](/docs/licensing/activation-flows). For a working `/activate` page, see [`activation/AutoActivation.vue`](https://github.com/Moonbase-sh/corino-vue-storefront/blob/main/app/components/activation/AutoActivation.vue) in the Corino reference site.
---
## useBundle {{ label: 'Products & Bundles' }}
The `useBundle` composable returns a computed ref of a specific bundle specified by the bundle ID given.
```ts
const bundle = useBundle('demo-bundle')
```
The bundle will be `null` if it's not found in your publicly available bundles, or if the storefront data has not yet been loaded.
---
## useBundles {{ label: 'Products & Bundles' }}
The `useBundles` composable returns a computed ref of all currently loaded and available bundles.
```ts
const bundles = useBundles()
```
The bundle list will be empty if the storefront data has not yet been loaded.
---
## useProduct {{ label: 'Bundles & Products' }}
The `useProduct` composable returns a computed ref of a specific product specified by the product ID given.
```ts
const product = useProduct('demo-product')
```
The product will be `null` if it's not found in your publicly available products, or if the storefront data has not yet been loaded.
---
## useProducts {{ label: 'Bundles & Products' }}
The `useProducts` composable returns a computed ref of all currently loaded and available products.
```ts
const products = useProducts()
```
The product list will be empty if the storefront data has not yet been loaded.
---
## useOffer {{ label: 'Offers' }}
The `useOffer` composable returns a computed ref of a specific offer specified by the offer ID given.
```ts
const offer = useOffer('d6688961-7843-4bf4-be7c-4d9d6c5ce7be')
```
The offer will be `null` if it's not found, or if the storefront data has not yet been loaded.
---
## useOffers {{ label: 'Offers' }}
The `useOffers` and `useEligibleOffers` composables returns a computed ref of all offers and eligible offers respectively.
Eligible offers are offers where the condition of the offer is currently satisfied, and the promoted product is not already in the cart.
The `useLockedOffers` composable is the mirror of that: the item offers the cart has not unlocked yet, each paired with its `progress` towards the spend needed to unlock it, sorted so the closest one comes first.
Use it to nudge a customer towards an offer they are nearly qualified for.
Only offers gated on a cart total show up here, which is why `progress` is always an amount to spend rather than items to add.
An offer that just wants more of the same products is reached by adding what the cart already lists, so the storefront surfaces it as an upsell once it applies instead.
```ts
const offers = useOffers()
const eligibleOffers = useEligibleOffers()
const lockedOffers = useLockedOffers()
```
These lists will be empty if the storefront data has not yet been loaded.
---
## useCartOffer {{ label: 'Offers' }}
The `useCartOffer` composable tracks the cart offer on the current order, which is the kind of offer that discounts the whole order once the cart clears a threshold rather than discounting a single item.
```ts
const cartOffer = useCartOffer()
```
It returns `null` until there is a cart to reason about, and otherwise an object with `applied`, `next`, `subtotal` and `currency`.
`applied` is the offer currently taking money off the order along with what it saves, and `next` is the offer just out of reach along with its `progress`.
Both can be set at the same time when you run tiered offers, in which case `next` is always worth more than what is already applied, so you can render a "spend a little more and save more" prompt without comparing the two yourself.
---
## usePromotions {{ label: 'Offers' }}
The `usePromotions` composable returns a computed ref of the sales currently running across your catalogue, so you can present a campaign in your own layout rather than using the banner the embedded storefront renders.
```ts
const promotions = usePromotions()
```
Everything in this list is live and applies to the customer looking at the page right now: the validity window and the audience restriction are both evaluated server-side before the storefront is sent, so never filter the list again yourself.
It does change when the customer signs in or out, since that changes who qualifies.
Each promotion carries the `discount` it applies, and that discount's `promotionId` is what ties it back to a price: a pricing variation only ever shows its single best discount, so check for `promotionId` on the variation's own discount to know which items a promotion is really pricing.
---
## useCart {{ label: 'Shopping' }}
The `useCart` composable contains functions to handle cart manipulation, as well as a computed property of the current contents and value of the cart.
To avoid delays in rendering, the `total` of the cart contents is calculated client-side based on products added to the cart.
```ts
const {
items,
currency,
total,
breakdown,
cartOffer,
addToCart,
setQuantity,
removeFromCart,
checkout,
} = useCart()
```
Where `total` is the single number to put in front of the customer, `breakdown` is how it was arrived at: the `original` list price, the `subtotal` after product discounts and item offers, the `cartOffer` taken off on top of that, and the `discount` covering every saving whatever its source.
`cartOffer` is the same value lifted out for convenience, and is `null` when no cart offer applies.
The SDK takes care of storing the cart session in browser storage so that customers can resume shopping when coming back to the store.
Also handled by the SDK is shopping in multiple tabs simultaneously, where the cart will be kept synchronized across the tabs.
Item offers reach a cart line when something hands one to `addToCart`, which in a storefront of your own means the customer pressing whatever you render for the offer.
Setting `autoApplyItemOffers` on the storefront context lets the cart attach an eligible offer to the line it discounts on its own instead:
```ts
const storefront = createStorefront('https://{YOUR-ACCOUNT-ID}.moonbase.sh')
if (storefront.autoApplyItemOffers)
storefront.autoApplyItemOffers.value = true
```
It is `false` by default.
The property is optional on the `StorefrontContext` type so that a hand-rolled context is not forced to implement it, but one built by `createStorefront` always carries it.
It never adds anything to the cart and never replaces an offer a line already holds, so it only ever fills an empty slot on a line that is in the cart already, and it leaves alone any offer naming a product the customer has not added yet.
If you would rather do the pairing yourself, the helpers behind it are exported from `@moonbase.sh/storefront-api` as `CartUtils.assignItemOffers`, `CartUtils.bestItemOffer`, `CartUtils.offerTargetsLine` and `OfferUtils.allTargetsInCart`.
For a product sold with [licenses that cover only some releases](/docs/concepts/#release-access), pass the customer's license as `targetLicenseId` to sell an upgrade or renewal of it.
The purchase then extends that license instead of issuing a new one, priced for that license from the product's `licenseUpgrades`:
```ts
addToCart(product, undefined, undefined, { targetLicenseId: license.id })
```
Each upgraded license is a cart line of its own with a quantity of 1, and `useCheckout()` takes the same `targetLicenseId` on each item.
A purchase without it issues a new license.
`checkout()` takes a `redirect` option that decides where checkout happens. The same option is accepted by `useCheckout()` and `renewSubscription()`.
| Value | Behavior |
| --- | --- |
| `'auto'` (default) | Overlay iframe on desktop and tablet, full-page redirect on phones. |
| `'always'` / `true` | Always redirect to the Moonbase-hosted checkout. |
| `'never'` / `false` | Always use the overlay iframe. |
`'auto'` exists because Apple Pay and Google Pay cannot render inside the overlay, and redirecting to the hosted checkout is what brings those wallets back. It takes that trade only on phones, where wallet usage concentrates, and keeps the overlay on desktop.
The overlay opens checkout in the current page, with no navigation and no full-page reload. That is the pattern the Corino reference site uses from its right-side cart drawer:
```ts
const cart = useCart()
const route = useRoute()
async function startCheckout() {
await cart.checkout({ redirect: 'never', returnUrl: route.fullPath })
}
```
Pair the overlay with the `onCheckoutCompleted` and `closeCheckout` handlers exposed by `createStorefront` (see [Nuxt SSR support](#nuxt-ssr-support)): register an `onCheckoutCompleted` listener at boot to close the overlay and dismiss your cart drawer once an order completes.
A call that redirects cannot report an outcome, since the result only arrives once the customer is back, so it resolves with `{ completed: false, redirected: true }`. Check `redirected` before treating `completed: false` as an abandoned checkout.
`returnUrl` is where a redirected customer comes back to, and is also used by any flow the backend wants to resume on the storefront side (for example confirming an order email). It defaults to the page the customer is on, query string and hash included. Moonbase strips its own `mb_*` parameters from whatever you pass, since the checkout appends its completion handshake to that URL.
---
## useCommunicationPreferences {{ label: 'Communications' }}
The `useCommunicationPreferences` composable wraps the public communications API — newsletter and product-update opt-ins for visitors who don't necessarily have a customer account yet. Use it to back a footer newsletter form, the confirmation page linked from a double-opt-in email, a "manage your preferences" page, and the one-click unsubscribe target.
```ts
const {
subscribe,
confirm,
get,
update,
unsubscribe,
} = useCommunicationPreferences()
```
`subscribe({ email, name, newsletter, productUpdates })` records the opt-in. With email confirmation turned on for your account, the call resolves with `{ status: 'confirmation_sent' }` and Moonbase sends a double-opt-in confirmation email wherever the address has not been confirmed yet; with it turned off, the preferences are recorded directly and the call resolves with `{ status: 'subscribed' }`. For a visitor who is not signed in, the status follows that setting rather than whether the email was already subscribed. `newsletter` and `productUpdates` both default to `true`.
`confirm(email, token)` redeems the confirmation token from the double-opt-in email and finalizes a pending subscription.
`get(email, token)` and `update(email, token, { newsletter, productUpdates })` back the "manage your preferences" page — the token is the long-lived unsubscribe token included in every marketing email Moonbase sends. `update` lets a subscriber drop newsletters while keeping product updates (or vice versa); `unsubscribe(email, token)` is the all-off one-click target for email footers.
For the underlying REST surface, see the [Communications section of the Storefront API reference](/docs/storefronts/api#communications).
---
## useVoucher {{ label: 'Fulfillment' }}
The `useVoucher` composable contains functions to handle voucher redemption.
[Vouchers](/docs/concepts/#vouchers) are redeemable codes that grant licenses to products on redemption.
Since these are redemeed to a customer, redeeming a voucher will require an authenticated user.
See the [useAuth](#useAuth) composable for how to authenticate customers.
```ts
const {
peek,
redeem, // 🔒 Needs authenticated user
} = useVoucher()
```
The returned payload from these methods contain details on which products and bundles have been redeemed by the voucher.
---
## Custom storefront mode
A Moonbase account configured for **custom storefront mode** drives users back to merchant-controlled URLs for the flows Moonbase normally handles on its own hosted customer portal — license activation, sign-in callbacks, email confirmations, password resets, product downloads, and subscription management. Each entry in the account's `CustomStorefrontLocations` settings maps to a path on your storefront origin; the backend appends the listed query parameters and redirects the user there.
When you build a custom storefront on this SDK, you implement one page per row in the table below. Pick the SDK call from the right-hand column and feed it the query params from the URL.
| Account setting | Suggested path | Query params | SDK call to invoke |
| --- | --- | --- | --- |
| `AutoActivation` | `/activate` | `token` | `useActivationRequest(token).fulfillLicense()` or `.fulfillTrial(optIn)` |
| `OfflineActivation` | `/activate` | _(none)_ | `useInventory().activateProduct(deviceToken, ActivationMethod.Offline)` |
| `LogIn` | `/login` | _(none)_ | `useAuth().signIn(email, password)` |
| `ConfirmAccount` | `/sign-up` | `email`, `code` | `useAuth().confirmAccount(email, code)` |
| `ConfirmEmail` | `/confirm-email` | `email`, `code` | `useAuth().confirmEmail(email, code)` |
| `ConfirmEmailChange` | `/account/confirm-email-change` | `email`, `code` | `useAuth().confirmEmailChange(email, code)` |
| `ResetPassword` | `/forgot-password` | `email`, `code` | `useAuth().forgotPassword(email)` or `.resetPassword(email, code, password)` |
| `DownloadProduct` | `/download` | `product_id`, optional `version` and `key` | `useInventory().downloadProduct(...)` (typically after a redirect to a product page) |
| `Checkout` | _(optional)_ | — | leave unset and use the embedded overlay via `useCart().checkout({ redirect: 'never' })` |
| `ManageSubscription` | `/subscriptions` | `subscription_id` | `useInventory().getSubscription(subscriptionId)` |
The paths are suggestions — the only requirement is that whatever path you configure on your Moonbase account matches the route you implement. For working implementations of every row above, see the Corino reference site below.
## Reference implementation: Corino
For a complete, end-to-end example of the Vue SDK powering a real custom storefront, see the open-source **Corino** reference site — a Nuxt 4 build for a fictional Oslo audio-plugin company wired to the public `corino-demo.moonbase.sh` Moonbase account. It exists specifically as a demonstration of what it takes to ship a custom storefront on this SDK: marketing landing page, cart drawer, embedded checkout, account area, product downloads, license activation, and voucher redemption — with the catalog and user state hydrated into the SSR payload so the first paint is real data.
Try it live at [corino-vue.moonbase.sh](https://corino-vue.moonbase.sh) — sign up with any email, add a plugin to your cart, and walk through the embedded checkout against the demo Moonbase account. Then read the source — the repo shows how to wire every composable on this page into a working storefront:
- **SSR plugin boot** (`app/plugins/moonbase.ts`) with the `useState` factory, `{ persistUtm: true }`, server-side `await updateStorefront()`, and a browser-only `onCheckoutCompleted` cleanup.
- **Live-bound pricing and ownership-aware CTAs** via `useProduct` / `useBundle` in `PluginCard.vue` and `BundleSection.vue` — the same card swaps its "Add to cart" button for "Download" once the user owns the product.
- **Embedded checkout overlay** opened from a right-side cart drawer (`CartDrawer.vue`) via `cart.checkout({ redirect: false })` and torn down via `onCheckoutCompleted` + `closeCheckout`.
- **Account area** at `/account` with nested routes for profile (`useAuth().update` / `setPassword` / `signOut`), owned products (`useInventory().getProducts`), per-product downloads and activations (`getProduct`, `downloadProduct`, `getProductActivations`, `revokeActivation`, `getProductLicenses`), and voucher redemption (`useVoucher().redeem`).
- **License activation** at `/activate` covering both modes — the online `?token=` flow via `useActivationRequest(token)`, and the offline machine-file upload via `useInventory().activateProduct(token, ActivationMethod.Offline)`, which returns a `data:` URL for the resulting license file.
- **Custom-storefront callback pages** for every row in the table above — `/login`, `/sign-up`, `/confirm-email`, `/forgot-password` (request + reset modes), `/download`, `/subscriptions`, and `/account/confirm-email-change`.
- **Deep-link auto-add-to-cart** via `?add_product=…` / `?add_bundle=…` handled in `app.vue`, so marketing links can drop visitors straight into the cart drawer.
If you want a much smaller integration with no build step, the [embedded storefront docs](/docs/storefronts/embedded/) cover a separate single-file HTML reference site for the same fictional shop.
---
---
# https://moonbase.sh/docs/webhooks/
title: 'Webhooks',
description: 'On this page, you can learn how to set up your own API to receive webhook events from Moonbase.',
}
# Webhooks
In case you want to perform your own actions when events happen in Moonbase, you can configure webhooks to forward events to your own APIs. Webhooks can be set up to trigger on a number of different events:
* Payment events
* `OrderCheckoutInitiated`
* `OrderPaid`
* `OrderCompleted`
* `OrderPayoutScheduled`
* `OrderRefunded`
* Licensing events
* `LicenseActivated`
* `LicenseProvisioned`
* `TrialActivated`
* Product release events
* `ProductReleasePublished`
* Subscription events
* `SubscriptionStarted`
* `SubscriptionRenewed`
* `SubscriptionExpired`
* `SubscriptionCancelled`
* `SubscriptionCompleted`
* Voucher events
* `VoucherCodeRedeemed`
* Customer events
* `CustomerSignedUp`
* `CustomerSubscribed`
* `CustomerUnsubscribed`
To get started with webhooks, head over to [Account settings > Developer](https://app.moonbase.sh/account-settings/developer) in Moonbase, and set up your first webhook:
Once created, it's immediately active and you will have access to the secret key used to compute the signature as described in [Security](#security). A webhook only receives the events it was set up for, so to start receiving an event that was added after you created it, edit the webhook and select it.
Importing data into Moonbase never triggers a webhook. Customers, licenses, subscriptions and trials brought in through the import endpoints or a CSV upload are not announced to your endpoints, whichever events you have selected.
Do you have a specific scenario you need webhooks for that is not covered by the current events and content?\
Reach out to us through the support channel, or at [developers@moonbase.sh](mailto:developers@moonbase.sh).
## Security
To ensure that the webhook requests are in fact originating from Moonbase and not some malicious actor, we apply a `HMAC-SHA256` algorithm on the body of the request and include this signature in a `X-Signature` header on the request.
```csharp
using var algorithm = new HMACSHA256(Encoding.UTF8.GetBytes(secretKey));
var json = await request.Content.ReadAsStringAsync();
var hash = algorithm.ComputeHash(Encoding.UTF8.GetBytes(json));
var signature = Convert.ToBase64String(hash).ToUpperInvariant();
var sentSignature = request.Headers.GetValues("X-Signature").Single();
Assert.Equal(sentSignature, signature);
```
Should you ever need to change the secret key, you can do so by editing the webhook.
## JSON structure
All webhook requests being sent by Moonbase will have a fixed structure with some basic details about the event that occurred. Additionally, relevant resources are also attached, so that you don't have to query the Moonbase API to fetch more details. The shape of these resources differ between events, and are described on this page.
Identifier of this unique webhook request.
The endpoint the request is being sent to.
The event being communicated, will one of the events listed in this article.
ISO-8601 date and time of the time at which the event occurred.
The resource that the event relates to:
One of: `Order`, `License`, `Trial`, `ProductRelease`, `Subscription`, `VoucherCode`, `Customer`
The actual contents of the entity. See below for more details about how this is structured.
Details about the customer associated with the event. In case the customer is unknown, it will be null.
Unique identifier of the customer.
Name of the customer.
Email address of the customer.
Flag showing if the customer has an account they can sign in with. `false` for a newsletter contact.
Flag showing if the customer account was deleted
Any custom properties configured on the customer, keyed by name. Omitted when the customer has none. See [Customer events](#customer-events) for the shape of each value.
```json {{ title: 'Webhook request' }}
{
"id": "a885619a-cb5e-41a6-a07b-1be4e520cccb",
"endpoint": "https://api.my-domain.example/webhook",
"eventType": "OrderCompleted",
"timestamp": "2024-11-11T11:11:11.0000000Z",
"resource": {
"type": "Order",
"data": {...}
},
"customer": {
"id": "92c0f540-9044-4b00-af4c-fe29f5da355e",
"name": "Example customer name",
"email": "user@example.com",
"hasAccount": true,
"isDeleted": false
}
}
```
## Payment Events
When customers make purchases through Moonbase, they make them on what we call an "Order". This is why the events related to payments are all prefixed with `Order`, and the typical lifecycle of an order goes like this:
1. The customer reaches the checkout and gives us an email address to reach them at, a `OrderCheckoutInitiated` event is sent
1. The customer pays for an order, a `OrderPaid` event is sent (not applicable for free purchases)
1. Moonbase fulfills the order, issuing licenses and sending receipts, *completing* the order, a `OrderCompleted` event is sent
1. Moonbase then calculates all affiliate revenue splits and schedules payout for the order, a `OrderPayoutScheduled` event is sent
`OrderCheckoutInitiated` is the event to build abandoned-checkout recovery on: unlike the other order events, the order it describes may never be paid for. It is sent at most once per order, and only once the checkout has both an email address for the buyer and a priced total, so someone who opens the checkout and leaves before filling anything in produces no event. Subscription renewals are charged against a stored payment method without anyone visiting a checkout, and never send it. An order you build through the [Storefront API](/docs/storefronts/api) sends the event when one of its checkout URLs is opened, not while you are still adding items to it.
Buyers do not need a Moonbase account to check out, and most people who abandon a checkout do not have one, so the top-level `customer` on this event is often null. The order's own `billingDetails` always carries the email address that triggered the event.
Lastly, if you refund the order, Moonbase will emit a `OrderRefunded` event to any webhook listening. The same event is sent for both full and partial refunds: check `isFullyRefunded` and `isPartiallyRefunded` to tell them apart, and read the `refundHistory` array for the amounts and line items covered by each refund. `OrderRefunded` is also sent when you apply business details to a completed purchase and Moonbase returns the over-collected tax. That refund returns no units, so both flags stay `false` and its `refundHistory` entry has a `kind` of `TaxAdjustment`.
All events concering orders will have the same shape of the order. On `OrderCheckoutInitiated` the order is still open and unpaid, so the fields that only exist once money has moved are absent, among them `completedAt`, `payout` and the `fulfillment` on each line item.
Unique identifier of the order.
The current status of the order. `Open` while the buyer is at the checkout and has not paid, `Paid` if not yet completed, `Completed` if paid and fulfilled.
The currency used for this purchase.
The timestamp for when the order was completed.
The timestamp for when the order was fully refunded. Omitted while the order is not fully refunded.
Whether the entire order has been refunded. Remains `false` for a partial refund, even though `refundHistory` lists the refunded amounts.
Whether the order has been partially but not fully refunded. `true` once at least one refund has settled while the order still has unrefunded units.
The settled refunds applied to this order, present once at least one refund has settled. Each entry describes a single refund:
Unique identifier of the refund.
The timestamp for when this refund was made.
The amount refunded to the customer in this refund, containing:
* `currency`: The currency of the refunded amount.
* `amount`: The refunded amount.
What the refund returned. `Sale` for a refund of the purchase itself, `TaxAdjustment` for over-collected tax returned after business details were applied to a completed purchase. A `TaxAdjustment` refunds no units, so each of its `lineItems` carries a `quantity` of `0`.
The order line items covered by this refund, each containing:
Identifier of the refunded order line item. Matches the `lineItemId` of an entry in the order's `items` array.
The number of units refunded for this line item in this refund.
The amount refunded to the customer for this line item, with the same `currency` and `amount` properties as above.
Flag indicating if this purchase has been disputed.
Calculated total for all items part of the order, contains:
* `original`: The original amount before discounts
* `discount`: The total amount of discounts added
* `subtotal`: The total amount after discounts have been removed
* `taxes`: Total taxes to pay, may be inclusive or exclusive of the `subtotal` depending on configuration, currency and region.
* `due`: How much is being paid in total by the customer
Payout details for this order, only present if an amount is to be paid.
Note that this may get updated as affiliate revenue splits are calculated later in the pipeline.
* `subtotal`: The original amount paid by the customer
* `taxes`: The total amount of taxes collected and remitted
* `platformFees`: The total amount of fees going to Moonbase
* `due`: How much is being paid out to you
Billing details about the customer who made the purchase:
Full name of the customer.
In case the purchase was a business purchase, this field will have the name.
In case the purchase was a business purchase, this field will have the tax id if given.
Email address of the customer.
Phone number of the customer. Note that collecting phone numbers is an optional feature in Moonbase and not activated by default.
Billing address for the customer, not present if the purchase was a lead generator purchase.
Contains the following properties:
ISO 3166-1 alpha-2 two-letter country code.
First line of the regular street address.
Second line of the regular street address.
Postal code of the address.
Locality of the address, only required if no region is given.\
Also known as `City`.
Region of the address, only required if no locality is given.\
Also known as `State`.
Collection of items part of the order.
Note that this can be either products or bundles, and they are discriminated using the `type` property.
Some properties are present on both types, others are shared:
### Product line item
Item type discriminator.
The unique ID of the product.
The customer's license this line upgrades or renews, for a license that [covers only some releases](/docs/concepts/#release-access).
### Bundle line item
Item type discriminator.
The unique ID of the bundle.
### Shared
Stable identifier of this order line item. Use it to correlate entries in `refundHistory` back to the line they refunded.
The quantity of this item.
The original price of the product or bundle.
The calculated total for this line item, with `original`, `discount`, `subtotal` and `due` amounts.
It also splits the discount per source, each amount being what one unit of the line was discounted by: `productDiscount`, `offerDiscount` for an offer picked for this item, `couponDiscount`, and `cartOfferDiscount` for this line's share of a cart offer applied to the order as a whole.
All four are omitted on older orders that were priced before the split existed.
Details about the selected pricing variation for this item.
Details about the license fulfillment for this purchase.
A `License` fulfillment lists the issued `licenseIds`, and `extendedLicenseIds` for the licenses an upgrade or renewal extended instead.
A link to the order's receipt as a PDF, for you to send to your customer. It opens without signing in and does not expire, so send it to the buyer only.
Present from `OrderCompleted` onwards. On some older orders it is left out: [get the order](/docs/api#get-order-by-id) from the Core API for a working link to those.
```json {{ title: 'Order data example' }}
{
"id": "dc0b53f9-4e43-4179-8554-00f2a8228a25",
"status": "Completed",
"currency": "EUR",
"completedAt": "2024-11-11T11:11:11.0000000Z",
"isFullyRefunded": false,
"isPartiallyRefunded": false,
"isDisputed": false,
"total": {
"original": {
"currency": "EUR",
"amount": 10
},
"discount": {
"currency": "EUR",
"amount": 5
},
"subtotal": {
"currency": "EUR",
"amount": 5
},
"taxes": {
"currency": "EUR",
"amount": 5
},
"due": {
"currency": "EUR",
"amount": 5
}
},
"billingDetails": {
"name": "Example User",
"businessName": null,
"taxId": null,
"email": "user@example.com",
"phone": null,
"address": {
"countryCode": "NO",
"streetAddress1": "Utsikten 6",
"streetAddress2": null,
"locality": "Skien",
"region": null,
"postCode": "3718"
}
},
"couponsApplied": [
{
"id": "43396b94-53b4-4901-8e9e-ab1d6ee7d3b5",
"code": "MY-UNIQUE-CODE",
"name": "Half off coupons",
"description": "Thanks for being our customer!",
"discount": {
"type": "PercentageOffDiscount",
"percentage": 0.5
},
"applicableProductVariations": {},
"applicableBundleVariations": {}
}
],
"items": [
{
"type": "Product",
"lineItemId": "7c1f0b2a-9d3e-4a5b-8c6d-0e1f2a3b4c5d",
"productId": "example-product",
"quantity": 1,
"price": {
"EUR": 10
},
"total": {
"original": {
"currency": "EUR",
"amount": 10
},
"discount": {
"currency": "EUR",
"amount": 5
},
"subtotal": {
"currency": "EUR",
"amount": 5
},
"due": {
"currency": "EUR",
"amount": 5
}
},
"variation": {
"id": "v802c5",
"name": "Default",
"entitlement": {
"type": "PerpetualLicense"
},
"recurrence": {
"type": "OneOff"
},
"price": {
"EUR": 10
}
},
"fulfillment": {
"type": "License",
"licenseIds": [
"d564a47a-d7f3-48ea-8698-57ad7512b11d"
]
}
}
],
"receiptUrl": "https://demo.moonbase.sh/api/customer/orders/dc0b53f9-4e43-4179-8554-00f2a8228a25/receipt?t=CfDJ8Nw3..."
}
```
When an order is only partially refunded, `isPartiallyRefunded` is `true` while `isFullyRefunded` stays `false`, no order-level `refundedAt` is set, and the `refundHistory` array carries the details of each settled refund:
```json {{ title: 'Order data example (partially refunded)' }}
{
"id": "dc0b53f9-4e43-4179-8554-00f2a8228a25",
"status": "Completed",
"currency": "EUR",
"completedAt": "2024-11-11T11:11:11.0000000Z",
"isFullyRefunded": false,
"isPartiallyRefunded": true,
"isDisputed": false,
"total": {
"original": { "currency": "EUR", "amount": 20 },
"discount": { "currency": "EUR", "amount": 0 },
"subtotal": { "currency": "EUR", "amount": 20 },
"taxes": { "currency": "EUR", "amount": 5 },
"due": { "currency": "EUR", "amount": 20 }
},
"refundHistory": [
{
"id": "b3f1c2a4-6d8e-4f51-9c7a-1d2e3f4a5b6c",
"at": "2024-11-12T09:30:00.0000000Z",
"amount": { "currency": "EUR", "amount": 10 },
"kind": "Sale",
"lineItems": [
{
"lineItemId": "8f2c1b4e-3a6d-4f51-9c7a-1d2e3f4a5b6c",
"quantity": 1,
"amount": { "currency": "EUR", "amount": 10 }
}
]
}
],
"items": [
{
"type": "Product",
"lineItemId": "8f2c1b4e-3a6d-4f51-9c7a-1d2e3f4a5b6c",
"productId": "example-product",
"quantity": 2,
"price": { "EUR": 10 },
"total": {
"original": { "currency": "EUR", "amount": 20 },
"discount": { "currency": "EUR", "amount": 0 },
"subtotal": { "currency": "EUR", "amount": 20 },
"due": { "currency": "EUR", "amount": 20 }
}
}
]
}
```
An `OrderCheckoutInitiated` order carries the same shape, priced and with the buyer's billing details filled in, but with nothing paid or fulfilled yet:
```json {{ title: 'Order data example (checkout initiated)' }}
{
"id": "dc0b53f9-4e43-4179-8554-00f2a8228a25",
"status": "Open",
"currency": "EUR",
"isFullyRefunded": false,
"isPartiallyRefunded": false,
"isDisputed": false,
"total": {
"original": { "currency": "EUR", "amount": 10 },
"discount": { "currency": "EUR", "amount": 0 },
"subtotal": { "currency": "EUR", "amount": 10 },
"taxes": { "currency": "EUR", "amount": 2.5 },
"due": { "currency": "EUR", "amount": 12.5 }
},
"billingDetails": {
"name": "Example User",
"businessName": null,
"taxId": null,
"email": "user@example.com",
"phone": null,
"address": {
"countryCode": "NO",
"streetAddress1": "Utsikten 6",
"streetAddress2": null,
"locality": "Skien",
"region": null,
"postCode": "3718"
}
},
"items": [
{
"type": "Product",
"lineItemId": "7c1f0b2a-9d3e-4a5b-8c6d-0e1f2a3b4c5d",
"productId": "example-product",
"quantity": 1,
"price": { "EUR": 10 },
"total": {
"original": { "currency": "EUR", "amount": 10 },
"discount": { "currency": "EUR", "amount": 0 },
"subtotal": { "currency": "EUR", "amount": 10 },
"due": { "currency": "EUR", "amount": 10 }
},
"variation": {
"id": "v802c5",
"name": "Default",
"entitlement": { "type": "PerpetualLicense" },
"recurrence": { "type": "OneOff" },
"price": { "EUR": 10 }
}
}
]
}
```
## Licensing events
We currently expose the following licensing related events:
* `LicenseActivated`: Happens the first time a license is activated on any device
* `LicenseProvisioned`: Happens when a license is provisioned for a customer, for example after an order completes, a voucher is redeemed, or a subscription is migrated. Not sent for imported licenses.
* `TrialActivated`: Happens the first time a trial is started on any device
These events have different resource shapes:
### License events
Both `LicenseActivated` and `LicenseProvisioned` carry the same license resource shape:
Unique identifier of the license.
Your own external identifier for the license, if one was set. Omitted when not set.
The current status of the license.
The product ID that the license is for.
The maximum number of devices the license can be activated on.
Whether the license is allowed to be activated offline.
What a license that [covers only some releases](/docs/concepts/#release-access) covers, as an `updatesUntil` date, an `upToMajor` version, or both.
Omitted when the license covers every release.
Custom properties configured on the license, keyed by name. Omitted when the license has no custom properties. Each value contains:
The type of the property value.
The property value, shaped according to `type`.
Whether the property is exposed publicly.
Whether the property is included in issued license tokens.
Unique identifier of trial.
The current status of the trial.
The product ID being trialled.
The time of last validation.
The time at which this trial expires.
Absent for an endless trial, one started while its product's trials never expire.
```json {{ title: 'Trial data example' }}
{
"id": "7cda66c7d03bd35bac892b97436c33b8",
"status": "Active",
"productId": "example-product",
"lastValidatedAt": "2024-11-11T11:11:11.0000000Z",
"expiresAt": "2025-11-11T11:11:11.0000000Z"
}
```
## Product release events
We currently expose the following product release related events:
* `ProductReleasePublished`: Happens every time a new version of a product is being released
### Event
The product ID of the released product
The version of the release
The description of the release
The time at which the product release was published
```json {{ title: 'Product release data example' }}
{
"productId": "example-product",
"version": "1.2.3",
"description": "Enhanced performance and critical bug fixes",
"publishedAt": "2024-11-11T11:11:11.0000000Z"
}
```
## Subscription events
We currently expose the following subscription related events:
* `SubscriptionStarted`: Happens every time a new subscription is started
* `SubscriptionRenewed`: Happens every time a subscription is renewed
* `SubscriptionExpired`: Happens every time a subscription expires
* `SubscriptionCancelled`: Happens every time a subscription is cancelled
* `SubscriptionCompleted`: Happens when a subscription reaches its natural completion, for example when a fixed-term subscription runs its course
### Event
The unique ID of the subscription
The current status of the subscription. `Completed` is used once the subscription has reached its natural completion.
The time at which the subscription expires unless sucessfully renewed.
The last time at which the subscription was renewed, null if never renewed.
The time at which the subscription started originally.
Calculated total to be paid for each subscription cycle, contains:
* `original`: The original amount before discounts
* `discount`: The total amount of discounts added
* `subtotal`: The total amount after discounts have been removed
* `taxes`: Total taxes to pay, may be inclusive or exclusive of the `subtotal` depending on configuration, currency and region.
* `due`: How much is being paid in total by the customer
The length of each subscription cycle on this subscription.
The content of the subscription, can either be a product or a bundle:
### Product content
Content type discriminator.
ID of the product.
The number of licenses being subscribed to.
The fulfillment details for this product, will contain the following properties:
A list of license IDs that has been fulfilled for this fulfillment.
### Bundle content
Content type discriminator.
ID of the bundle.
The number of licenses being subscribed to for each product in the bundle.
The fulfillment details for this bundle, will contain the following properties:
A list of license IDs that has been fulfilled for this fulfillment.
```json {{ title: 'Subscription data example' }}
{
"id": "4e794c6a-56c3-4a2b-a568-a99eaa0d3b7f",
"status": "Active",
"expiresAt": "2025-02-14T21:26:45.3769978Z",
"renewedAt": "2025-02-13T21:26:45.3769978Z",
"startedAt": "2025-02-08T21:08:43.6530272Z",
"total": {
"original": {
"currency": "EUR",
"amount": 15
},
"discount": {
"currency": "EUR",
"amount": 0
},
"subtotal": {
"currency": "EUR",
"amount": 12.4
},
"taxes": {
"currency": "EUR",
"amount": 2.6
},
"due": {
"currency": "EUR",
"amount": 15
}
},
"cycleLength": "Monthly",
"content": {
"type": "Product",
"quantity": 1,
"fulfillment": {
"type": "License",
"licenseIds": [
"922c8100-e57e-48e6-9ea8-a0e00db52c13"
]
},
"productId": "example-product"
}
}
```
## Voucher events
We currently expose the following voucher related events:
* `VoucherCodeRedeemed`: Happens every time a code of a voucher is redeemed by a customer
### Event
The code being redeemed
Unique ID of the customer that redeemed this code
ISO-8601 date and time for when the redemption took place.
Details about the parent voucher object, including:
Unique ID of this voucher
Name as configured in your Moonbase account
Description as configured in your Moonbase account
List of products that this voucher redeems, each object in the list contains:
The ID of the product
Number of licenses provisioned per redemption
List of bundles that this voucher redeems, each object in the list contains:
The ID of the bundle
Number of licenses provisioned per redemption
```json {{ title: 'Voucher data example' }}
{
"code": "EXAMPLE-VOUCHER-CODE",
"redeemedBy": "922c8100-e57e-48e6-9ea8-a0e00db52c13",
"redeemedAt": "2025-02-14T21:26:45.3769978Z",
"voucher": {
"id": "4e794c6a-56c3-4a2b-a568-a99eaa0d3b7f",
"name": "Example voucher",
"description": "This voucher is used for demo purposes",
"redeemsProducts": [
{ "value": "example-product-id", "quantity": 1 },
],
"redeemsBundles": [
{ "value": "example-bundle-id", "quantity": 1 },
],
},
}
```
## Customer events
We currently expose the following customer related events:
* `CustomerSignedUp`: Happens when a customer creates a Moonbase account, either by signing up themselves or when an account is created for them during checkout or license provisioning. Not sent for imported customers or customers registered without an account.
* `CustomerSubscribed`: Happens when a customer opts in to your newsletter and marketing communications. Many subscribers are newsletter contacts without an account, which `hasAccount` tells apart from customers who can sign in.
* `CustomerUnsubscribed`: Happens when a customer opts out of your newsletter and marketing communications.
All three events share the same customer resource shape:
Unique identifier of the customer.
Name of the customer.
Email address of the customer.
Flag showing if the customer has an account they can sign in with.
`false` for a newsletter contact, until they sign up or buy with the same email address.
Flag showing if the customer account was deleted.
Custom properties configured on the customer, keyed by name. Omitted when the customer has no custom properties. Each value contains:
The type of the property value.
The property value, shaped according to `type`.
Whether the property is exposed publicly.
Whether the property is included in issued tokens.
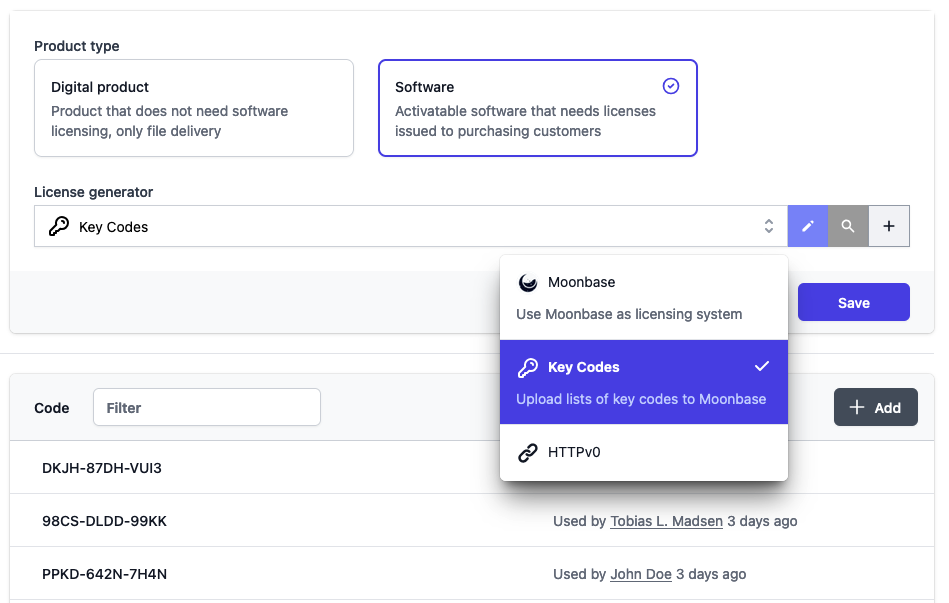
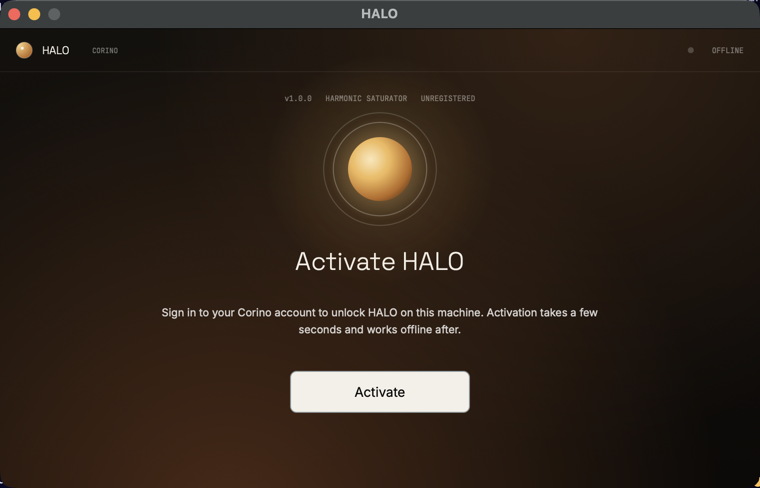 HALO demonstrates the full set of bridge features in a shippable shape — `tryLoadStoredLicenseAsync` on startup, the browser activation handshake, file-backed license storage under `~/Library/Application Support/Corino/HALO/`, and `revokeActivationAsync` wired to a UI control. It also includes the macOS + Windows CI and release pipeline that publishes signed builds straight to the Moonbase account as product downloads.
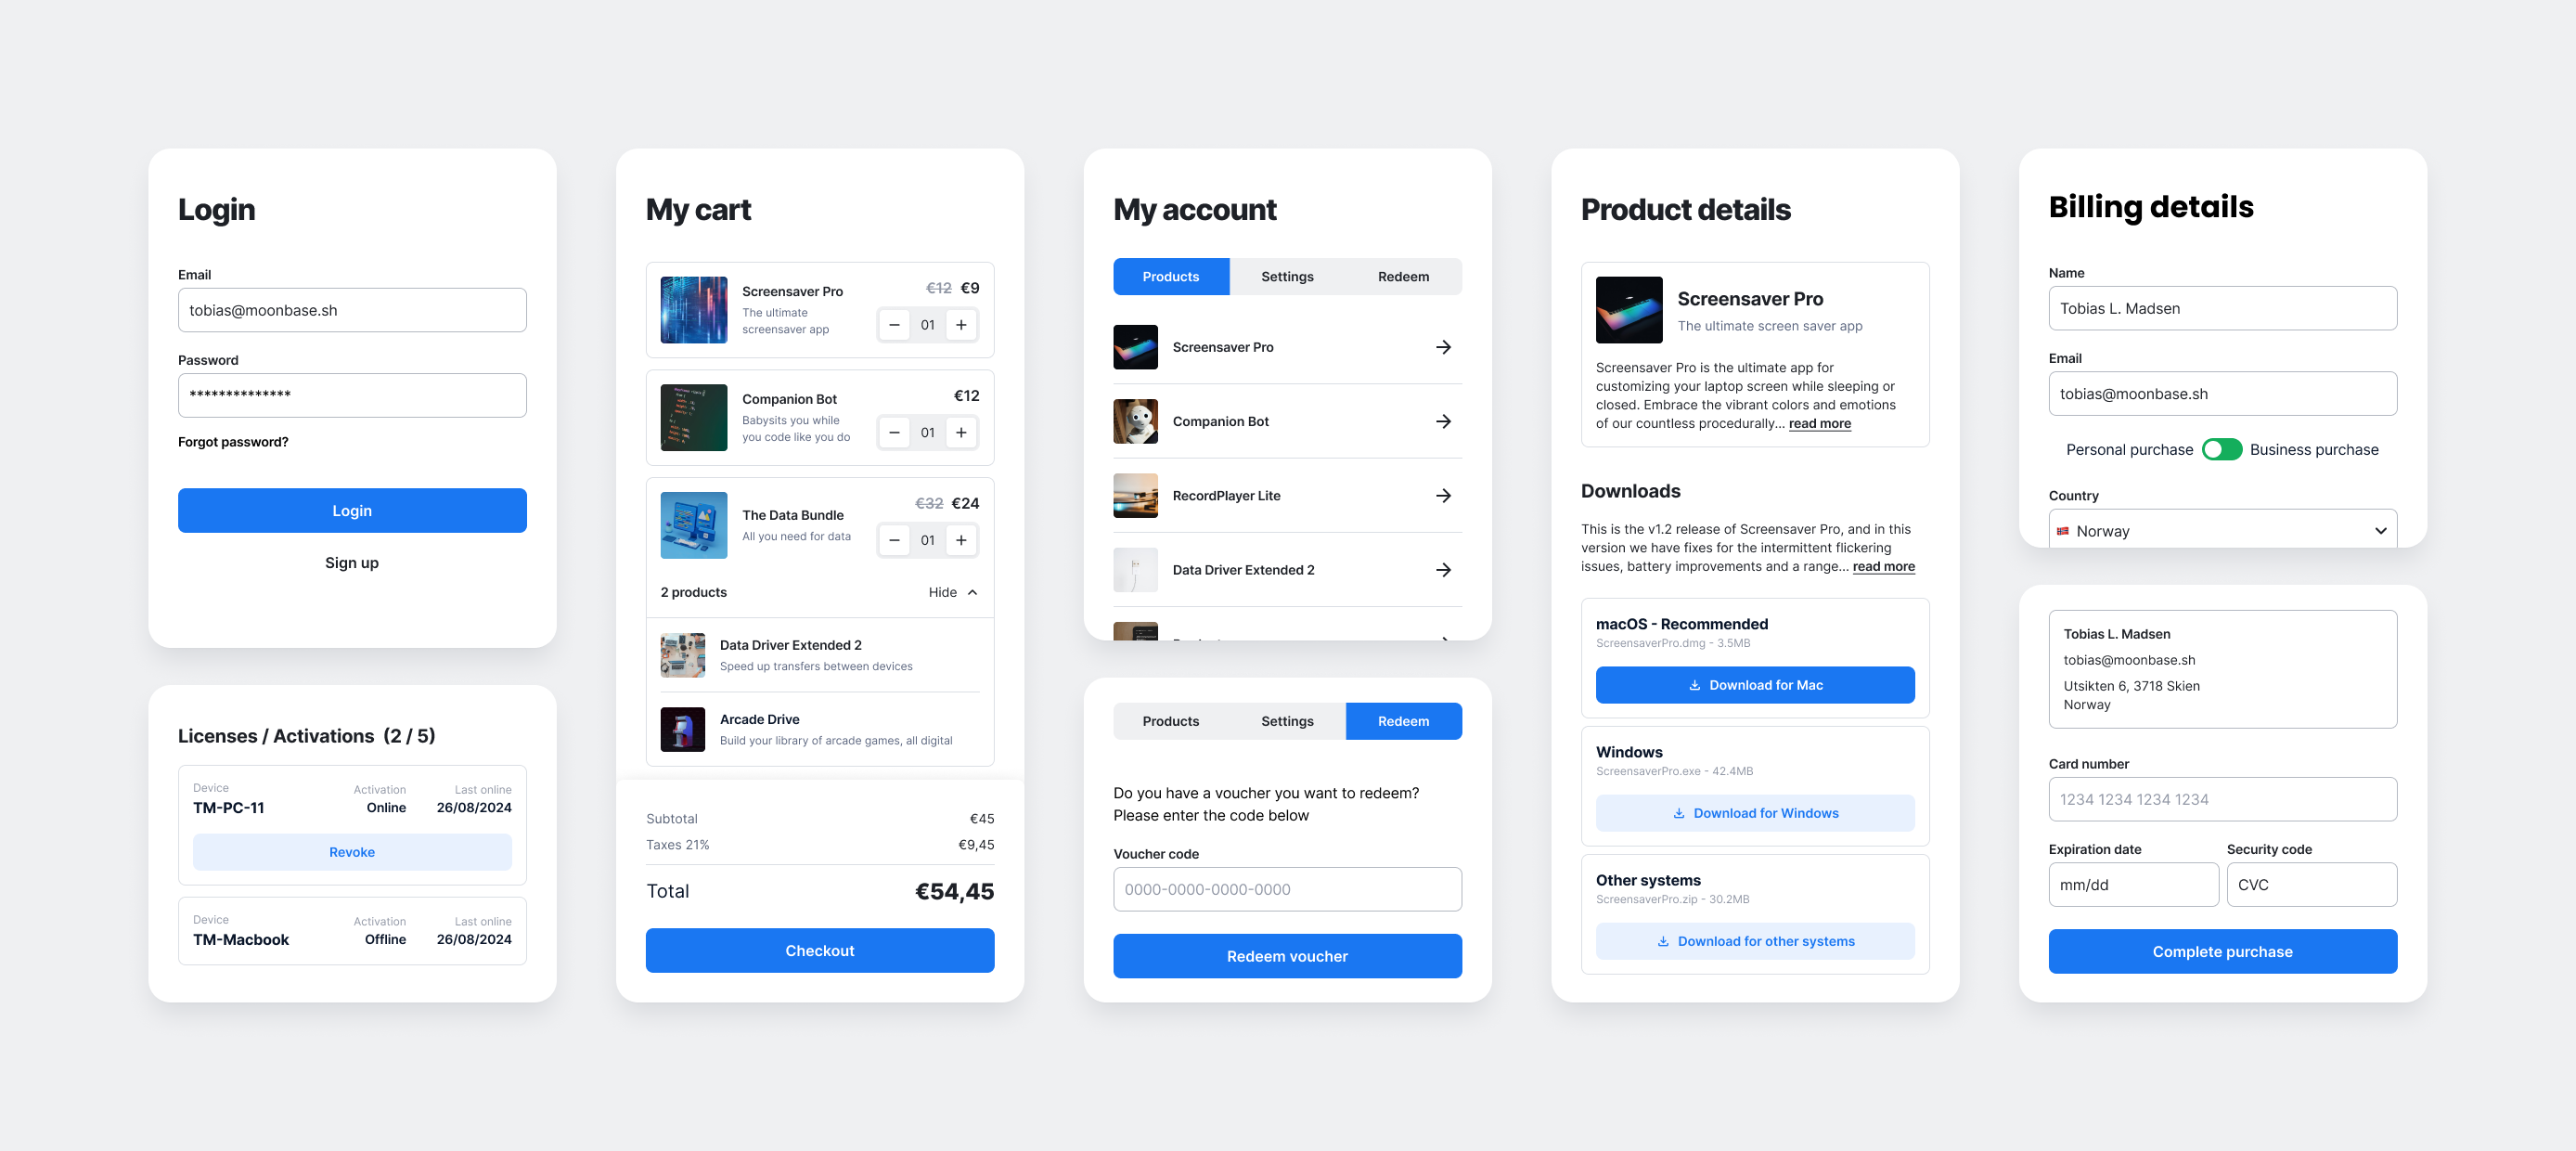 The embedded storefront can be included in your own websites, no matter what platform you use.
On this page you will find instructions for popular platforms, but if yours is missing, reach out to us through the support channel, or at [developers@moonbase.sh](mailto:developers@moonbase.sh).
To make sure the module works on your website, take care to add your domain to the whitelisted domains of your Moonbase account in your [account settings](https://app.moonbase.sh/account-settings). If you experience CORS errors, the domain is not whitelisted correctly. If your site sets a Content-Security-Policy, allow `https://
The embedded storefront can be included in your own websites, no matter what platform you use.
On this page you will find instructions for popular platforms, but if yours is missing, reach out to us through the support channel, or at [developers@moonbase.sh](mailto:developers@moonbase.sh).
To make sure the module works on your website, take care to add your domain to the whitelisted domains of your Moonbase account in your [account settings](https://app.moonbase.sh/account-settings). If you experience CORS errors, the domain is not whitelisted correctly. If your site sets a Content-Security-Policy, allow `https:// Try it live at [corino.moonbase.sh](https://corino.moonbase.sh) — sign up with any email, add a plugin to your cart, and walk through the embedded checkout against the demo Moonbase account. Then read the source: